


Adobe Creative Cloud is a powerhouse for designers, photographers, and creatives. But when it starts consuming too much storage and affecting system performance, uninstalling it should be your go-to option. But here is a thing: removing Adobe Cloud isn’t that simple.
It crashes while uninstalling, won't shut down background processes, or keeps leaving stubborn files behind. If you've attempted to uninstall it but still find residual remnants or error messages, don't worry.
Fortunately, we have the fix. This detailed guide will take you through a forced Adobe Creative Cloud uninstall process that thoroughly and seamlessly removes it. Let's start!
How to Force Uninstall Adobe Cloud | 4 Proven Methods
Deleting Adobe Creative Cloud from your computer means completely removing the program. This includes removing its apps, running processes, and source files from Windows. Here are three proven methods that can help you perform a forced Adobe Creative Cloud uninstall.
Method 1: How to Remove the Adobe Creative Cloud from Your PC Using the Master Uninstaller?
Manually uninstalling Adobe Creative Cloud can be time-consuming, especially when dealing with crashes, background processes, and leftover files. Thus, if you do not want to deal with unnecessary glitches and a lengthy process, using Master Uninstaller might help. It eliminates Adobe CC and all its residual files automatically without the hassle of navigating multiple registries.
Here is how to use this uninstaller to completely remove Adobe Creative Cloud from your PC.
Step 1: Download and Register
- Download the Master Uninstaller and register yourself in the desktop app.
Step 2: Uninstall Adobe Creative Cloud
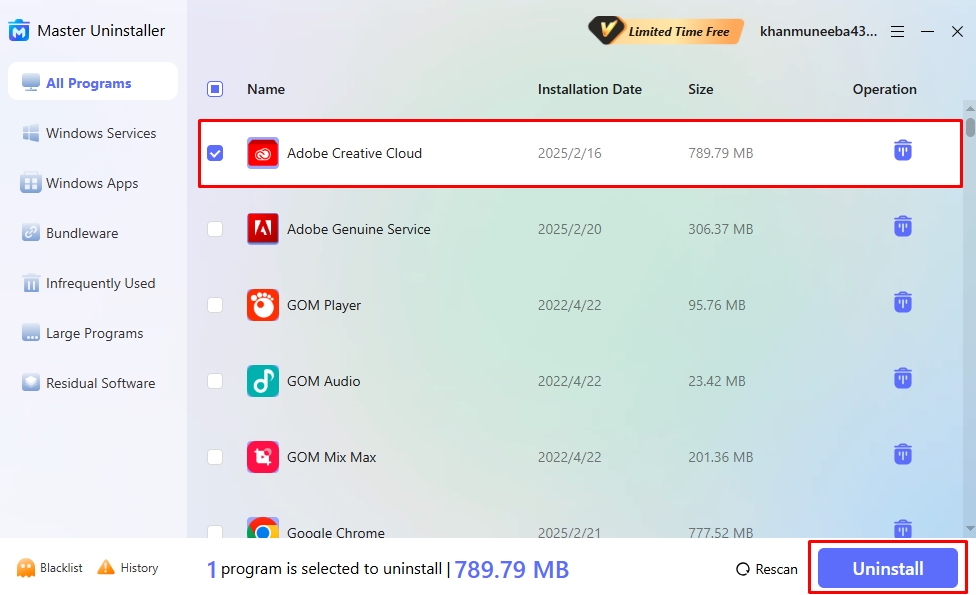
- Once on the dashboard, navigate to All Programs and find Adobe Creative Cloud from the on-screen menu.
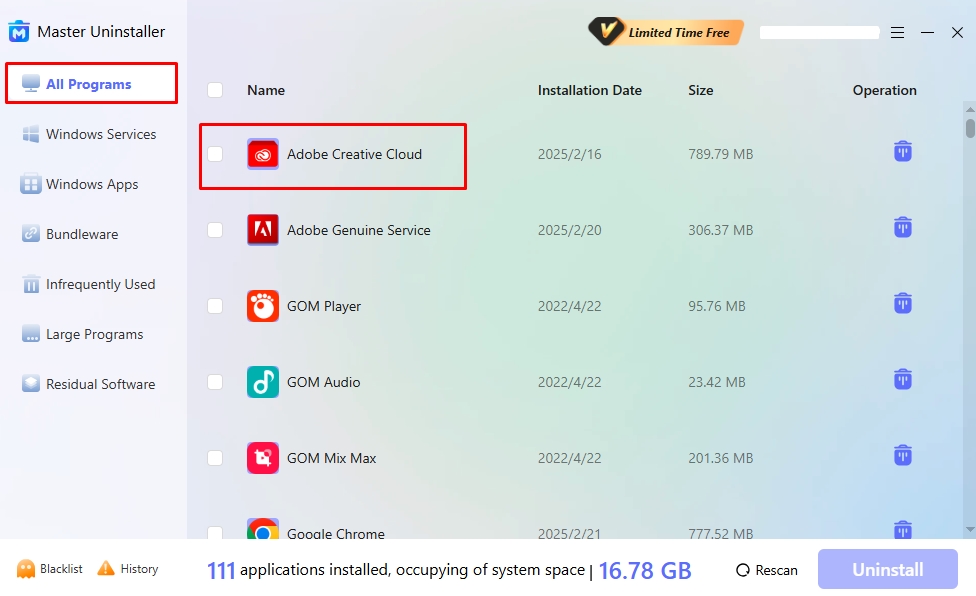
- Press the Uninstall button at the bottom and wait for a few seconds.
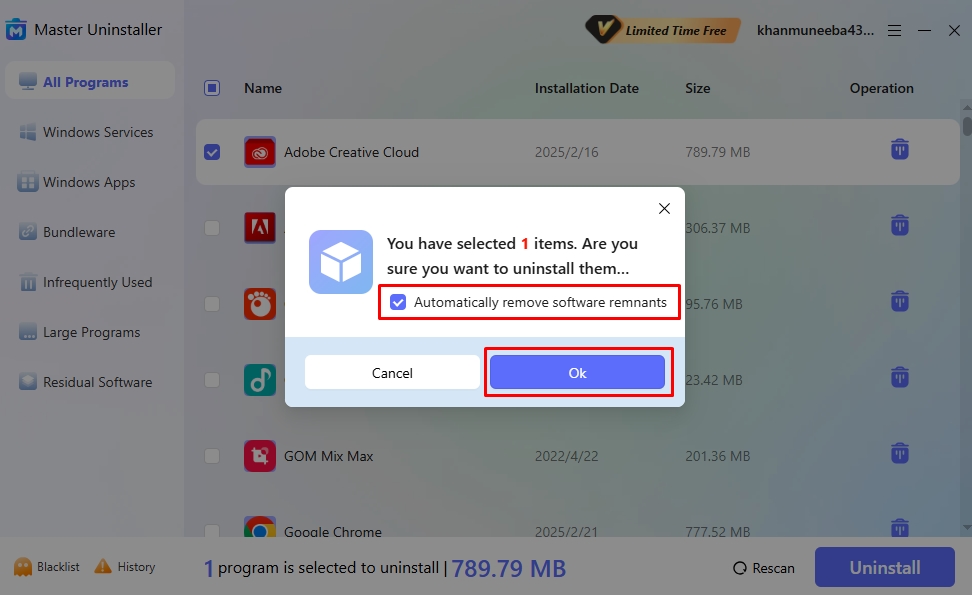
- Select Automatically Remove Software Remnants and confirm the uninstallation by clicking Yes.
Step 3: Blacklist the Program
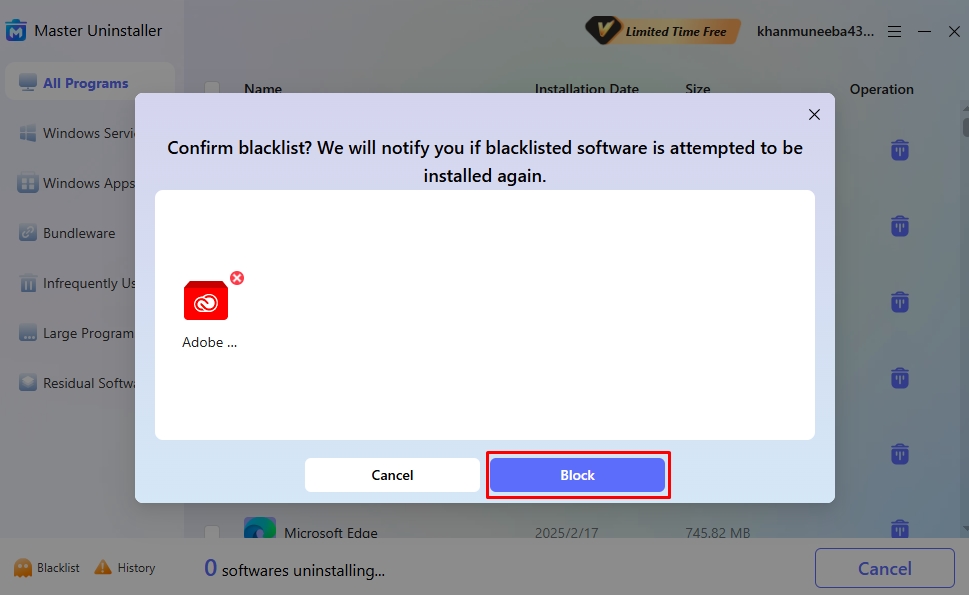
- Finally, you will see a pop-up menu requesting you to blacklist this app. Accept this, as it blocks the program from reinstalling it again and asks for your permission in case you attempt reinstallation.
Method 2: How to Remove Adobe CC with the Official Adobe Uninstaller?
Another way to remove Adobe Cloud and its associated files with minimal effort is with the Adobe Official Uninstaller. This method assures a clean removal of Creative Cloud, eliminating most files automatically. However, in some cases, it can leave residual files, such as preferences and log files, in the system, which you can delete manually.
Step 1: Uninstall all Installed Apps
Before we proceed to uninstall the Adobe CC desktop app, you must delete all your Adobe installed apps.
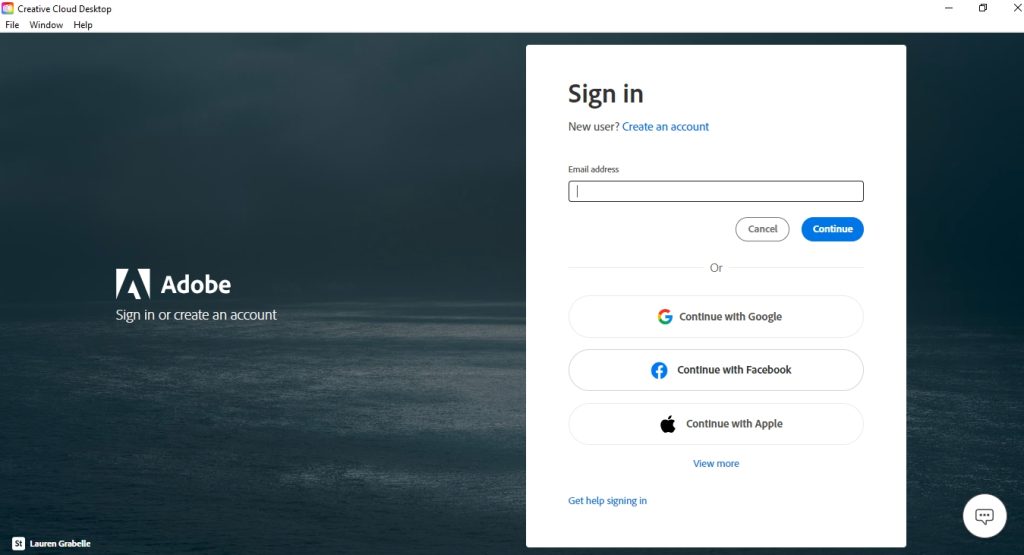
- Once the Adobe background processes are closed, open your Adobe Creative Cloud and sign in using your account.
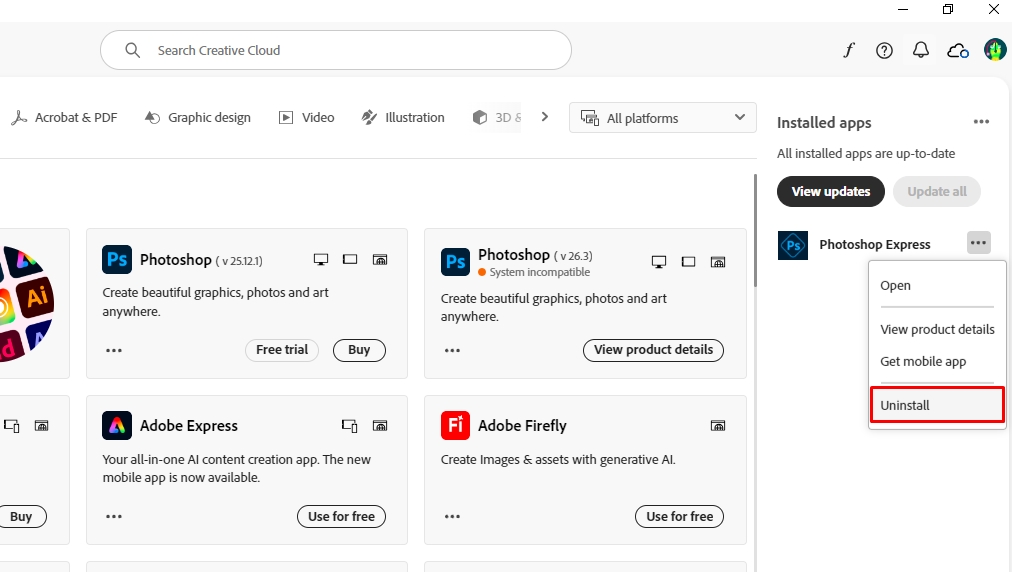
- Visit the Apps > All Apps tab and locate the installed Adobe apps.
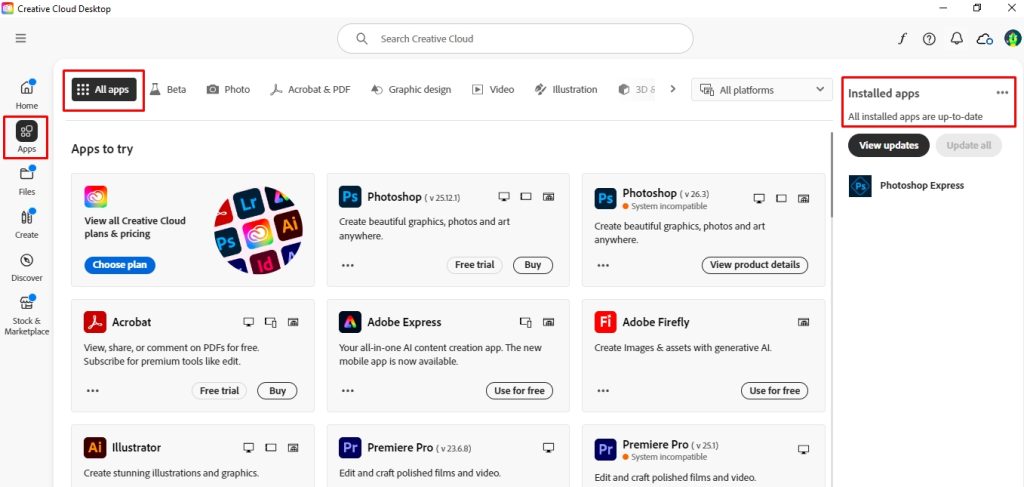
- From here, click the three-dot icon and select Uninstall from the drop-down menu. Follow the on-screen prompts to complete the app uninstallation process.
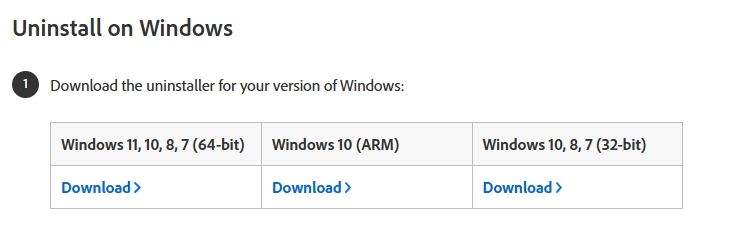
Step 2: Download the Adobe Creative Cloud Uninstaller
- Once done deleting the associated installed apps, download the official Adobe uninstaller for your Windows.
Step 3: Delete the App Using Uninstaller
- Now, extract the contents of the zipped file.
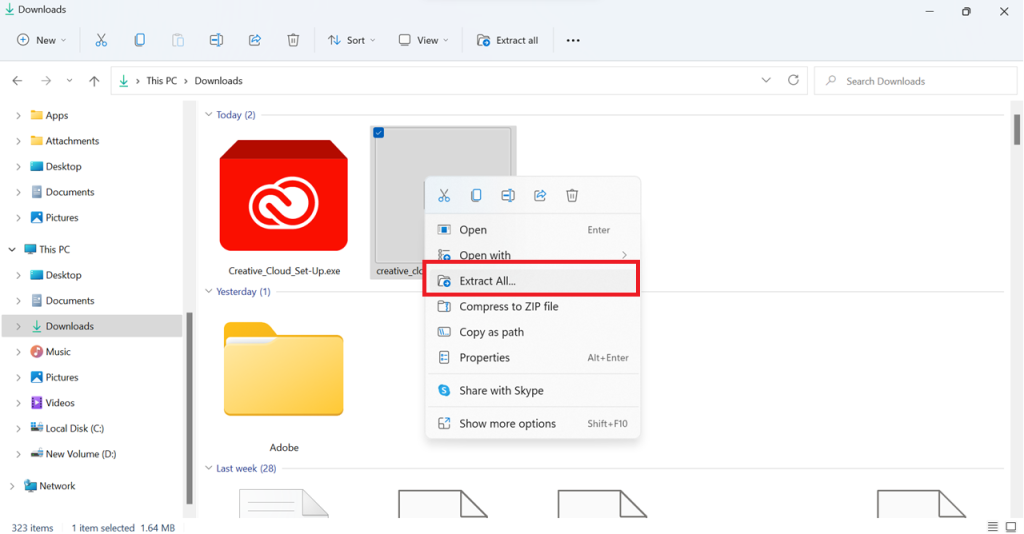
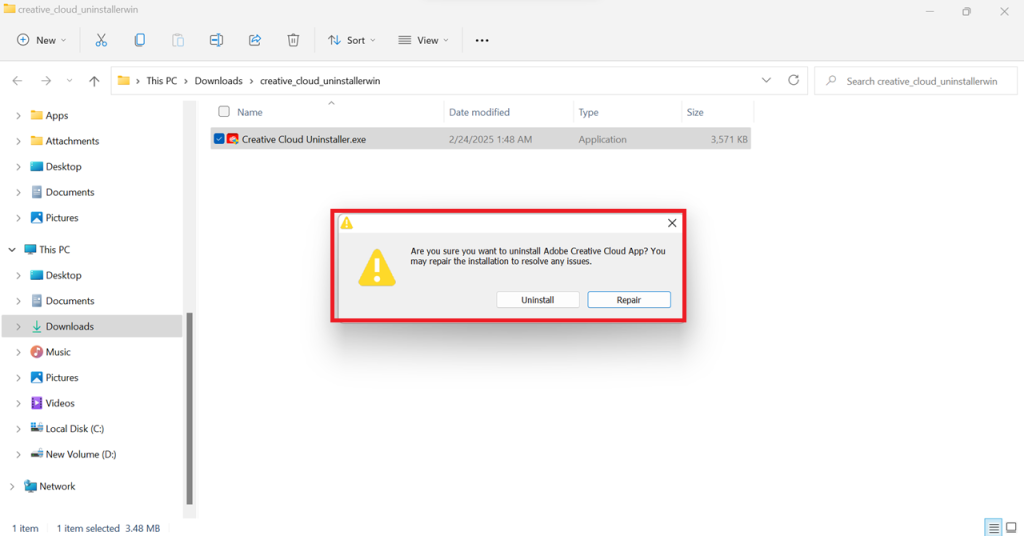
- Once extracted, open the Adobe Creative Cloud Uninstaller and follow the instruction prompt. Click Uninstall to finish deleting the desktop app.
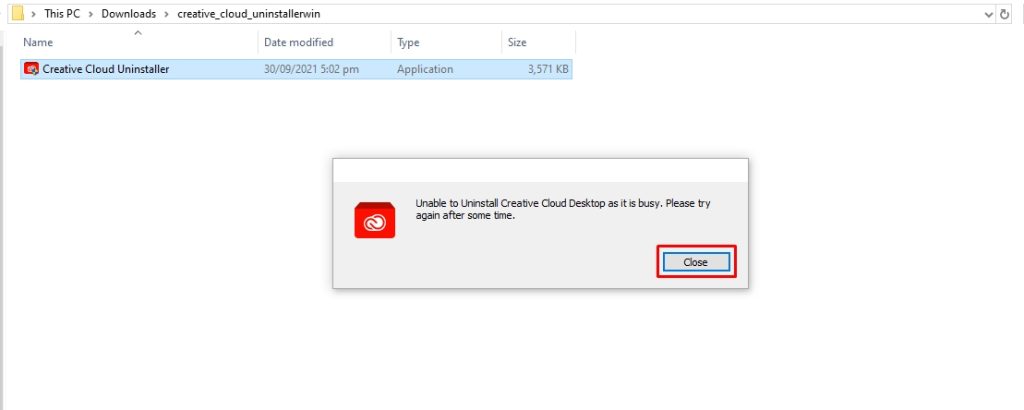
- Once the app has been uninstalled, click Close to complete the process.
Ta-da, with just a few steps, you’ve removed the Adobe Cloud.
Method 3: How to Uninstall Adobe Cloud using Windows Settings?
If you want to remove Adobe Creative Cloud from Windows directly, you can do so through the Windows Settings. This approach provides more control over the removal process and does not require any third-party tools. Although some background processes are still running, these steps ensure that Adobe CC is removed entirely from your system without leaving behind any unwanted files.
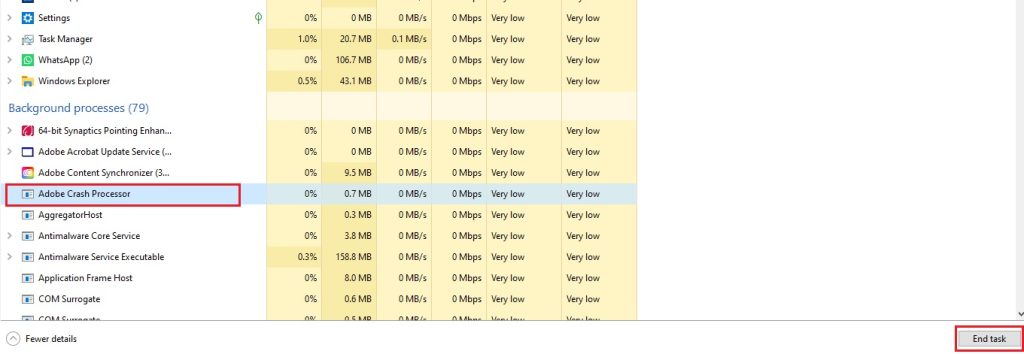
Step 1: Close the Background Processes
- Right-click the Start button from your computer’s main menu and select Task Manager.

- Navigate to Processes > Background Processes tab and left click End Task to close any running Adobe operations.
Note: Before you proceed, ensure that you have uninstalled all the Adobe apps (Photoshop, Illustrator, etc.) before initiating the Creative Cloud uninstallation. Otherwise, the Creative Cloud residuals will remain in the system. To do this, go to the All Apps tab from the Creative Cloud desktop version and delete the applications.
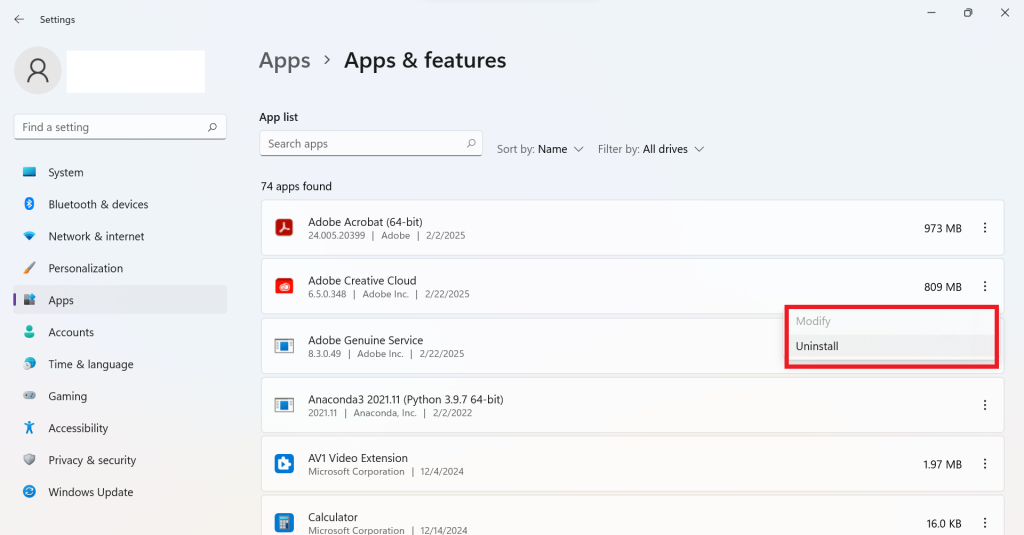
Step 3: Uninstall Adobe Creative Cloud from the Settings Panel
- Now that you have closed all background processes. Press Windows + I to enter the Windows Settings Panel, select Apps, and then choose Apps and Features.
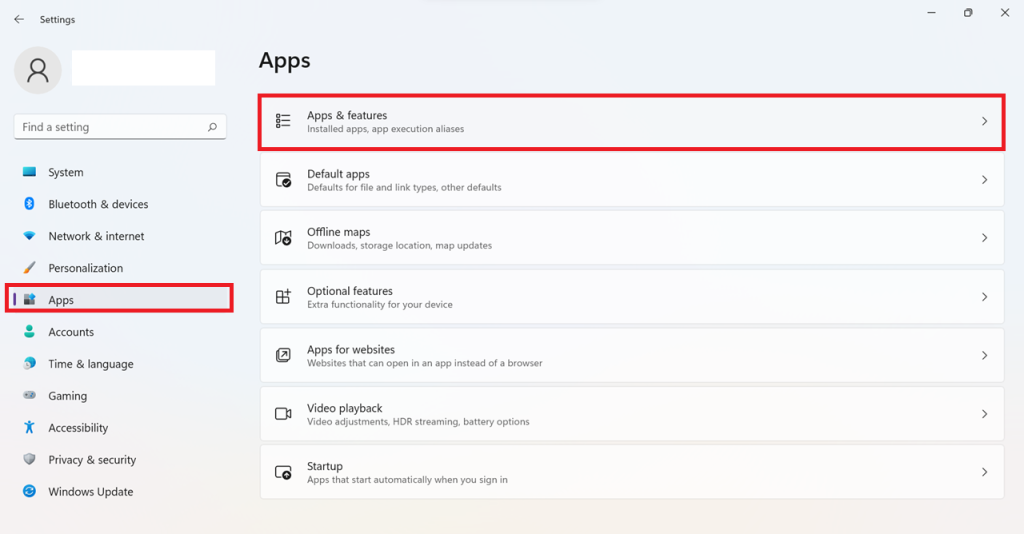
- Scroll down to the Adobe Creative Cloud, click the three-dotted button, and then select Uninstall.
Woah, and just like that, it’s uninstalled!
Method 4: How to Delete Adobe Creative Cloud from Mac?
On macOS, dragging Adobe Creative Cloud to the Trash won’t completely remove it. Leftover files may remain, taking up valuable storage space. You must follow this step-by-step guide to delete the application from your MacBook.
Step 1: Uninstall Adobe Apps
Start by removing any CC-related apps on your laptop; Photoshop, Lightroom, Illustrator, etc.
- To do this, open the CC desktop app and go to the All Apps tab. Locate the app you wish to uninstall, select the More Actions icon under it, and click Uninstall.
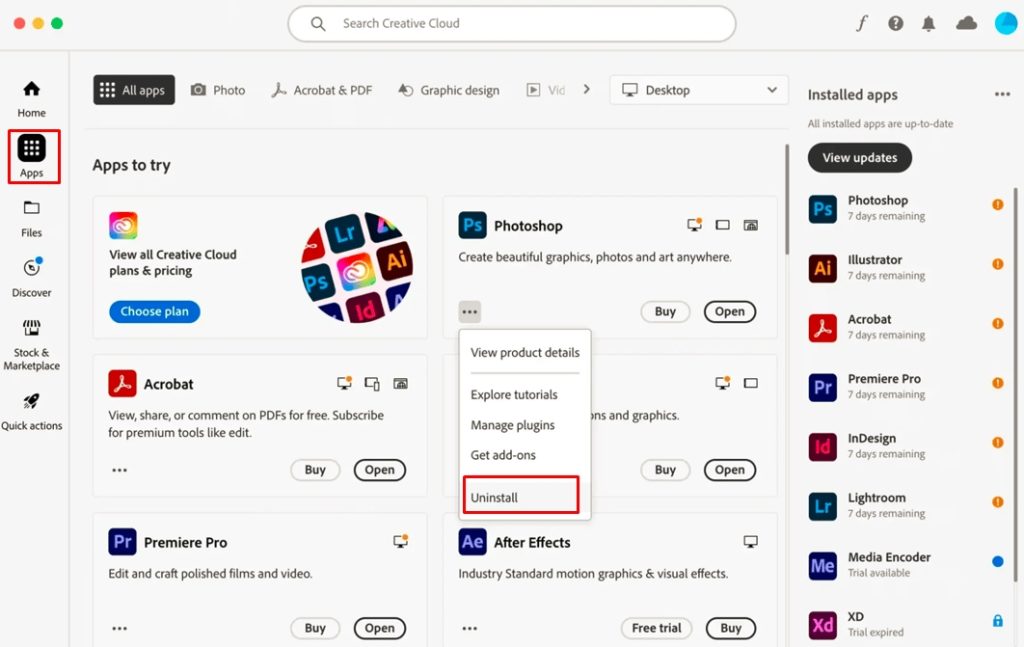
- Follow the on-screen instructions to complete the process.
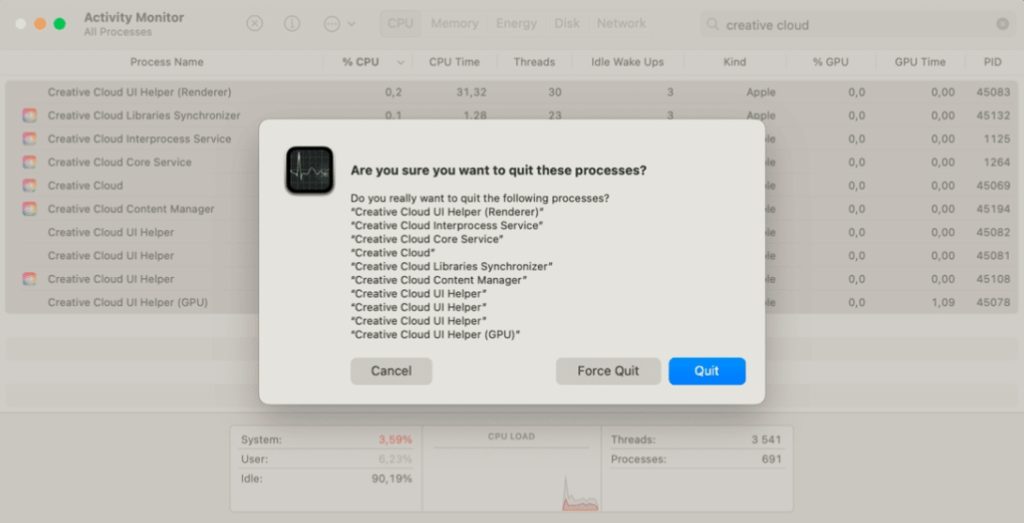
Step 2: Quit the Related Processes
The second step is quitting all related processes. Here is how it goes.
- Visit the Application Folder > Utility > Activity Monitor. Alternatively, use the spotlight to open the activity monitor.
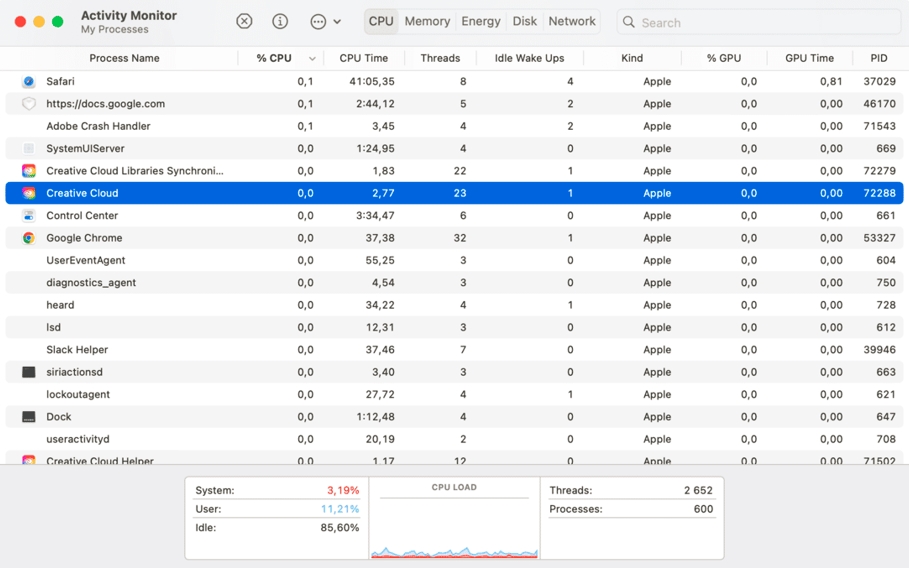
- Search for any Creative Cloud processes and click the Force Quit button. Click Quit in the pop-up window to confirm the process.
Step 3: Run the Adobe CC Official Uninstaller
- Finally, download the official Adobe uninstaller for Mac and extract the zipped file.
- Double-click the CC uninstaller.dmg file. You may receive a warning about using a DMG file for uninstallation.
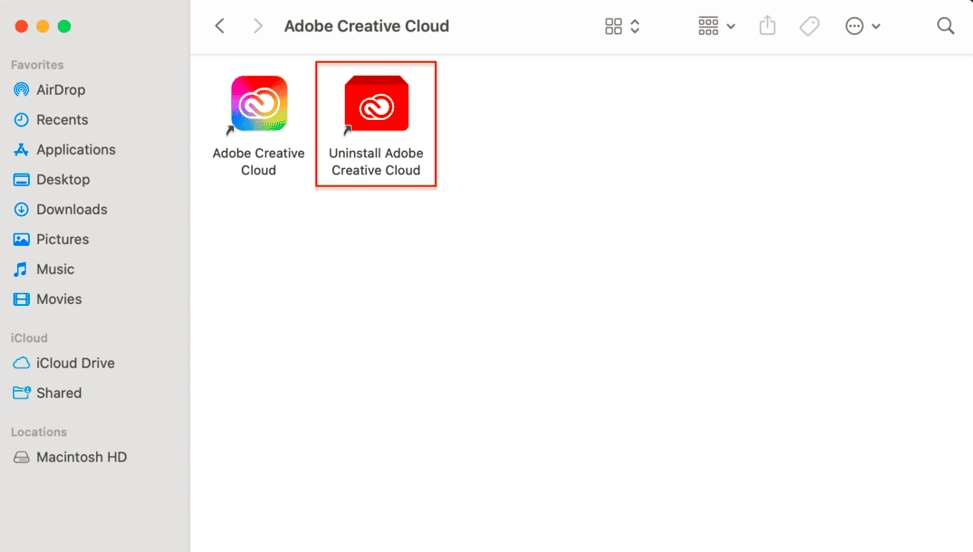
- Enter your password and select Uninstall to continue.

- Close the pop-up menu once it is done uninstalling.
4 Main Reasons to Use Master Uninstaller for Deleting Adobe Creative Cloud
Here are some reasons why using Master Uninstaller is a good option to delete apps from my PC.
- Complete Program Deletion: Whether a stubborn game like Adobe CC or bulk files, the Master Uninstaller ensures the app is fully deleted and leaves no remnants. This improves system performance significantly.
- Fast Single-Click Operation: The best part of this uninstaller is its ease of use. All you need to do is track down the app and uninstall it. Moreover, even with large programs, it hardly takes any time. For instance, completely deleting Adobe CC from the PC took me a few seconds.
- Blacklisting Function: The Master uninstaller has a blacklisting function that lets you block any stubborn program from reinstalling on its own. It will always ask for your permission before attempting any installation action.
- Bundleware Uninstallation: This uninstaller program can detect bundleware programs that install unnecessary additional apps without your notice. It lets you keep your device clutter-free and efficient.
Problems that May Arise While Deleting Adobe Creative Cloud
It is normal to encounter problems while uninstalling the Adobe Creative Cloud desktop app. But knowing the right route to troubleshoot is a plus. So, let’s discuss some issues that may arise during the force Adobe Creative Cloud uninstall and their quick fixes.
- Adobe installer not working: The Adobe built-in installer might not work correctly. In such cases, it is always better to manually uninstall it via Windows settings or the control panel.
- Uninstallation file missing: A source file required for the uninstallation might not work. Don’t panic! Delete the WinZip uninstaller folder from your computer and re-download it.
- Leftover Adobe files: Not all Adobe files were successfully uninstalled. As demonstrated in the second method, you must delete the Adobe backup processes and apps from the computer’s registry and control panel.
- Background processes running: Suppose an Adobe background running process prevents the program from being uninstalled. If so, ensure all Adobe background apps are correctly closed from the registry.
Troubleshoot: Please note that one primary reason you are unable to delete Adobe Creative Cloud from your computer is the incomplete uninstallation process. Make sure to follow each step to thoroughly remove the app.
Frequently Asked Questions
Final Thoughts!
Here are three quick and effective force Adobe Creative Cloud uninstall methods. Whatever process you choose, make sure to take time to prepare for the uninstallation. Always sync your files in the cloud, close background running processes, and delete apps to remove the Adobe Cloud smoothly.
Given its nature, if the Creative Cloud still remains in the system, it is only wise to use a third-party uninstaller. I would recommend using Master Uninstaller for its ease of use and functionality. In a few seconds, it cleans the residue of stubborn apps like CC from your system completely.
They are offering a free version for a limited time now, so give it a try, and see if it works.

-

Simple and Practical: Easily uninstall unwanted software.
-
Thorough Cleanup: Completely remove residual files.
-
Blacklist Protection: Identify and block malware and adware.