


Did you know that simply uninstalling an app doesn’t always remove it completely? Many programs leave behind hidden files, registry entries, and background processes, cluttering your system and affecting performance.
If you’re struggling to remove an app on Windows 11, whether it’s a pre-installed program, a stubborn third-party tool, or an unnecessary startup app, this detailed guide has you covered.
Follow these steps to free up space and optimize your PC effortlessly. From quick uninstalls via the Start Menu to advanced removal methods using PowerShell and Master Uninstaller.
Methods to Remove Apps on Windows 11
Are you trying to remove an app on Windows 11 but still finding traces of it on your system? Some apps uninstall easily, while others leave registry clutter, hidden files, or background processes behind. Windows 11 provides multiple methods to uninstall programs effectively. Choosing the right approach ensures a complete cleanup, freeing storage and improving performance.
Method 1: Remove Apps Using the Start Menu (Quickest Method)
If you are a noob and want to know the easiest method of removing apps, then the start menu option is the answer. However, this method works best for the apps installed via the Microsoft Store.
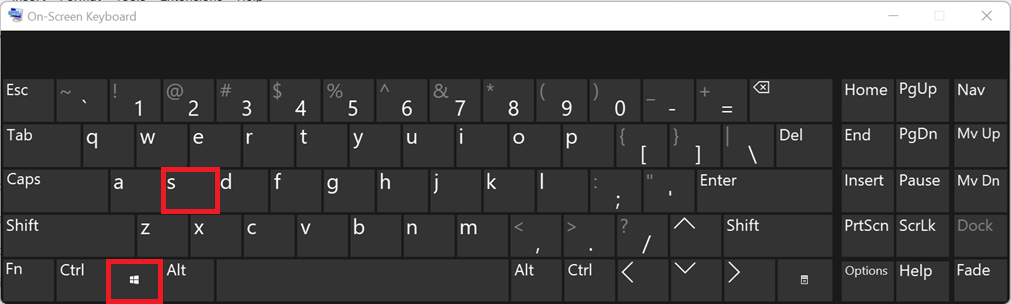
Step 1: Open the Start Menu
- To open the search menu, click on the Start Button below or press Win + S.
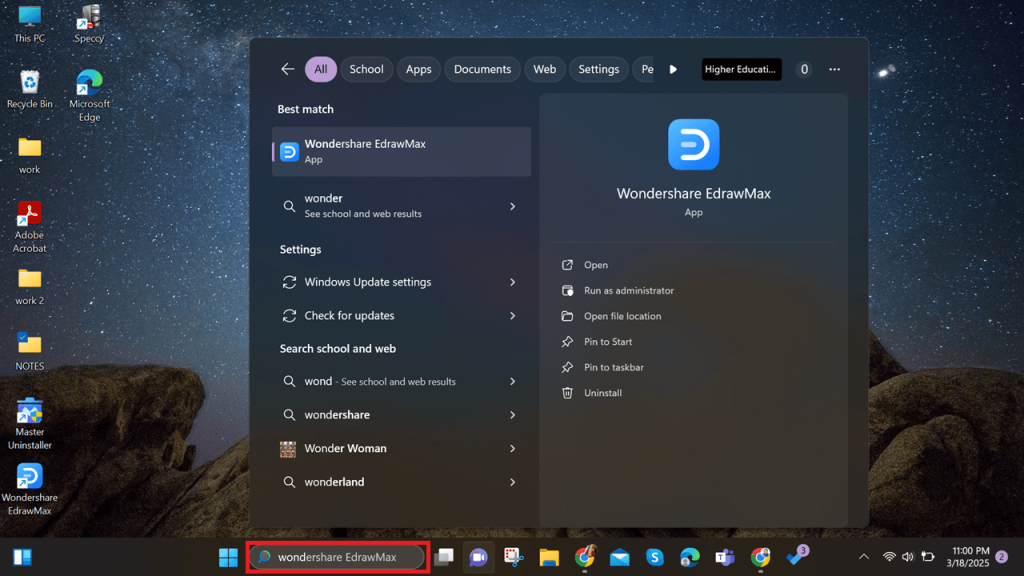
Step 2: Locate the App
- Now, you can either scroll through the recent apps you want to remove or search for the app's name in the search bar below.
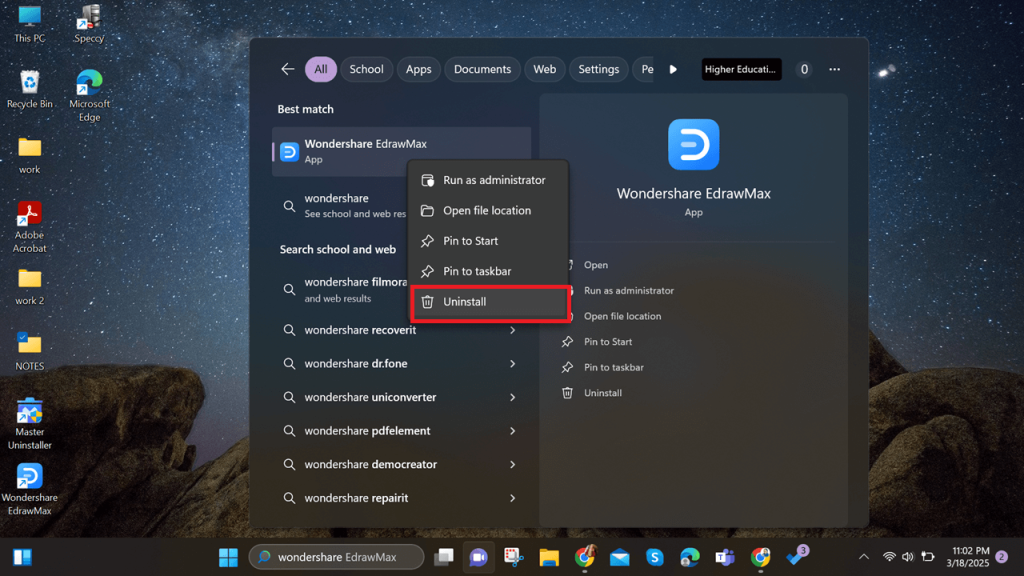
Step 3: Uninstall the App
- Then, right-click the app and select Uninstall from the app's menu you are removing.
Step 4: Confirm Uninstallation
- You’ll now be redirected to the Control Panel. Once there, locate the app you want to remove by scrolling through the list. Right-click on the app and select Uninstall to proceed with the removal. Follow any on-screen prompts to complete the process.
Method 2: Remove Apps via Windows 11 Settings (Best for Installed Apps)
For Microsoft Store apps and most installed programs, Windows Settings offers a simple and direct way to remove them. This method is ideal for those who prefer a user-friendly approach without needing advanced tools
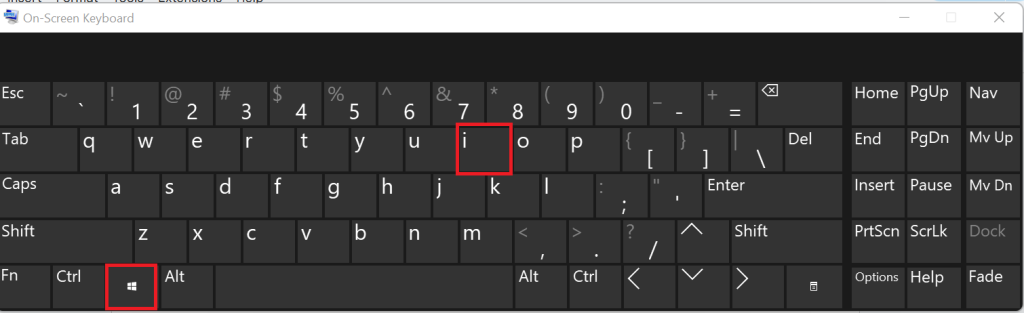
Step 1: Open Windows Settings
- Press Win + I to open Settings instantly. Alternatively, click the Start Menu, type Settings, and hit Enter.
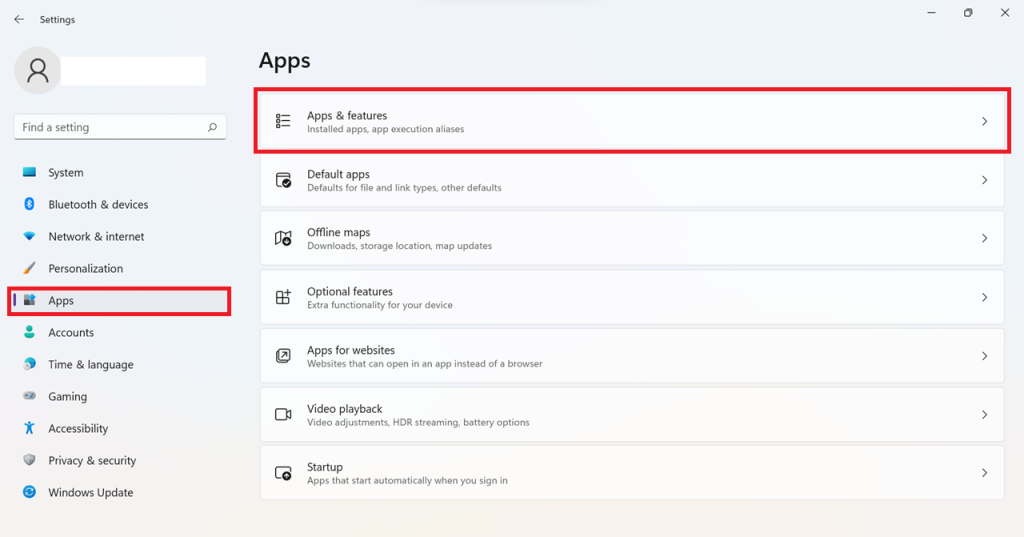
Step 2: Access Installed Apps
- Now, click on the Apps >Apps & Feature option.
Step 3: Select the App to Remove
- Scroll through the list or use the search bar to find the app. Click the three-dot menu (⋮) next to it and then click Uninstall. Some apps may require extra steps, such as confirming administrator permissions.
Img: uninstall-the-app.jpg
Alt: confirm app uninstallation
This process will leave the residual file, which you can uninstall directly from Windows: C folder.
Note: If the Uninstall button is grayed out, the app is a system-protected program and may require PowerShell or a third-party uninstaller for complete removal.
Method 3: Remove Apps Using Control Panel (For Traditional Desktop Apps)
If you're dealing with traditional desktop programs installed via EXE or MSI, the Control Panel remains the most effective tool for complete removal. This method is best for software that doesn’t appear in the Windows Settings app list.
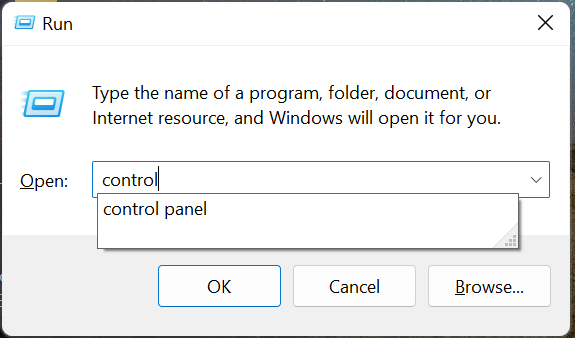
Step 1: Open Control Panel
- Press Win + R, type control, and hit Enter to launch the Control Panel.
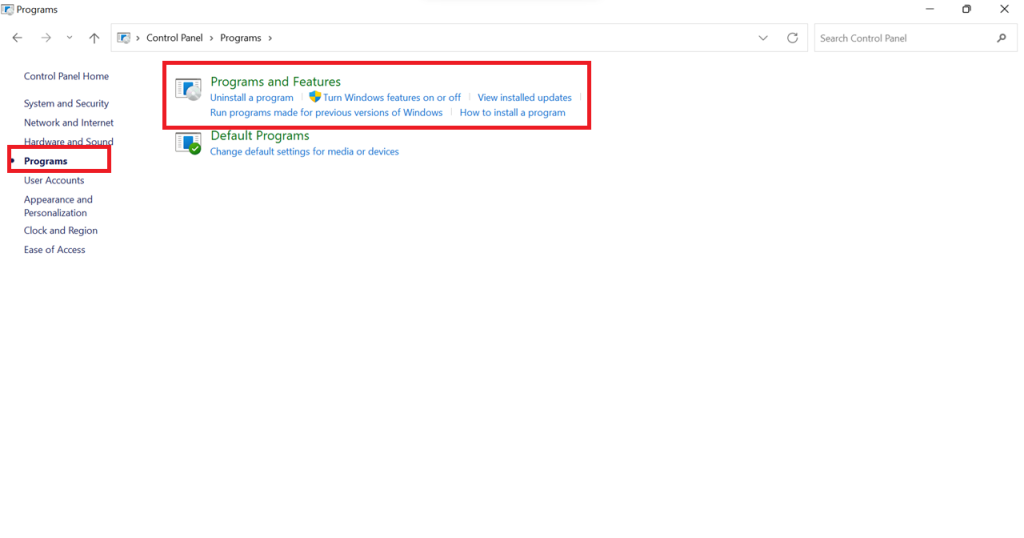
Step 2: Navigate to Programs & Features
- Click Programs, then select Programs and Features to see a list of all installed applications on your system.
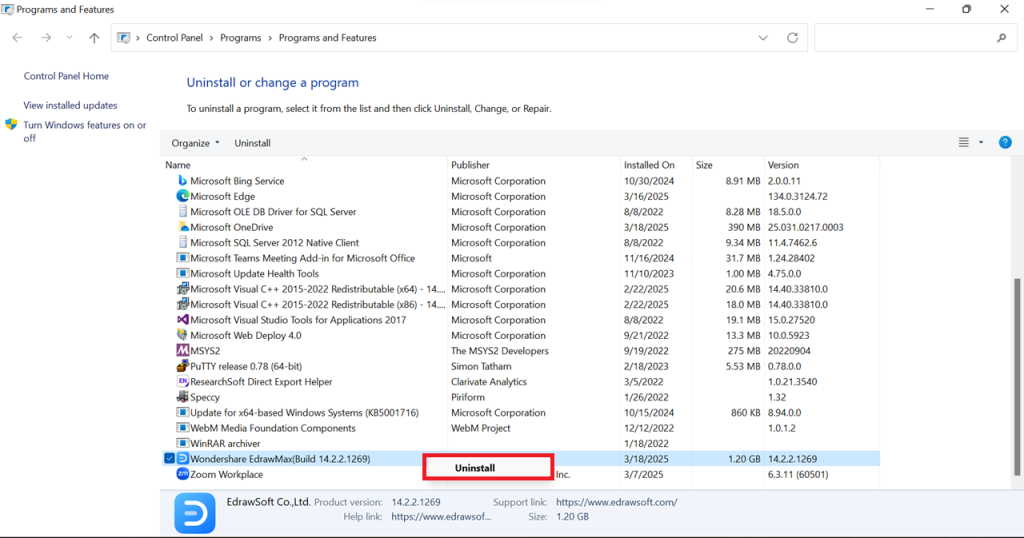
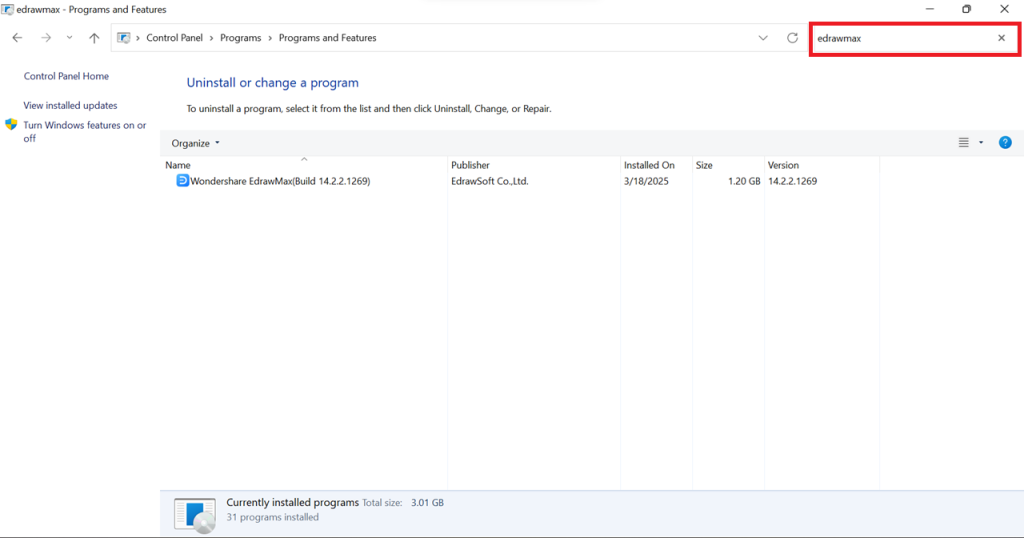
Step 3: Find the App to Remove
- Now, scroll through the list or use the search bar to quickly locate the app you no longer need.
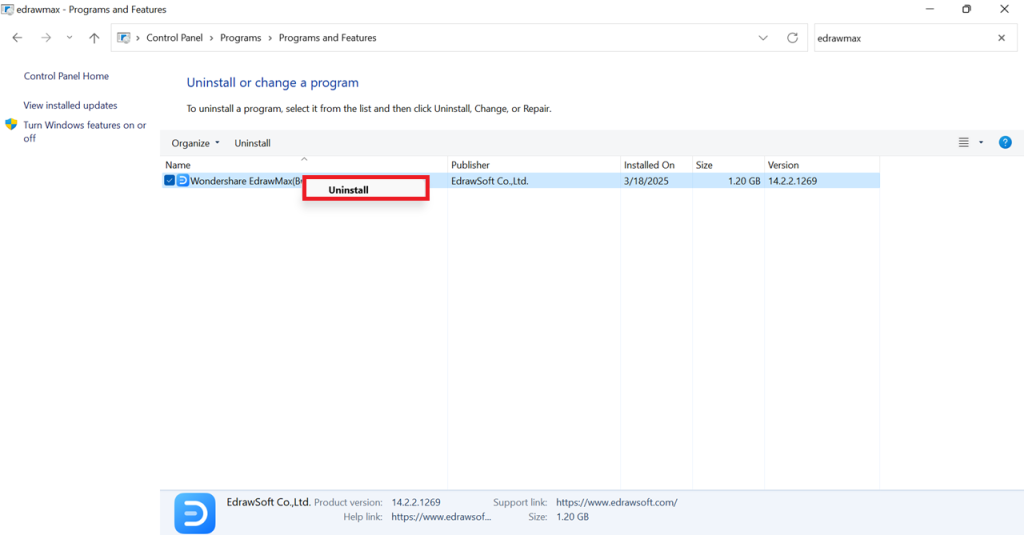
Step 4: Uninstall the App
- Right-click the app, select Uninstall, and follow the on-screen prompts. In just a few clicks, the app will be gone.
How to Remove Apps on Startup Windows 11
Too many startup apps slow down boot time and drain system resources. Disable the ones you don’t need to speed up performance and free up memory.
Method 1: Disable Startup Apps via Task Manager
If your PC takes too long to boot, unnecessary startup programs might be the cause. Task Manager lets you disable these apps, improving startup speed and overall system performance.
Step 1: Open Task Manager
- Press Ctrl + Shift + Esc to launch Task Manager instantly. Alternatively, right-click the taskbar and select Task Manager from the menu.
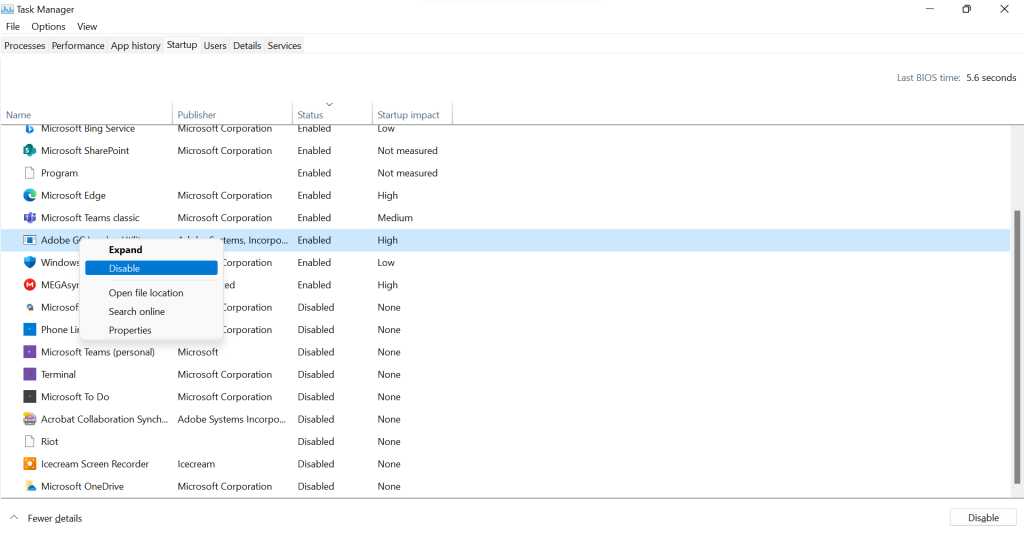
Step 2: Navigate to the Startup Apps Tab
- Click on the Startup Apps tab in the top menu. This will display all programs that launch when Windows starts.
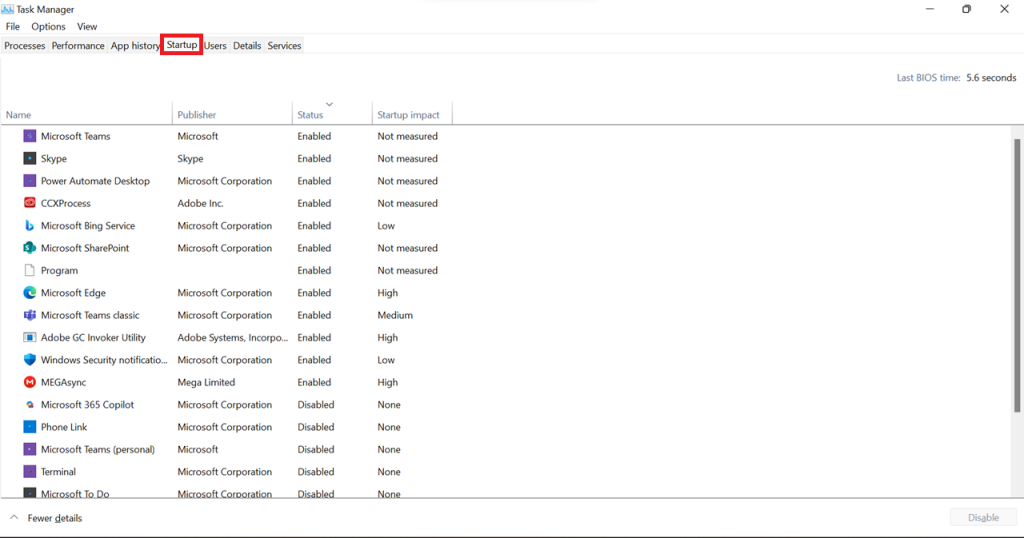
Note: Windows assigns a Startup Impact level to each app:
- High Impact: Significantly slows startup. Disable if unnecessary.
- Medium Impact: Moderately affects boot time. Safe to disable if not frequently used.
- Low Impact: Minimal effect. Disabling it may not be noticeable.
Step 3: Disable Unnecessary Startup Programs
- Now, scroll through the list and identify high or medium-impact apps you don’t need at startup. Right-click the app and select Disable. Repeat for all unwanted programs.
Method 2: Disable Startup Apps via Windows Settings
Windows Settings offers a simple way to disable startup apps without using Task Manager. This method is great for users who prefer a more visual and organised approach.
Step 1: Open Windows Settings
- Press Win + I to launch Settings.

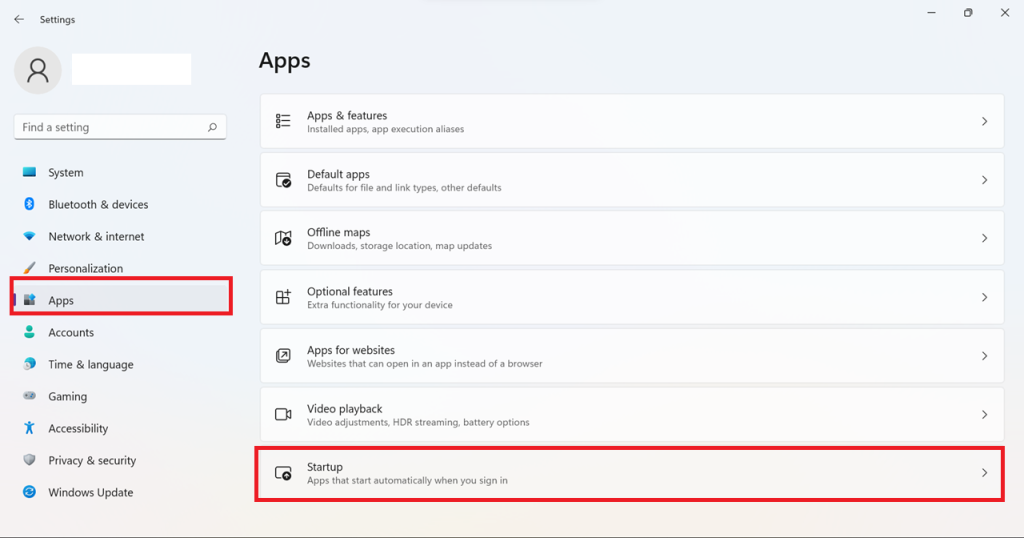
Step 2: Navigate to Startup Apps
- Go to Apps > Startup to view a list of programs that launch at startup.
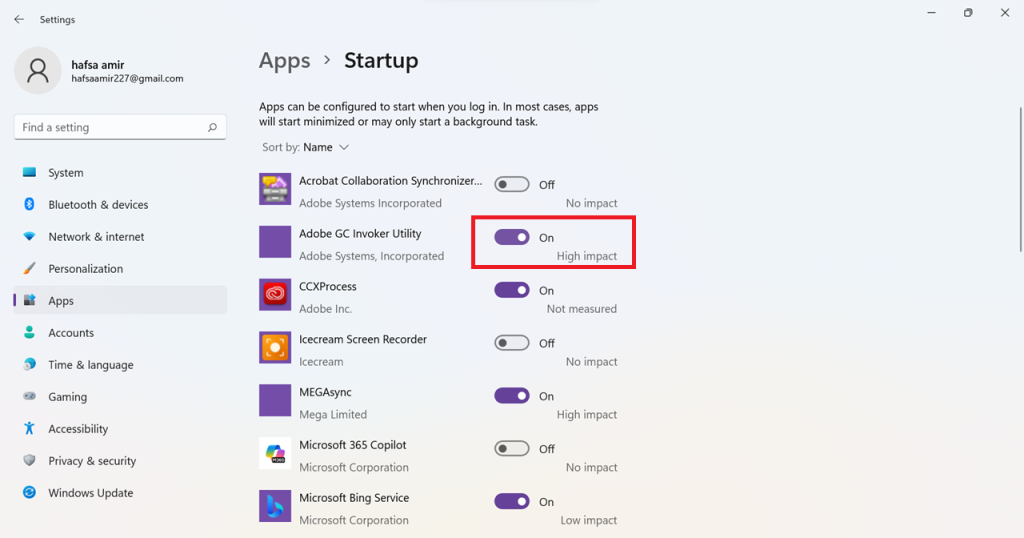
Step 3: Disable Unwanted Apps
- Now, scroll through and find the apps you don’t need, then toggle Off the switch next to them.
How to Force Remove Apps on Windows 11 (For Stubborn Apps)
Some apps don’t uninstall properly and leave behind residual files. Here’s how to force-remove them:
1. Remove Apps Using PowerShell (For System Apps)
Use PowerShell to force-remove system apps that Windows blocks from uninstalling. It’s ideal for deleting pre-installed applications.
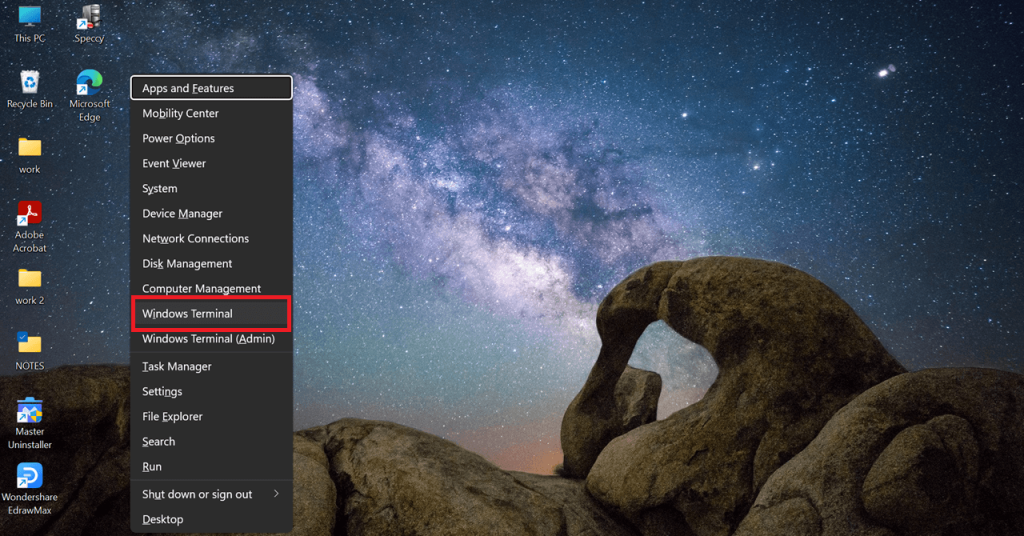
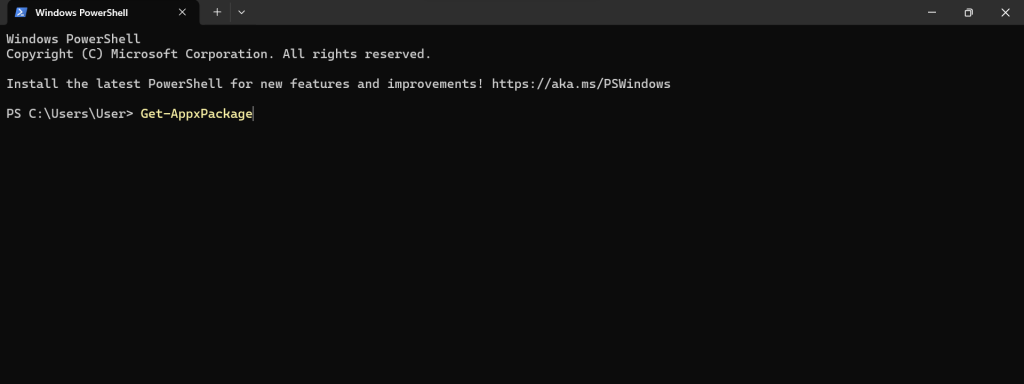
Step 1: Open PowerShell as Administrator
- Press Win + X and select Windows PowerShell (Admin) from the menu.
Step 2: List Installed Apps
- Type the following command and press Enter to display all installed apps:
Get-AppxPackage | Select Name, PackageFullName
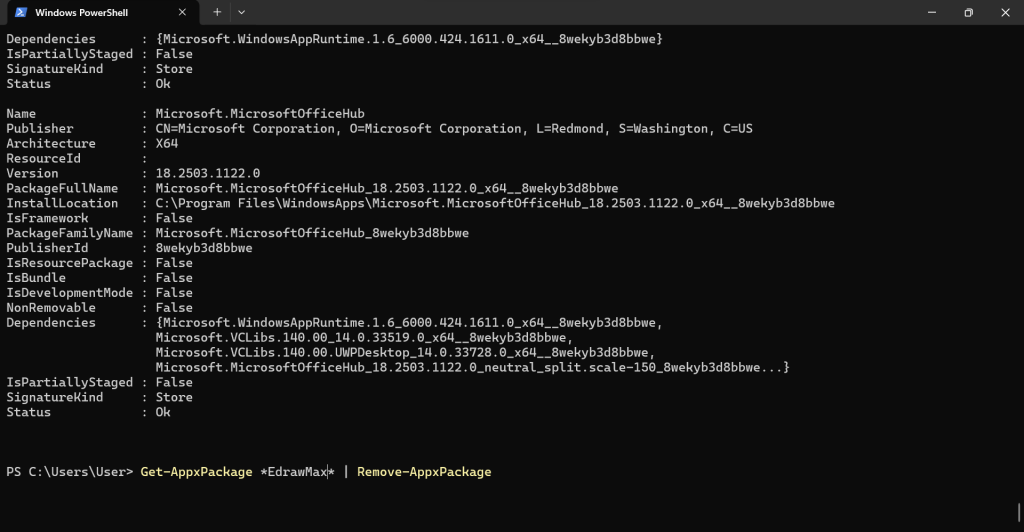
Step 3: Identify the App to Remove
- Find the PackageFullName of the app you want to uninstall.
Step 4: Uninstall the App
- Run the following command, replacing AppName with the actual package name:
Get-AppxPackage *AppName* | Remove-AppxPackage
Some system apps may be reinstalled after a Windows update. Use a third-party uninstaller to prevent this.
2. Use Third-Party Uninstallers (For Complete Removal)
You're not alone if you've ever tried uninstalling a program only to find it lurking in your system. Some apps leave behind hidden files, registry clutter, or even auto-reinstall after removal. Master Uninstaller ensures a deep and thorough cleanup, so you don’t have to dig through system folders manually.
Step 1: Download and Install Master Uninstaller
- Visit Master Uninstaller and install the software on your PC.
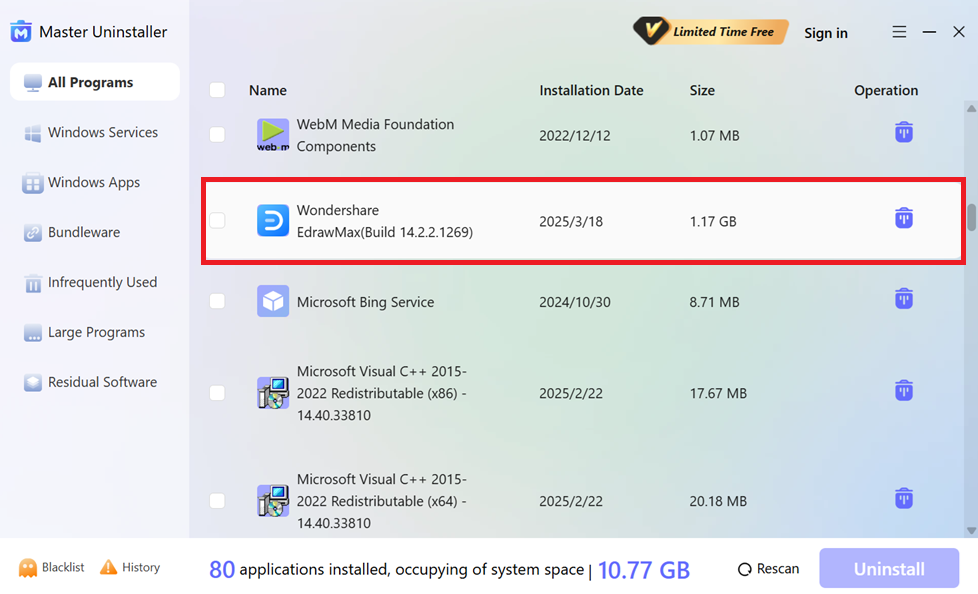
Step 2: Locate the App
- Launch Master Uninstaller and go to All Programs. Scroll through the list or use the search bar to find the software you want to remove.
Step 3: Uninstall the App Completely
- Click the Delete button next to the selected program. Choose Automatically Remove Software Remnants and confirm by clicking OK.
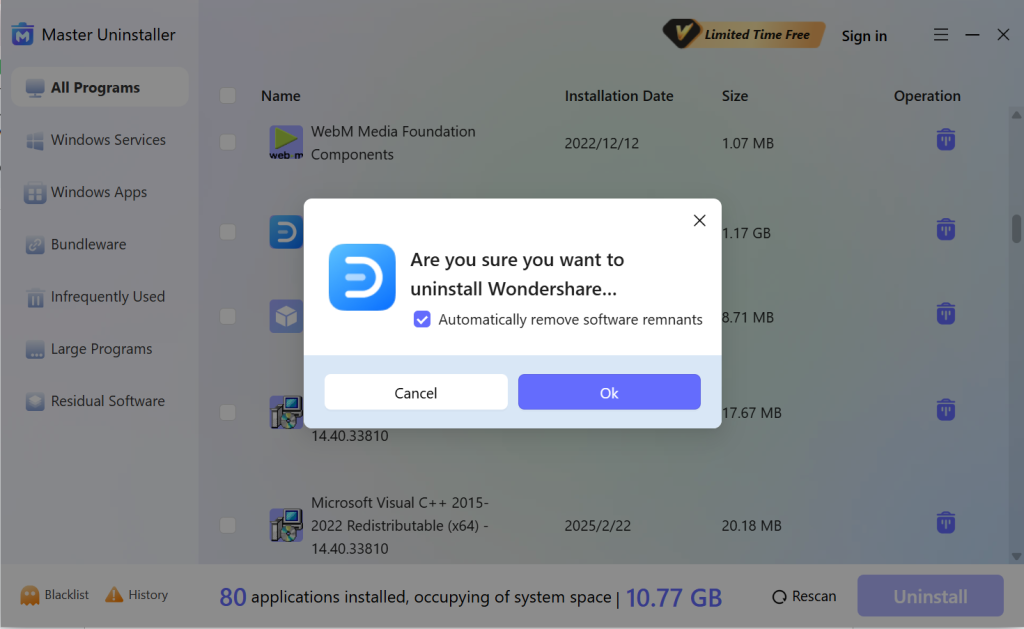
No more searching for leftover files or worrying about registry clutter; Master Uninstaller takes care of everything in one click for clean removal.
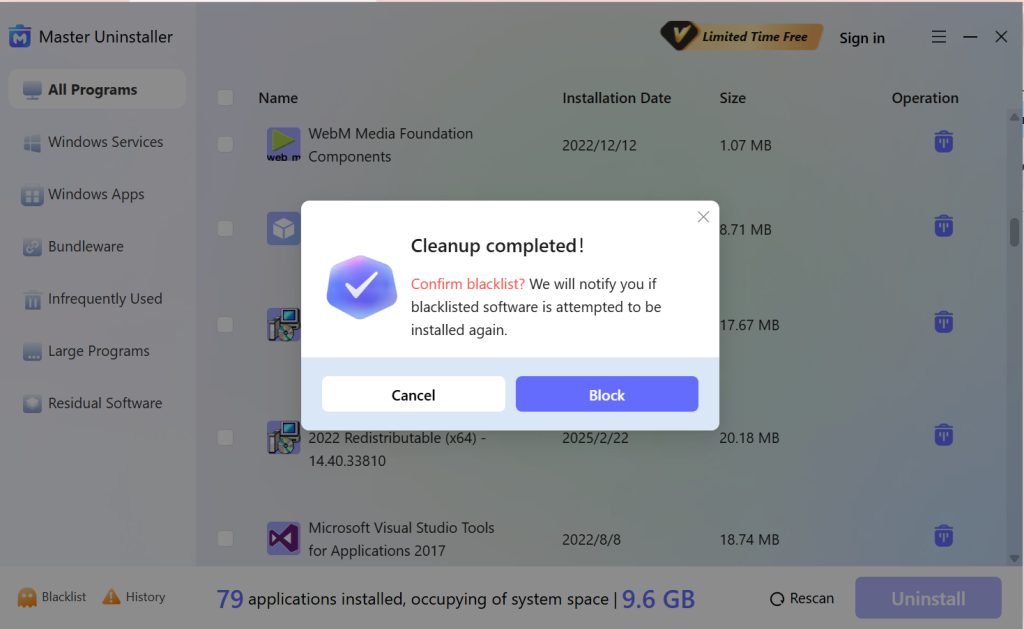
Step 4: Block the App
- If you never want to reinstall the app, a pop-up will appear after installation. Click Block, and that app will be moved to the Master Uninstaller Blacklisted Software folder.
FAQs
Final Words
Knowing how to remove apps on desktop Windows 11 helps keep your system clean and optimized. Whether uninstalling software through Settings, Control Panel, or PowerShell, choosing the correct method ensures complete removal.
If an app refuses to uninstall or leaves behind unwanted files, Master Uninstaller provides a deep, clean solution by erasing residual data and preventing reinstallation. Keeping your PC free of clutter enhances performance, security, and boot speed, allowing you to enjoy a faster and more efficient Windows 11.

-

Simple and Practical: Easily uninstall unwanted software.
-
Thorough Cleanup: Completely remove residual files.
-
Blacklist Protection: Identify and block malware and adware.