


Is your PC taking forever to start? You press the power button and expect it to boot normally, but all you get is waiting as background applications quietly begin. These startup applications automatically load when you start your PC, taking up memory and slowing things down.
The truth is that some startup programs are necessary, but all aren't. They consume system resources, have a slow starting time, and leave your PC with endless loading time. The good part is that you do not have to tolerate this much.
This article will discuss three different methods for removing items from startup in Windows 11. Whether you prefer built-in settings, the Task Manager, or third-party tools, we have you covered.
What Are Startup Programs?
Startup programs are applications that automatically launch when you turn on your PC. These applications run in the background so that they are immediately available, and the user doesn't have to find them manually. Some software, like antivirus or cloud storage apps, is essential for startups for security and productivity, while others aren't.
Many programs enable startups without direct permission. Applications such as messaging platforms, game launchers, and auto-updaters set themselves to run during system startup, which increases background processes. Repeatedly doing this can hinder your system's load time, consume more memory, and lower the system's overall performance.
When your PC takes longer than average to boot, you must remove apps from startup in Windows 11. Turning off specific start-up applications can free up system memory and boost speed. Properly managing startup programs enables you to maximize your PC's performance effortlessly without sacrificing its capabilities.
How to Remove Startup Programs in Windows 11 | 3 Methods
Disabling unnecessary startup programs is a simple yet effective way to boost system performance. However, if not done correctly, some programs may continue running in the background, affecting speed and responsiveness. To help you, we've outlined five proven methods to remove programs from the PC startup menu in Windows 11.
1. Disable Startup Programs via Task Manager in Windows 11
If your PC takes too long to boot, unnecessary startup programs might be the cause. Using Task Manager, you can quickly disable unwanted startup apps and improve performance. Follow these steps to manage startup programs in Windows 11.
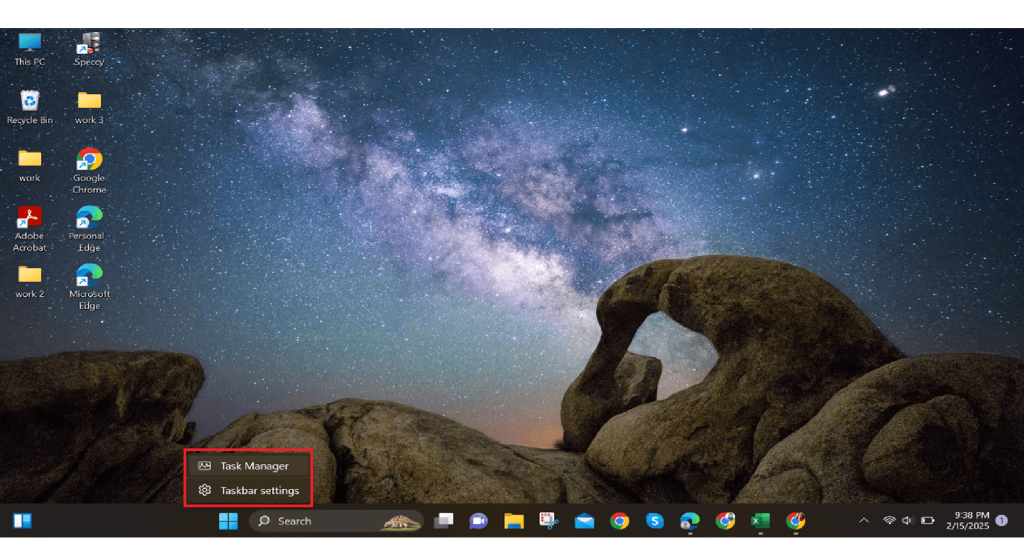
Step 1: Open Task Manager
- Press Ctrl + Shift + Esc to open Task Manager instantly. Alternatively, you can right-click the taskbar and select Task Manager.
Step 2: Navigate to the Startup Tab
- In Task Manager, click the Startup Apps tab from the upper menu. This will display all programs that launch when Windows starts.
Note: Startup App options can also be present on the right-hand side.
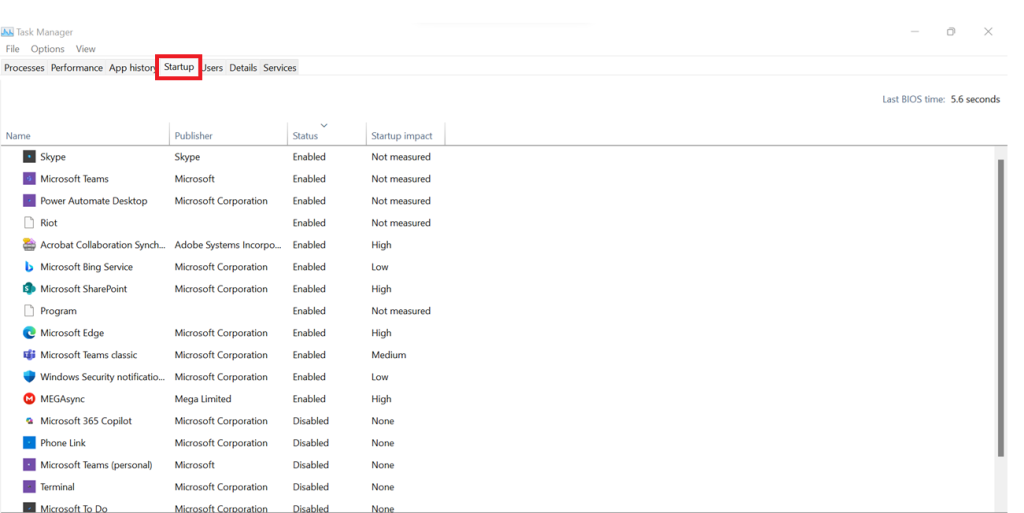
Before you disable programs, consider their Startup Impact, which Windows automatically assigns according to their impact on startup time:
- High Impact: Slows startup significantly. Disable only if required (e.g., antivirus, drivers).
- Medium Impact: Affects startup speed moderately. It is safe to disable unless used very heavily.
- Low Impact: Little or no effect on startup time. Disabling it may not be noticeable.
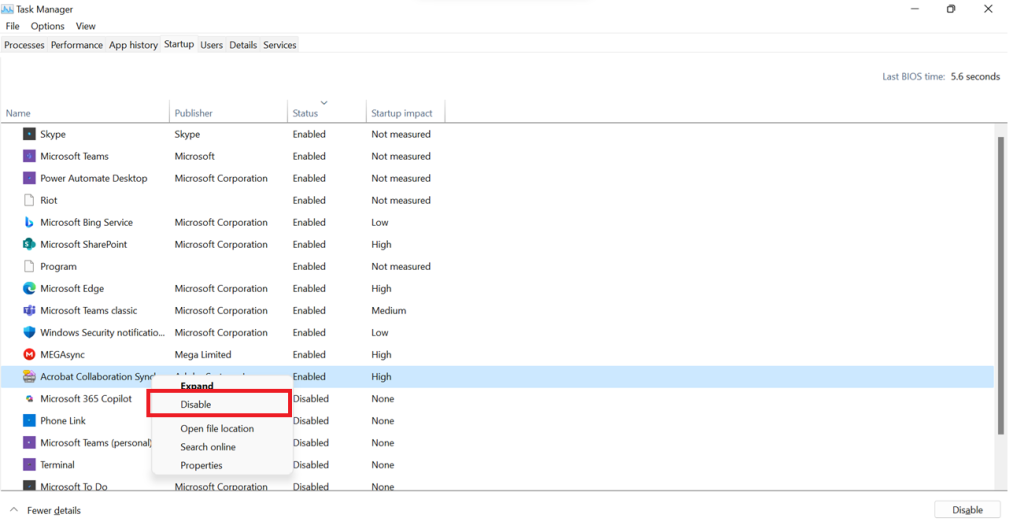
Step 3: Disable Unnecessary Startup Programs
- Scroll down the list and find unnecessary high—or medium-impact apps. Right-click on an app and select Disable. Repeat for all unnecessary apps.
2. Remove Startup Programs via Settings App in Windows 11
Windows 11 lets you control startup programs using the Settings app, providing a convenient method to turn off unwanted applications. Nevertheless, this menu will not find specific applications because of system limitations. To disable startup programs using Settings, follow these instructions.
Step 1: Open the Settings App
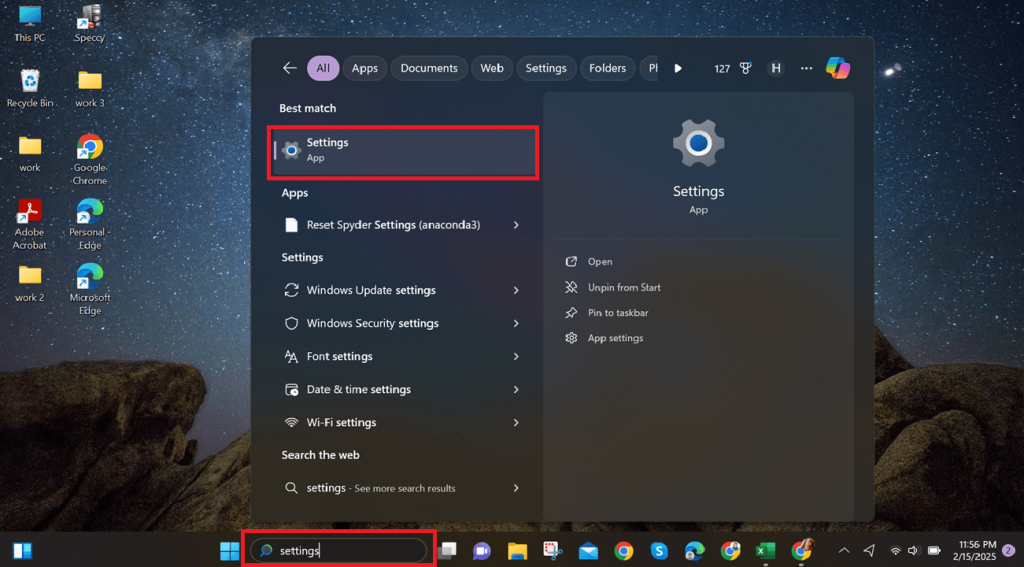
- Press Win + I to open Settings immediately. Alternatively, search for Settings in the Windows search field and open the app.
Step 2: Navigate to Startup Apps
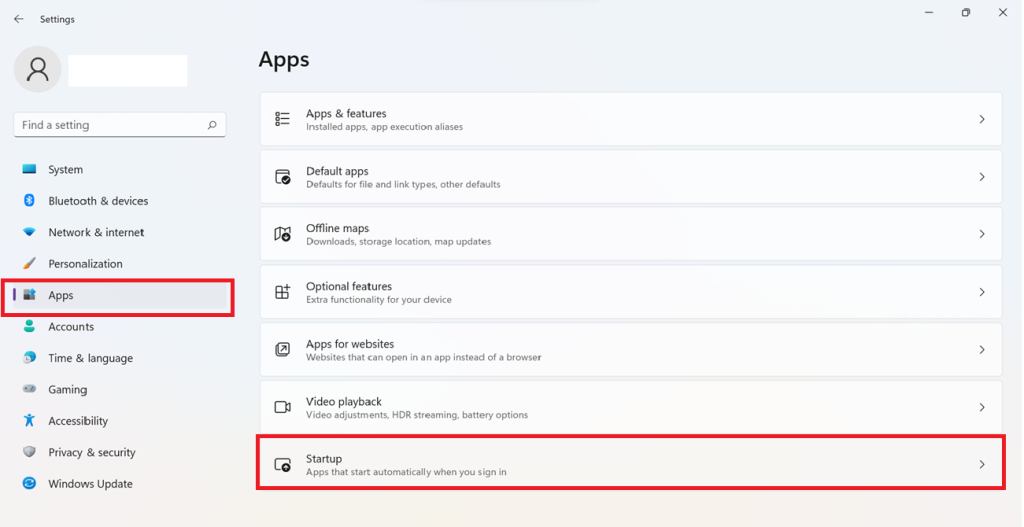
- In the Settings, navigate to Apps > Startup. This will display a list of apps that run at startup and toggles to enable or disable them.
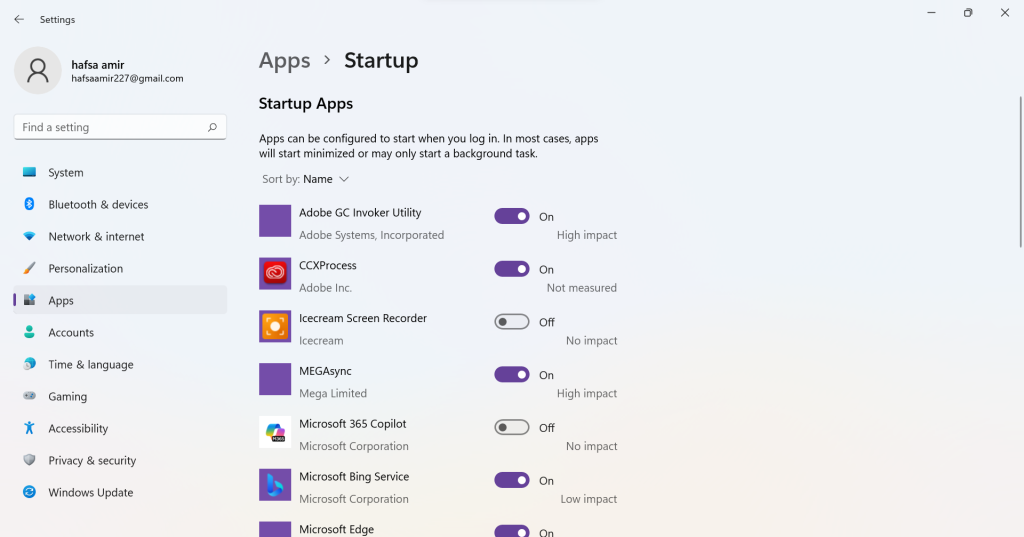
Step 3: Disable Unwanted Startup Apps
- Now, look for apps you do not require at startup. Toggle off to disable them, but be careful of the startup impact.
3. Remove Startup Programs via Windows Registry
If you want complete control over which programs run at startup, the Windows Registry allows you to remove startup entries manually. However, this method is for advanced users since modifying the Registry incorrectly can cause system issues. Follow these steps carefully.
Step 1: Open the Windows Registry Editor
- Press Win + R, type regedit, and hit Enter. Then, click Yes at the User Account Control (UAC) prompt to proceed.

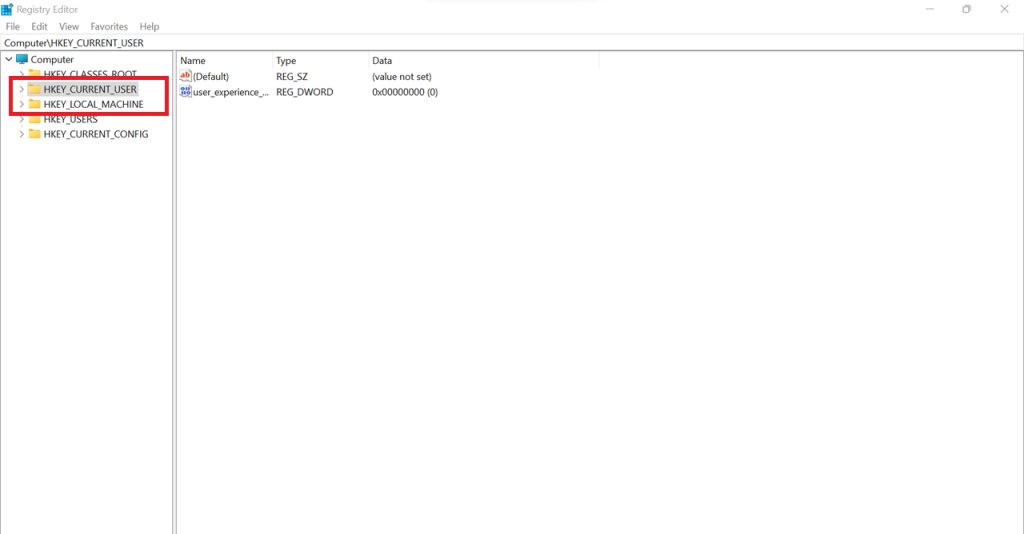
Step 2: Navigate to the Startup Entries
In the Registry Editor, go to the following files locations:
- HKEY_CURRENT_USER\Software\Microsoft\Windows\CurrentVersion\Run
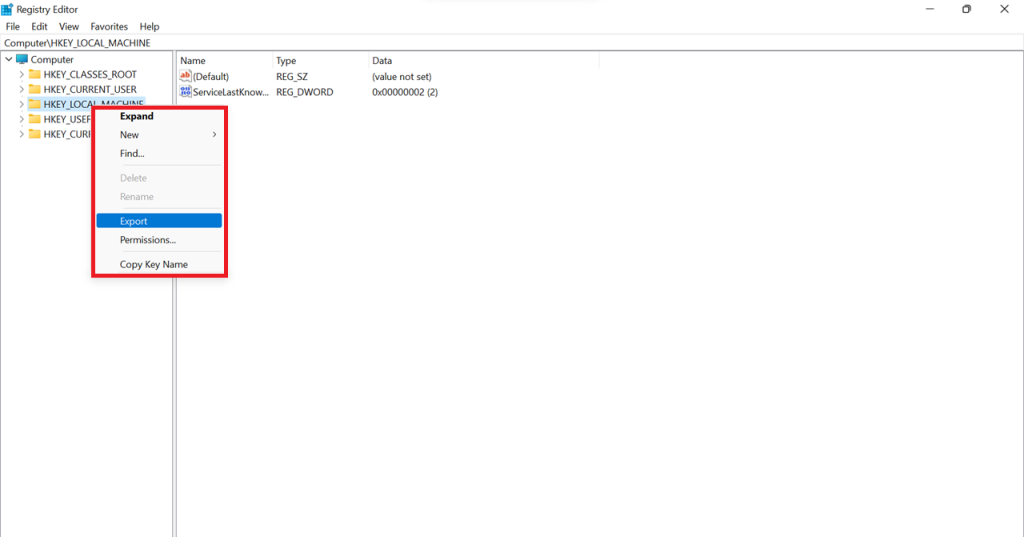
This section contains startup programs for your user account. To manage system-wide startup programs, navigate to:
- HKEY_LOCAL_MACHINE\Software\Microsoft\Windows\CurrentVersion\Run
Step 3: Identify and Delete Unwanted Entries
- Look for programs you don’t want to start automatically. Right-click the unwanted entry and select Delete. Confirm by clicking Yes.

5 Benefits of Removing Unnecessary Startup Programs
An unorganized startup program can significantly decrease the efficiency and speed of your PC. Deleting unused startup programs frees up memory, increases efficiency and gives you a smoother overall experience. Here's why it is essential:
1. Faster System Startup
If several programs are enabled at startup, it will take for your PC to power up. Waiting can be frustrating, especially if you need to start working immediately. Disabling unnecessary active applications allows for lower Windows 11 load time, improving your experience and running smoothly.
2. Improved System Performance
Even after powering up, programs in the background still consume RAM and CPU power, affecting overall speed and responsiveness. As a result, your system may feel laggy, making multitasking difficult. After removing unwanted startup programs, your PC operates more efficiently and functions at its peak while working, gaming, or browsing.
3. Reduced System Crashes & Freezes
When many apps compete for system resources, the risk of crashing, freezing, or sudden slowdowns increases. This is frustrating and disrupts productivity. Managing startup programs reduces system stress, lowers errors, and keeps your PC running optimally.
4. Better Battery Life
On laptops, startup programs run in the background, consuming power even when you are not actively engaged. Over time, this consumes battery life faster. Disabling unnecessary apps conserves power, allowing your laptop to last longer on a single charge.
5. More Control Over Your PC
Some programs install in the startup automatically without your knowledge, running processes you do not need. This not only slows down your system but also compromises security. By managing startup programs, you decide which apps run in the background, keeping your PC streamlined and secure.
FAQs
Final Words
Managing startup programs is one of the simplest yet most effective ways to boost system performance. Disabling unnecessary startup apps can reduce boot times, free up system resources, and prevent lagging issues.
While built-in tools like Task Manager and Windows Settings offer quick fixes, more advanced users can leverage the Registry Editor for more profound control. Regularly reviewing your startup list ensures that only essential apps run at boot, keeping your PC optimized and responsive. Take charge of your system, a clutter-free startup means a faster, smoother computing experience.

-

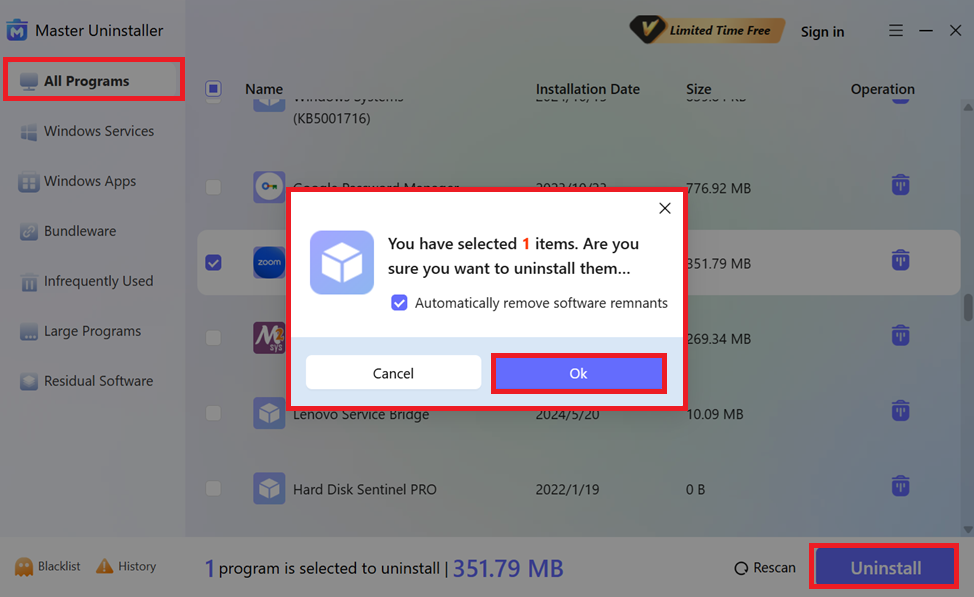
Simple and Practical: Easily uninstall unwanted software.
-
Thorough Cleanup: Completely remove residual files.
-
Blacklist Protection: Identify and block malware and adware.