


Windows fonts are important since they help enhance the aesthetics of texts displayed on your device. The apps and programs installed on your PC use different fonts to boost the user experience. At times, however, you may want to uninstall a font for different reasons. This guide seeks to elaborate more about "Windows how to uninstall a font."
We'll start by outlining different ways how to delete fonts on your computer. Next, we'll discuss scenarios where you may want to delete a font that's in use. The article will also discuss fixes you can apply when Windows refuses to delete a font. Keep reading to learn more.
How to Uninstall a Font in Windows in Different Ways
The Windows operating system allows you to remove a font whenever you don't need it. There exist different ways to uninstall a font on your PC. This section will cover the following four options:
- Using a Third-Party Uninstaller.
- Using Windows Settings.
- Using the Control Panel.
- Doing It Manually.
We'll show you how to use each method shortly.
Method 1. Uninstall Font Using Third-Party Uninstaller
A third-party uninstaller is arguably one of the best approaches for removing any font on your computer. One of the most recommended uninstallers to try out today is Master Uninstaller. This font uninstaller software lets you view all the available fonts on your device and remove those you no longer need. It conducts a deep scan on your device to ensure even the most hidden fonts are detected.
The software lets you delete the selected font in just a few steps. This helps to optimize the performance of your device by ensuring that you only remain with those fonts that are needed. You can do this by going to the "Infrequently Used" tab to find those rarely used fonts on your system. What more? Master Uninstaller allows you to turn off any Windows service that isn't actively in use.
Key Features of Master Uninstaller
- Uninstall multiple fonts on your PC at once.
- Conduct a deep scan to detect all the fonts installed.
- Access and delete or disable infrequently used fonts.
- Remove all files, including leftovers.
- Faster uninstall speeds.
- It gives a history of all the uninstalled apps/programs.
Do you want to efficiently uninstall or manage different fonts on your PC? For the best results, download Master Uninstaller. The steps for using this tool are very straightforward.
Steps for Using Master Uninstaller
Step 1. Visit the Master Uninstaller website and download a free version of the software to your device.
Step 2. Next, install and launch the uninstaller. Click "All Programs" to find the font you want to uninstall.
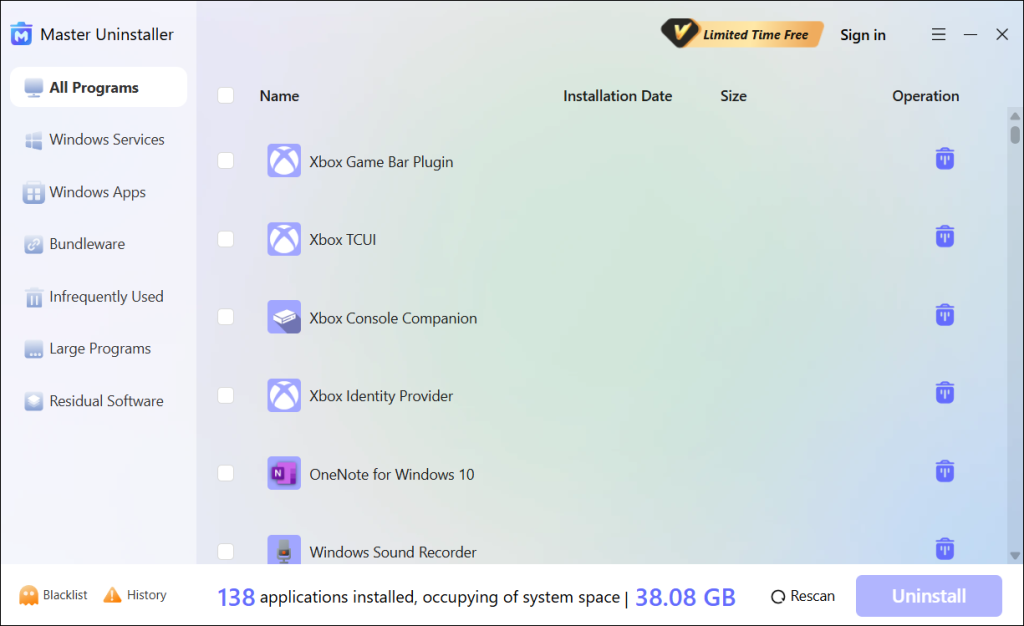
Step 3. Tick the checkbox next to the font and select the "Uninstall' button. When a popup message displays, check the button for "Automatically remove software remnants" and click "Ok" to initiate the uninstallation process. This will completely remove the selected font from your PC.

Method 2. Uninstall Font via Windows Settings
Windows has a built-in Settings app that allows you to manage all the programs and features on your device. You can use it to find and remove fonts that are no longer needed on your computer. You can accomplish that using the following steps:
Step 1. Launch your Windows Settings app.
Step 2. Next, click on "Personalization," then select "Fonts."
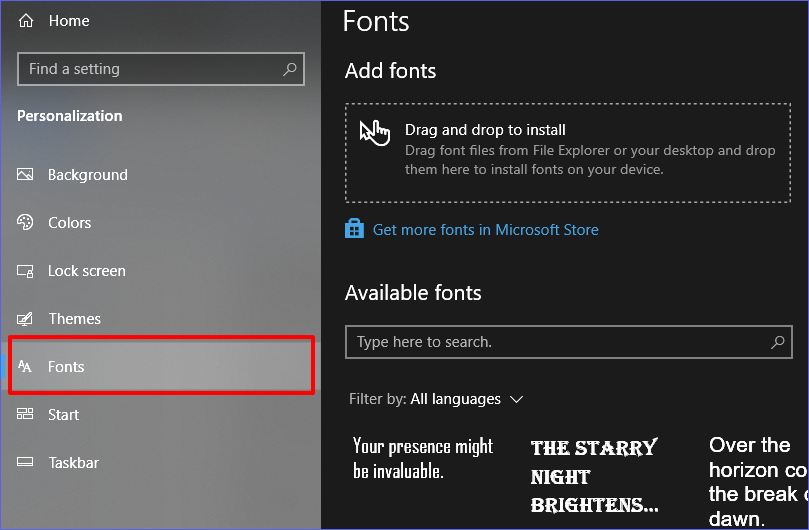
Step 3. Browse through the list of fonts and click on the one you want to uninstall.
Step 4. When the next window displays, select the "Uninstall" button to remove the selected font from your computer.
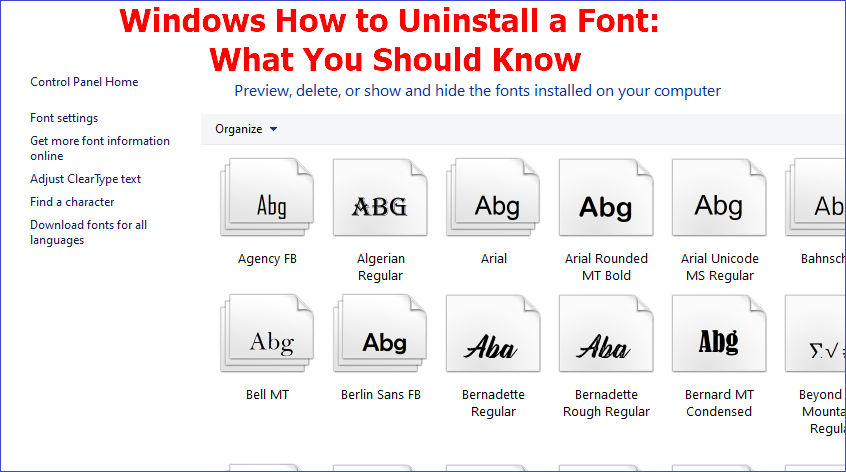
Method 3. Uninstall Font via Control Panel
Another option to remove a font if you don't want to use a third-party uninstaller is via the Control Panel. This Windows built-in utility allows you to access and manage all the programs and features installed on your device. Want to learn more about "Windows how to uninstall a font" using Control Panel? Check these steps:
Step 1. Open the Control Panel, then go to "Appearance and Personalization."
Step 2. Next, click the "Fonts" option to access a list of all the fonts installed on your PC.
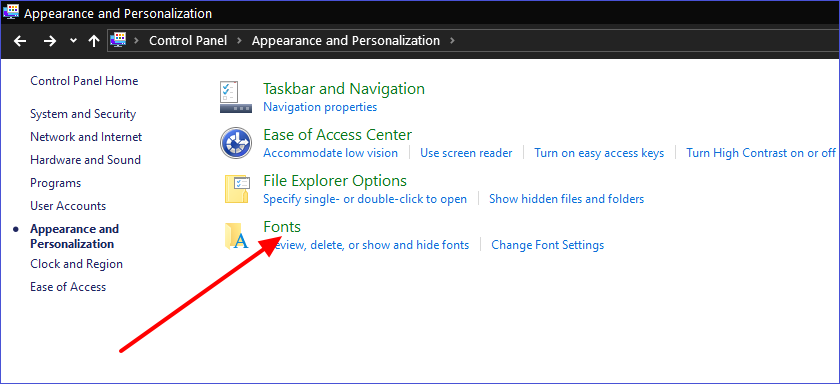
Step 3. To uninstall a font, click on it and select the "Delete" option. The system will then remove the selected font from your computer using the Control Panel.
Method 4. Uninstall Font Manually
Sometimes, the font you want to delete may not appear in the Control Panel font window. The only option is to manually find and delete the font file from your system. Check these steps:
Step 1. Go to File Explorer and open your C drive. Next, navigate to "Windows" and then "Fonts."
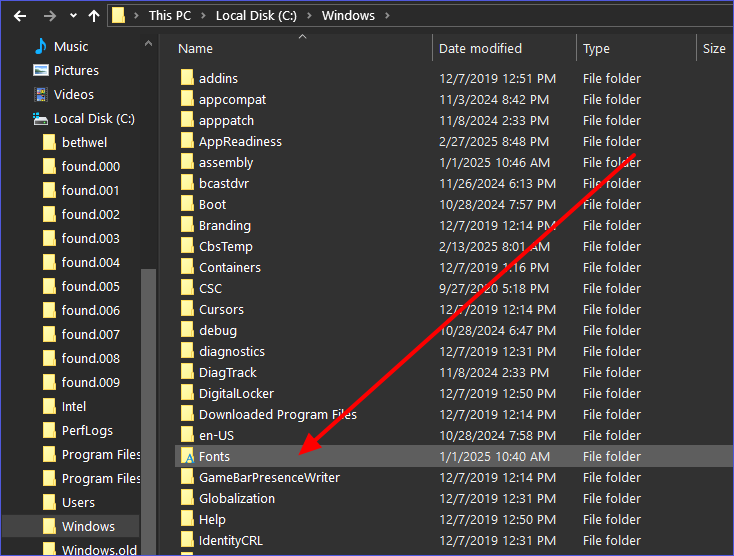
Step 2. The system will then display all the fonts installed on your device.
Step 3. To delete a font, right-click on it and select the "Delete" option. This will remove the selected font from your device. You can repeat the same process for the other fonts.
How to Delete Fonts That Are Open in the System
Sometimes, you may encounter challenges deleting a font, especially when the system is actively using it. How do you navigate to ensure you uninstall the font without disruptions? Below are some methods you can apply to fix the issue and delete open fonts in the system.
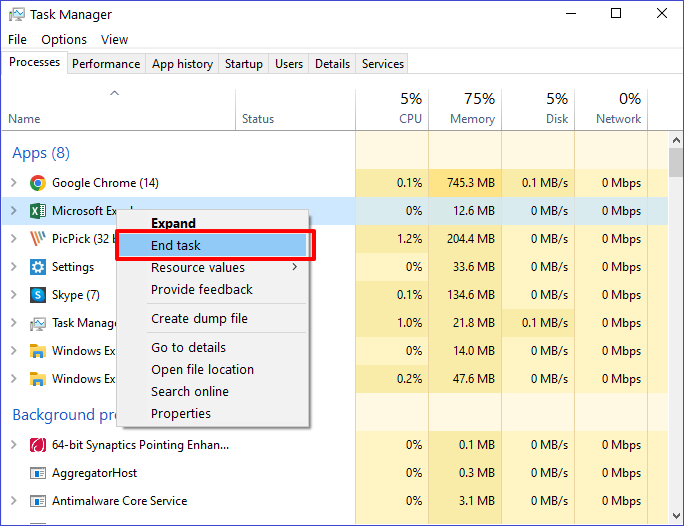
Method 1. End the Process Using the Font
Applications running in the background, such as Photoshop or Microsoft Word, may prevent you from successfully deleting an active font. You'll need to close these applications first before resuming the process. Another option would be going to the Task Manager and ending any background-running processes that could be using the font. You can thereafter try deleting the font again.
Method 2. Restart PC in Safe Mode
Entering Safe Mode makes your device limit the processes running in the background, allowing you to conveniently uninstall any font. You can restart in this mode using the following steps:
Step 1. Hit Win + R to open the Run dialog box. Next, type "msconfig" and click "OK."
Step 2. When the system configuration window opens, navigate to the "Boot" tab and check the button next to "Safe boot." Click "OK," then restart your PC.
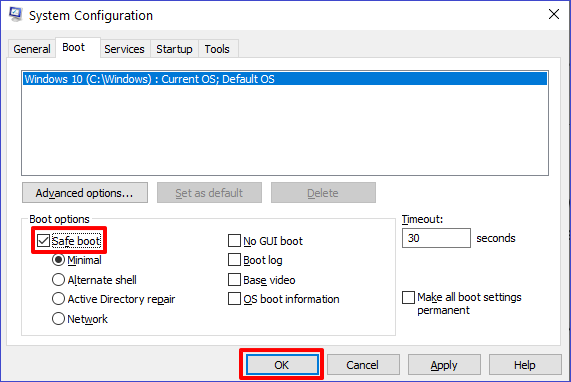
Step 3. Your device will then restart in Safe Mode. You can now remove any unwanted font by going to C:\Windows\Fonts.
Step 4. Once you're done with the above step, return to the system configuration settings and uncheck the "Safe boot" option. Restart your device to return it to its normal state.
Method 3. Use Command Prompt
Command Prompt is a powerful tool that can allow you to delete fonts even if they are in use. This is made possible by inputting specific commands in the CMD window. Check these steps:
Step 1. Type "CMD" in the search bar and select the "Run as administrator" option under "Command Prompt."
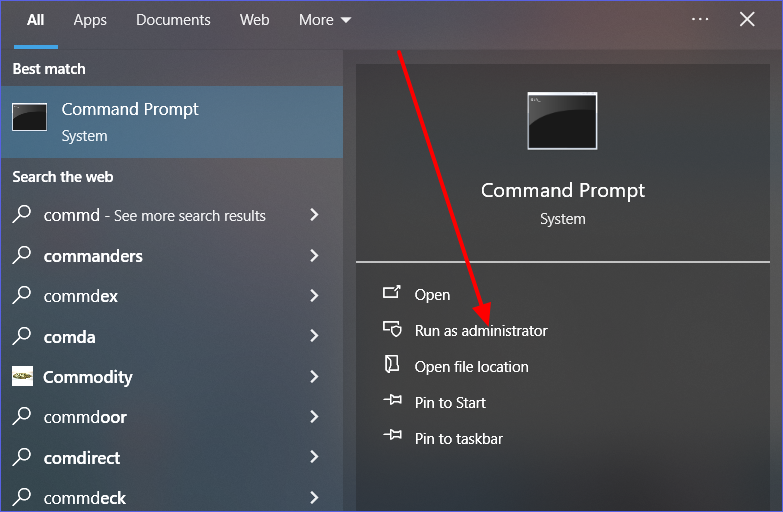
Step 2. When the CMD window opens, type the following command and hit Enter to access the Fonts Directory:
cd C:\Windows\Fonts
Step 3. Once the list of all installed fonts is displayed, you can delete a font using the following command (ensure you replace "fontname.ttf" with the exact name of the font you want to delete):
del fontname.ttf
Step 4. Hit Enter to run and execute the command. That's how to delete a ttf file using Command Prompt.
Bonus Tip: Windows Can't Delete Font? How to Fix It
Have you tried the steps mentioned previously, but Windows still can't delete your font? This could happen for different reasons, including restrictions from your system. You can fix the issue in the following three ways.
Fix 1. Use a Font Management Tool
There exist some third-party applications that can allow you to manage fonts on your computer. They let you enable or disable any fonts restricted by your system. Tools such as NexusFont or FontBase are efficient in collectively managing all the fonts installed on your system. You can try these tools whenever you face issues with deleting any font.
Fix 2. Take Ownership of the Font
Yes! A simple thing as taking ownership allows you to access all the restricted fonts. You can do that in the following steps:
Step 1. Go to your C drive and open the "Windows" folder.
Step 2. Locate the "Fonts" subfolder and right-click on it. Next, select "Properties" and then go to "Security">"Advanced."
Step 3. You can then change ownership by selecting your user account. You'll now have access to the restricted fonts and can delete those you don't want.
Fix 3. Use CMD
Command Prompt can allow you to delete any font where all the other methods have failed. To get started, you'll need to launch CMD as an admin, then type the following command and hit Enter (ensure you replace "fontname.ttf" with the correct name of the font you want to uninstall): del /F /Q C:\Windows\Fonts\fontname.ttf.
You can then restart your computer after this command's execution finishes.
FAQs About Windows How to Uninstall a Font
Step 1. Open the Control Panel.
Step 2. Go to "Fonts" and select "Font Settings."
Step 3. Next, click "Restore default font settings."
Final Remarks
This guide has covered everything you need to know about "Windows how to uninstall a font." You can uninstall a font using a third-party uninstaller, Windows Settings, Control Panel, or doing it manually. You've also learned how to uninstall fonts that your system is actively using. The best way to uninstall any Windows font is via third-party uninstallers.
Try Master Uninstaller today to delete those stubborn fonts on your PC. This software detects even the most hidden fonts on your device. It also supports deleting those fonts that are system-restricted. Master Uninstaller helps optimize your system by removing all residual files. Ensure you download this tool today to manage all your Windows fonts.

-

Simple and Practical: Easily uninstall unwanted software.
-
Thorough Cleanup: Completely remove residual files.
-
Blacklist Protection: Identify and block malware and adware.