


Though Microsoft has confirmed that its recent April 2024 security update is causing VPN connection failure, the company has no apparent justification for this.
Microsoft has recommended using the Windows Get Help app if they encounter this VPN issue. Despite this, it seems like there is no solution, and the only way to avoid this is by uninstalling the update.
If your VPN is not connecting in Windows 11 and you don’t know how to uninstall updates, worry not. Here are three proven methods to delete the recent security update on Windows 11. So, dive right in.
Windows 11 VPN Not Working After the Update | 3 Quick Methods to Uninstall Security Updates
Is your VPN not connecting to Windows 11? Is this because of the Windows update? How do you uninstall updates? Let's look at these three quick and effective methods.
Method 1: How Do You Uninstall An Update Using the Master Uninstaller?
Windows 11 is infamous for its update corruption issues, which usually means standard manual uninstallation is insufficient to fully remove the updates. Hence, a foolproof way to get rid of a program and all its associated files is to use the Master Uninstaller. It offers post-deletion cleanup so the registry has no system traces or leftovers.
So, if your VPN is not connecting in Windows 11 after the update, you can use the uninstaller to delete the updates.
Step 1: Download and Log Into Master Uninstaller
- Download Master Uninstaller.
- Once downloaded, run the program and register yourself.
Step 2: Uninstall the Windows 11 Update
- Now, navigate to the All Programs tab and locate the desired Window update.
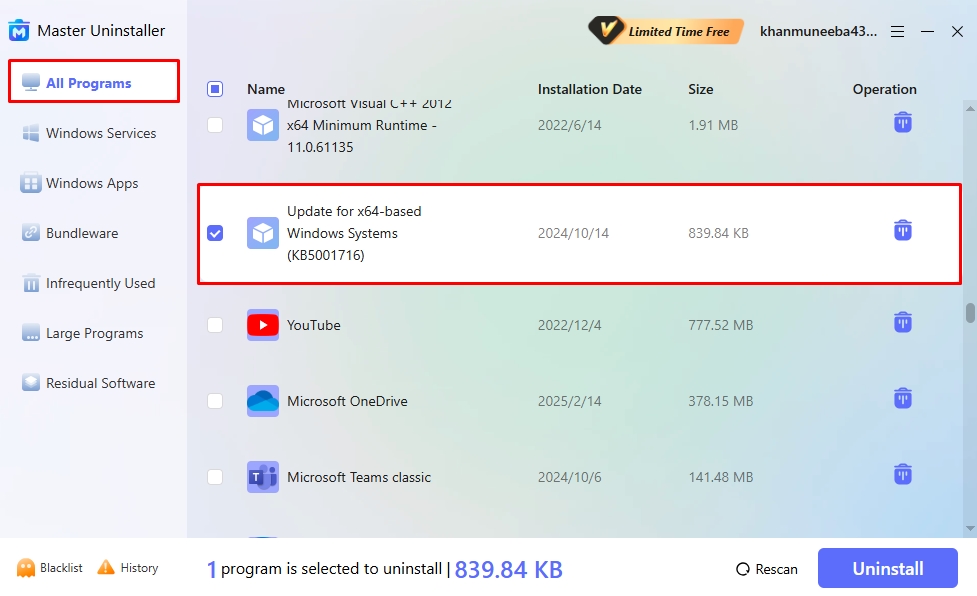
- Click the Delete icon next to the updates or press the Uninstall button from the bottom.
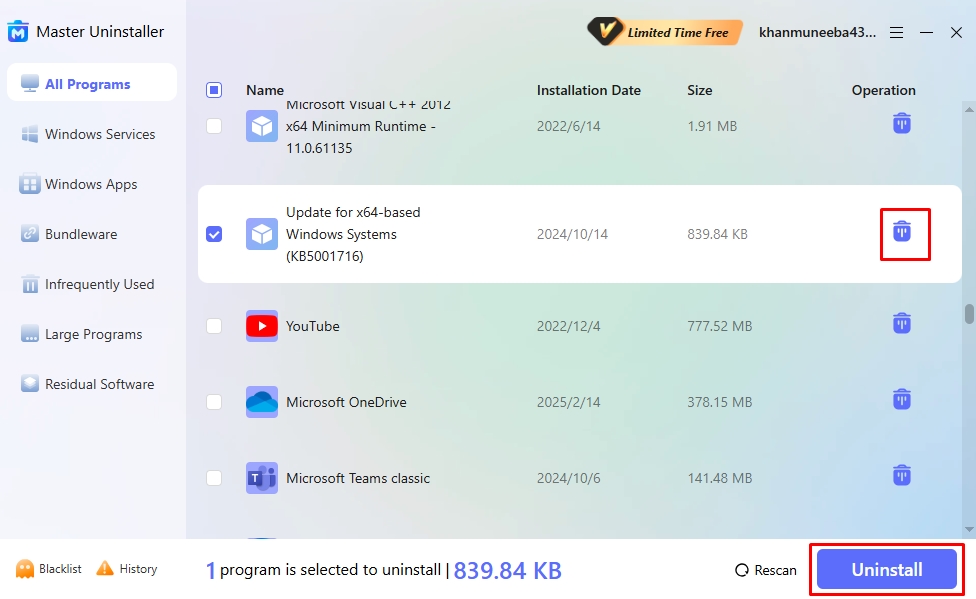
- Click OK to confirm the uninstallation, and you're done. Now, restart your PC and try using your VPN.

Method 2: How to Uninstall the Windows 11 April 2024 Security Update from Windows Settings?
If your Windows 11 VPN is not working after the update KB5036893, here is the easiest and safest official Microsoft method to uninstall this security update from Windows settings. However, doing this may remove some features of the operating system.
Step 1: Open Update and Security Settings
- Press Windows + I to enter the Windows Settings menu. Select Windows Update from here, then click Update History.
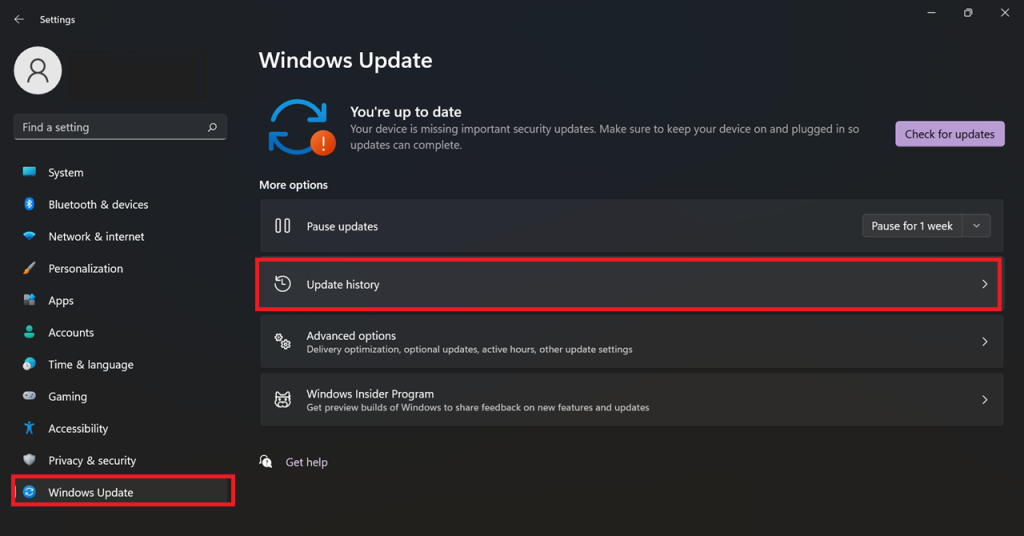
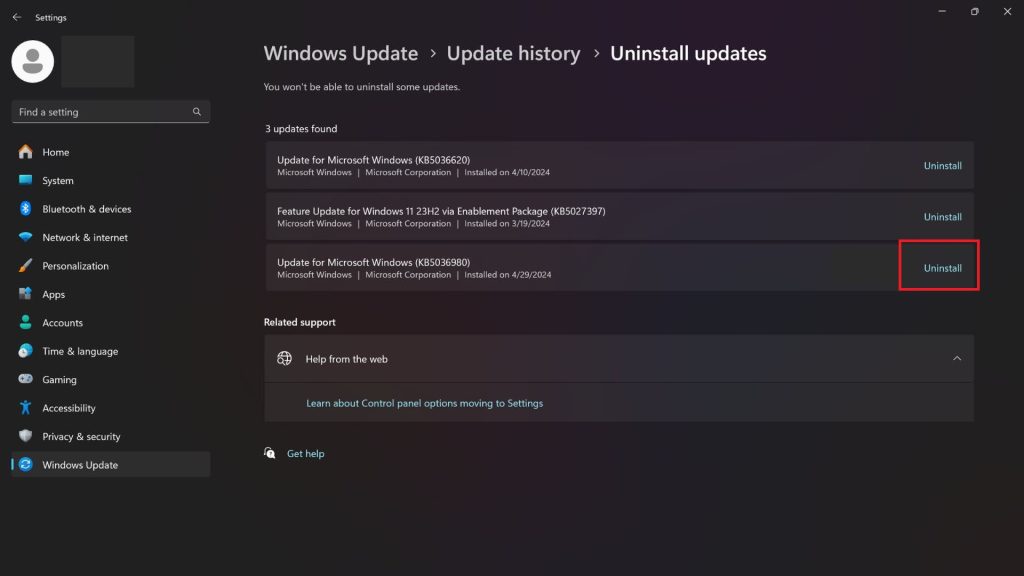
Step 2: Uninstall the KB5036893 Update
- Scroll down to the bottom and select Uninstall Updates. Find KB5036893 from the list of updates and select Uninstall.
Method 3: How to Uninstall Windows 11 Update in Control Panel?
Another official Microsoft method for uninstalling Windows 11 updates is from the control panel. Like the previous method, it manually deletes the update, so your security remains intact. However, it may also remove helpful operating system features. Here is how it goes.
Step 1: Open the Control Panel
- Open the Windows Start menu and type Control Panel in the search box.
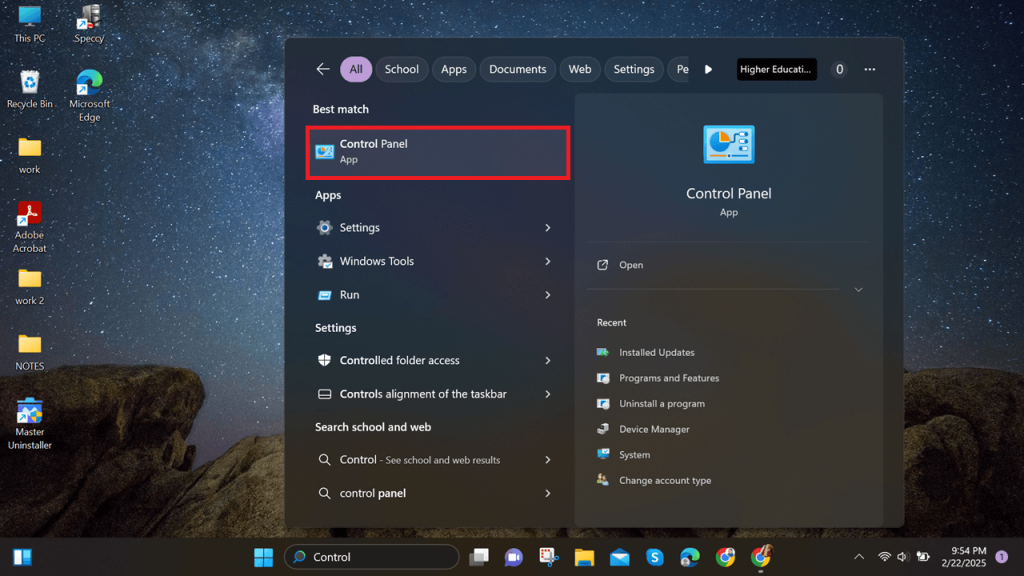
- From the on-screen menu, click Programs > Uninstall a Program.
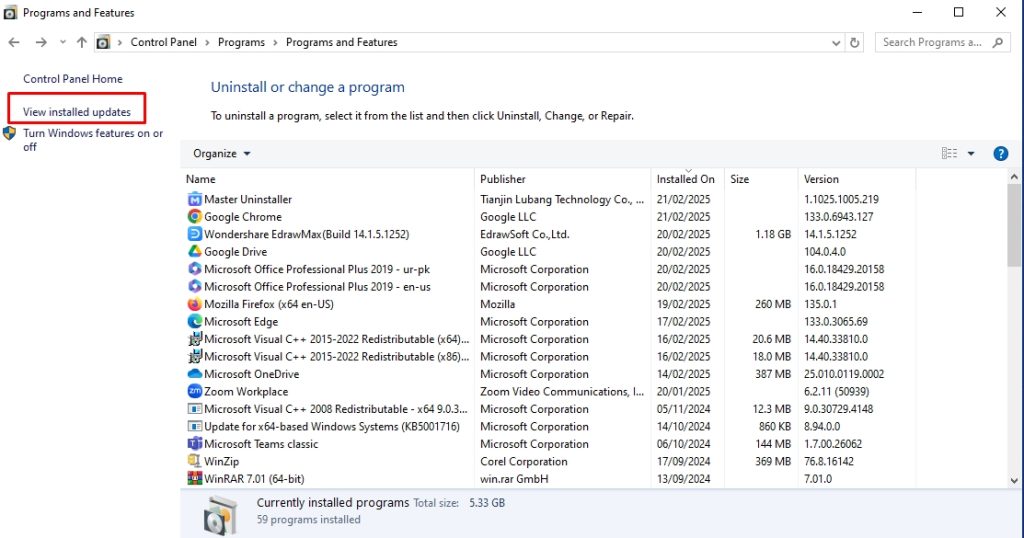
Step 2: Uninstall Windows 11 Update
- Now, select View Installed Updates from the left panel. It will display a list of your computer’s current updates.
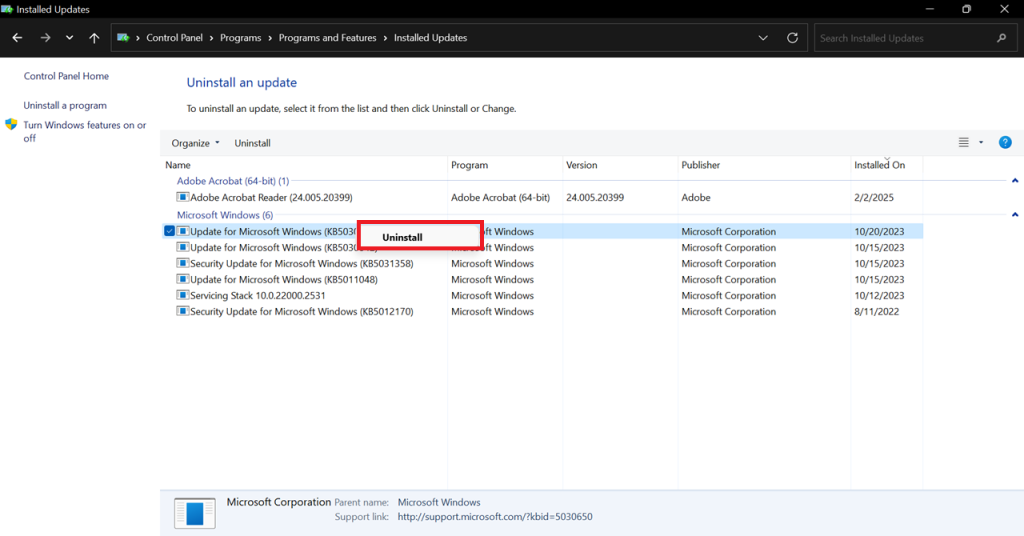
- Choose the desired update, click Uninstall, and that’s it. You have successfully deleted the Windows 11 updates.
Why Should You Use Master Uninstaller?
Using Windows's built-in uninstall function often leaves residual files and registry traces behind. A dedicated uninstaller, like Master Uninstaller, ensures complete removal of stubborn software while optimizing system performance. Choosing the right uninstaller makes all the difference in maintaining a clean and efficient PC. Here is what makes this uninstaller better than conventional alternatives.
- Intuitive Interface: Master Uninstaller is an easy-to-use program with a one-click software removal operation. Moreover, the categorical division of installed apps, Windows programs, and bundleware make locating a desired program easy in minutes.
- Post-Uninstallation Cleanup: This uninstaller program offers automated residual cleaning. It scans your system for leftover files, registry entries, and unnecessary folders, ensuring the device remains clutter-free and efficient.
- Fast Uninstallation: Unlike standard uninstallation methods, Master uninstaller deletes gigabytes of storage within seconds. All you need to do is locate the desired program and remove it.
- Versatile Operation: Master Uninstaller lets you delete almost all types of software on your PC, including Windows services, pre-installed applications, and third-party programs. It even shows bundle software that may install multiple programs without your notice.
- Blacklisting Functionality: If a program is stubborn and has components harmful to your PC, the Master Uninstaller blacklisting function is your savior. It blocks the program from installing again, so you can browse freely without worrying about your safety.
What Other Things You Can Do to Fix VPN Issues on Windows 11?
If your VPN still does not connect after the Windows 11 update uninstallation, the problem lies elsewhere. Here are four other things you can do to fix the VPN issue.
1. Flush Prior DNS Records from Cache
The DNS cache can also be why your VPN is not working in Windows 11. The only way to avoid this is by flushing the DNS records. This will eliminate the temporary storage from the DNS records and prevent the loss of your data. Follow these simple steps to do this.
Step 1: Open Command Prompt
- Press the Windows + S keys to open the Start menu, and type CMD in the search box.
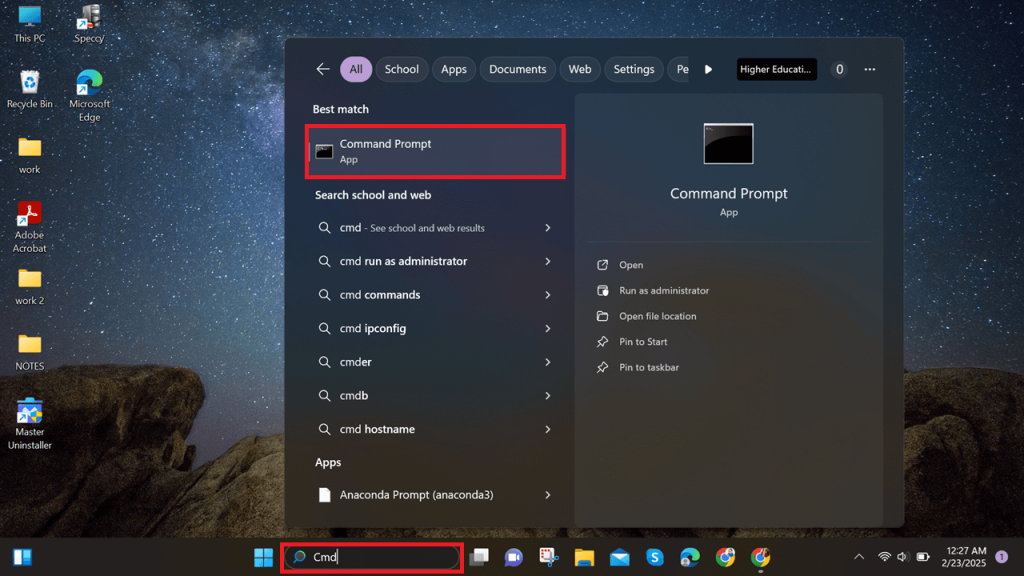
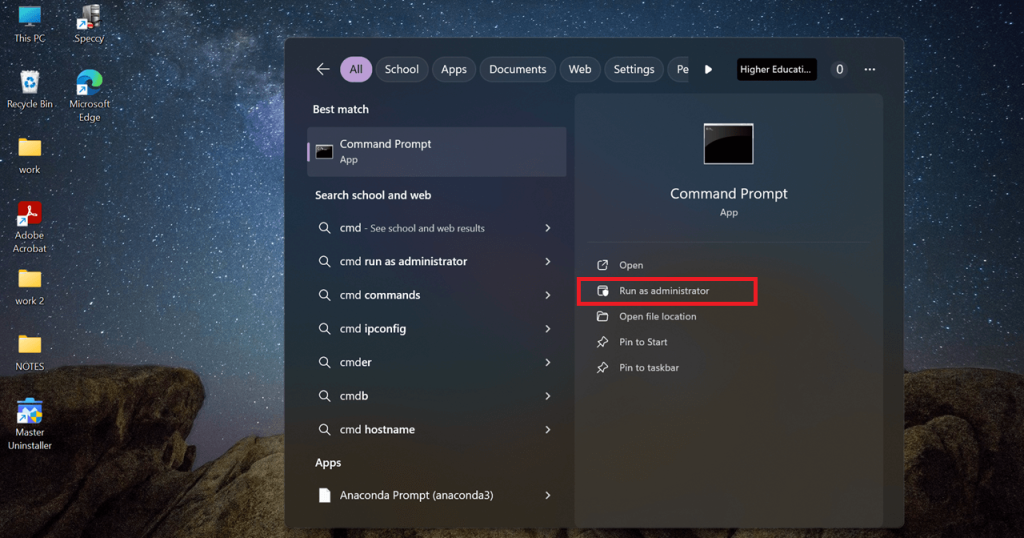
- Select Run as Administrator from here, and click Yes to permit.
Step 2: Run the Command Prompt
- Once in the command prompt, run the following commands one by one.
ipconfig /release
ipconfig /flushdns
ipconfig /renew
netsh int ip reset
netsh winsock reset
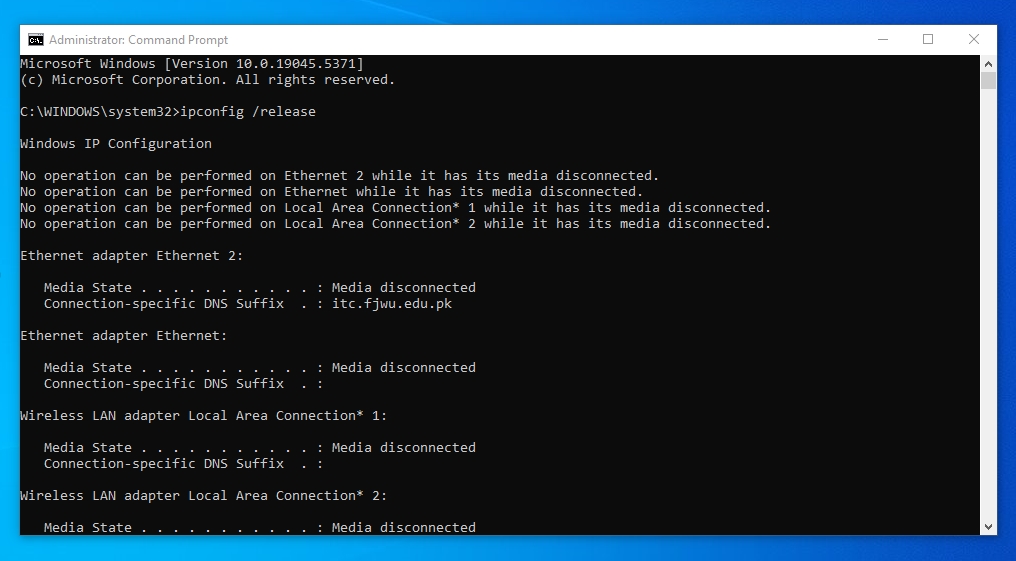
- Finally, close the command prompt and restart your PC. Try using the VPN; it will work fine.
2. Check Your PC Proxy Settings
On Windows 11, you have both the proxy and VPN settings. Sometimes, enabling the proxy settings causes issues running the VPN. In this case, you must check if your Windows is using proxy networks instead of VPN. Follow these simple steps to do this.
Step 1: Open Network and Internet Settings
- Open Windows Settings by pressing Windows + I on your keyboard, selecting Network and Internet from the display menu, and then navigating to the Proxy settings option.
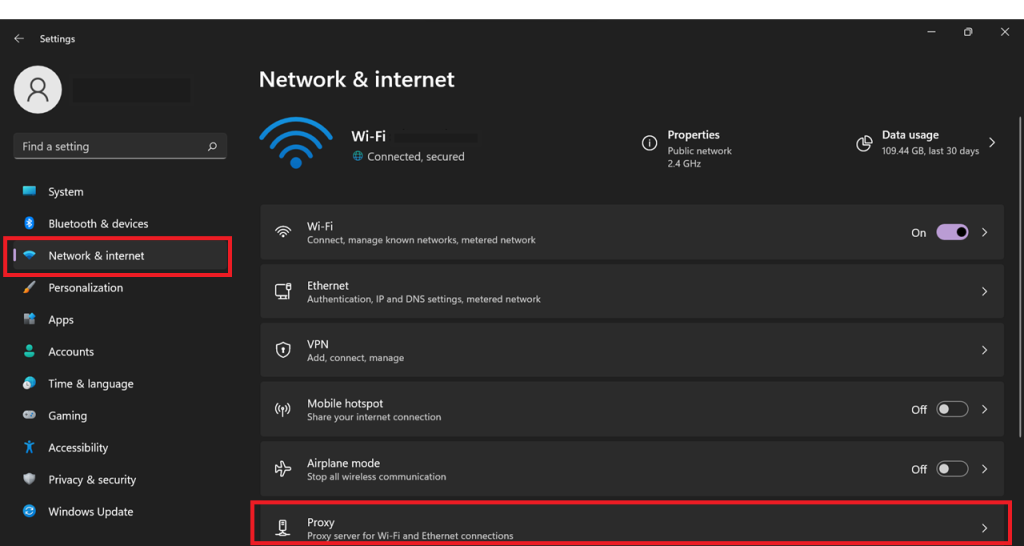
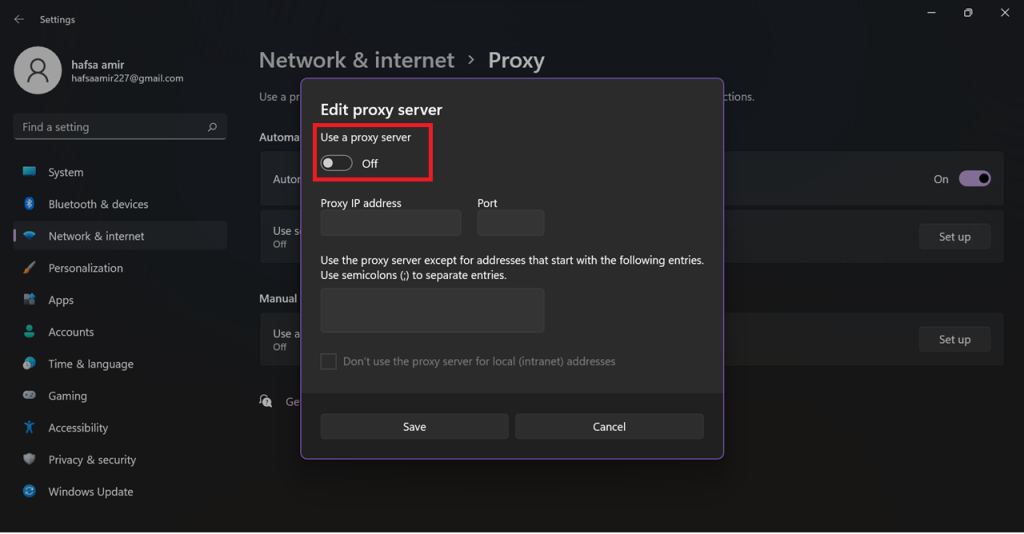
Step 3: Turn Off Proxy Server
- Locate the Manual proxy setup to see if the server is on. If it is, switch it off, and you are done.
3. Modify Windows Firewall Settings for VPN Access
Windows 11 uses an advanced version of the firewall for high-level security. However, it may also block your VPN connection. To avoid this, you must modify your firewall settings to let the VPN pass through the system.
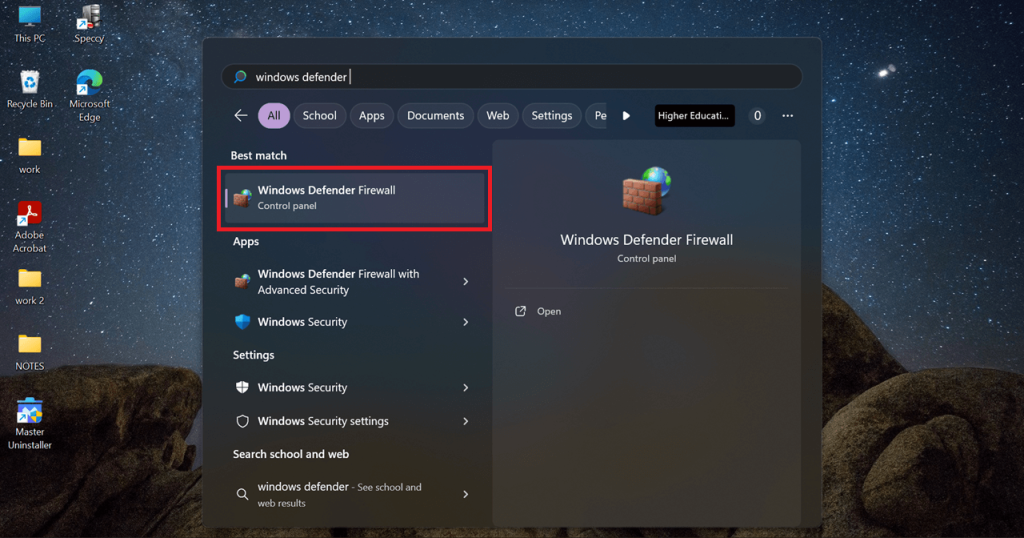
Step 1: Open Windows Defender Firewall
- Open Windows Search by pressing Windows + S from your keyboard and type Windows Defender Firewall in the search box.
Step 2: Allow the VPN to Pass Through the Firewall
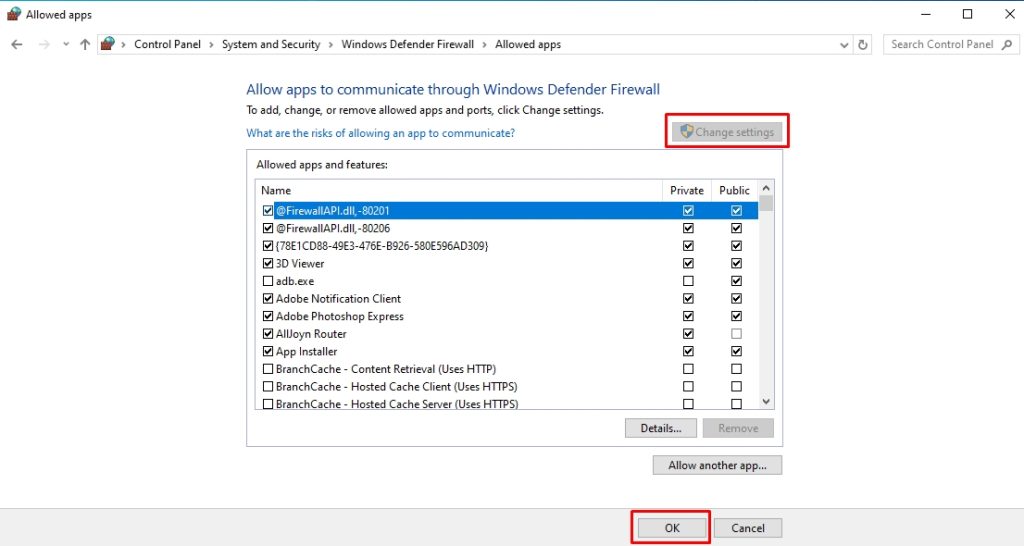
- Once the program opens, locate the button that states Allow an App or Feature through the Windows Defender Firewall in the left pane, and check if the VPN is on the list.
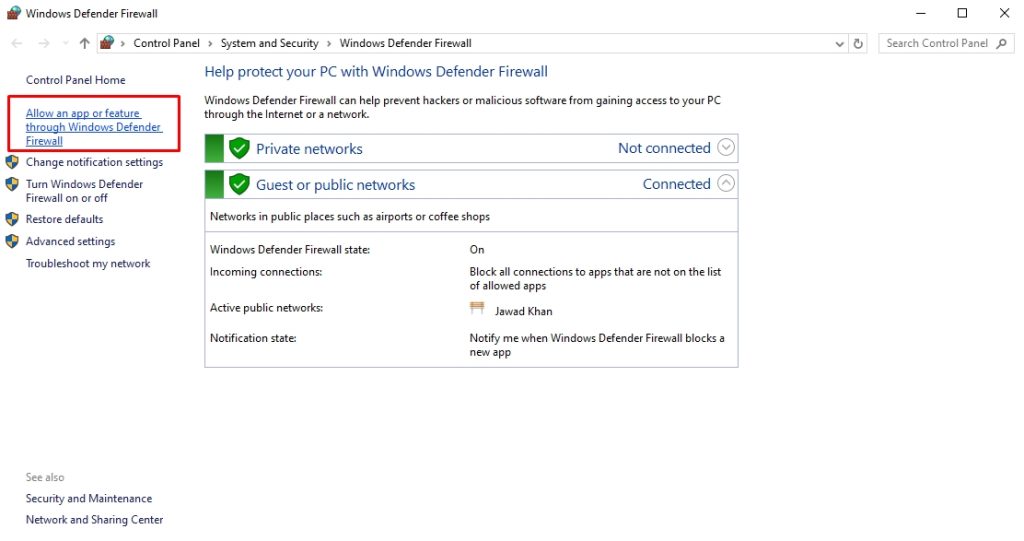
- If not, click Change Settings and enable the VPN access.
4. Reinstall WAN Miniport Drivers
Sometimes, faulty WAN Miniport drivers can also prevent Windows 11 VPNs from working. You must reinstall these drivers if you have tried everything and the issue persists. This will help restore your VPN connection. Here is how to do it.
Step 1: Open the Device Manager
- Press the Windows + R keys to open the run menu, and type devmgmt.msc in the search box. Click Ok to enter the device manager.

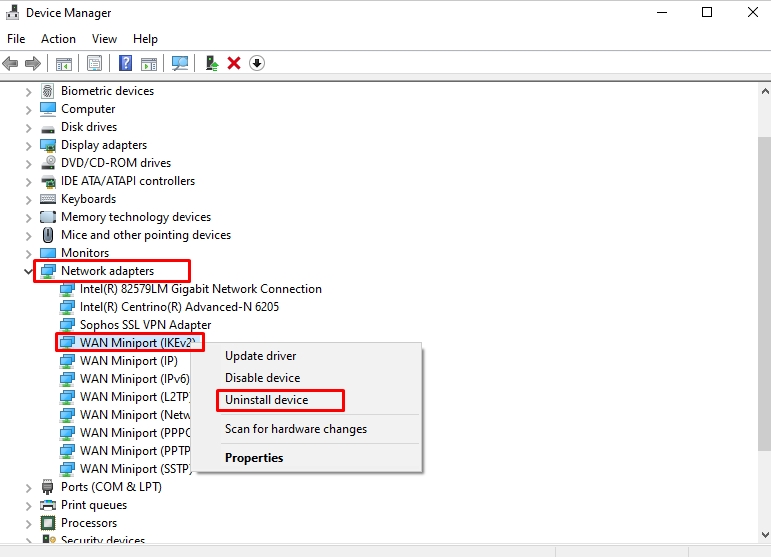
Step 2: Uninstall WAN Miniport Adapters
- Find the Network Adapters > WAN Miniport Network Adapter, right-click the menu, and choose Uninstall Device.
Step 3: Reinstall the Drivers
- Once uninstalled, locate the Action tab from the top of the device manager. From here, select Scan for Hardware Changes.
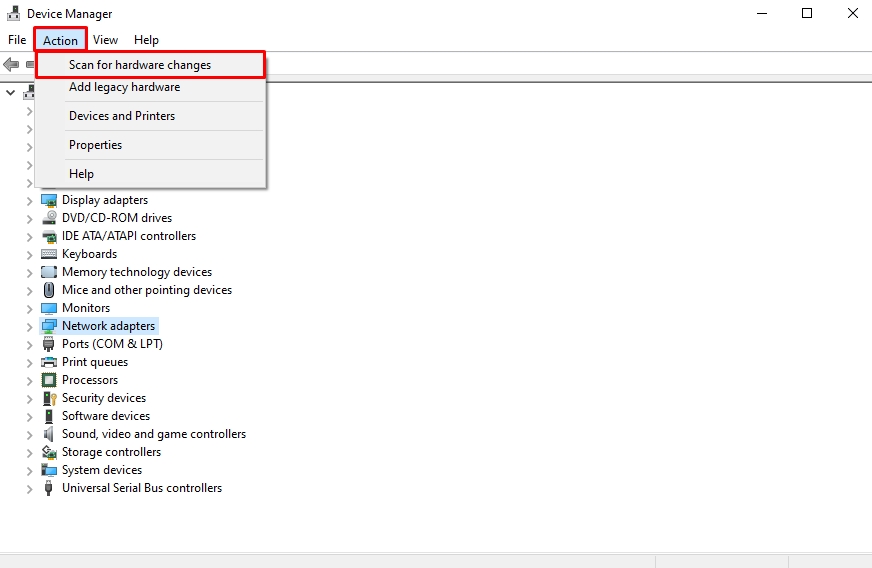
- Since the WAN adapters are your computer’s internal hardware, it will automatically reinstall the missing drivers. Now, restart your PC and see if the VPN is working fine.
Frequently Asked Questions
1. How do I uninstall security updates on Windows 11?
Start by opening the Windows Settings from the Start menu. Select Windows Updates from the side panel and click Update History. Choose Uninstall Updates > KB5036893 Update from the on-screen menu and click Uninstall to complete the process.
2. Why does the Windows update break AWS VPN?
The recent April 2024 security update on Windows 11 has caused VPN connection failures, including AWS. Microsoft is working to fix this issue with future updates. However, if you are experiencing this issue, it is best to uninstall the KB5036893 update from Windows Settings.
3. How to uninstall Windows 11 Update from the Control Panel?
First, access the Control Panel from the Start menu and select Uninstall a Program under the Programs tab. From here, click View Installed Updates and locate your desired Windows update. Right-click the update and click Uninstall.
4. Does Windows Update cause VPN issues?
Not all Windows updates cause VPN issues. However, the recent security update, KB5036893, seems to cause the VPN connection failure.
Final Thoughts
Finally, if your VPN is not connecting in Windows 11, here is how to uninstall updates. Though the standard methods to delete Windows updates are safe, they do not entirely remove the leftovers and system traces. Hence, it is always better to use something like Master uninstaller. It quickly and effectively eliminates updates and unnecessary files from the PC registry.

-

Simple and Practical: Easily uninstall unwanted software.
-
Thorough Cleanup: Completely remove residual files.
-
Blacklist Protection: Identify and block malware and adware.