


You may want to uninstall a driver in Windows 10 if it's causing hardware components to malfunction or has resulted in compatibility issues. You may also want to remove a driver because there's a new version that you want to install. No matter the situation, learning how to uninstall a driver on your PC is important.
This tutorial discusses five ways and the simple steps you can apply to conveniently remove any driver from your system. Removing a driver using the correct steps ensures your system functions normally. Want to learn how to uninstall device drivers using an efficient third-party uninstaller? Read on to learn more about it.
How to Uninstall a Device Driver in Windows 10
Removing a device driver on your PC is not a difficult thing. However, you need to apply the appropriate techniques to ensure you don't interfere with other drivers essential to your system. This section will discuss five ways to uninstall device drivers on Windows 10, including the use of:
- Third-Party Uninstaller.
- Device Manager.
- Control Panel.
- Command Prompt.
- Windows PowerShell.
Keep reading to learn how to uninstall a driver using these methods.
Method 1. Using a Third-Party Uninstaller
This is one of the best approaches for removing any device driver from your system. It's specifically applicable for those stubborn drivers that are difficult to remove via conventional methods. A reliable tool like Master Uninstaller allows you to access a list of all the installed drivers in your system and uninstall those you no longer need.
The uninstallation process is straightforward since it only takes a few steps. You must select a specific driver and hit the "Uninstall" button to initiate the process. The good thing about using a third-party driver uninstaller is that you can delete multiple drivers simultaneously. This greatly saves time and effort.
You can also detect and find hidden malware causing a specific driver to malfunction in your system. What more? The Master Uninstaller lets you delete leftover files and registry entries related to the driver software you uninstalled.
Key Features of Master Uninstaller
- Uninstall multiple device drivers simultaneously.
- Detecting and deleting deeply hidden drivers.
- Supports the removal of Windows built-in drivers.
- Fast and secure uninstallation speeds.
- Remove leftover files and registry entries related to the uninstalled driver.
- Rescan your device several times to locate all stubborn drivers.
Are you having trouble with stubborn device drivers on your Windows PC? Download Master Uninstaller today to conveniently delete unwanted drivers.
Steps for Using Master Uninstaller
Step 1. Visit the Master Uninstaller website and download a free version of the software to your device.
Step 2. Next, install and launch the uninstaller. Click "All Programs" to find the device driver (s) you want to uninstall.
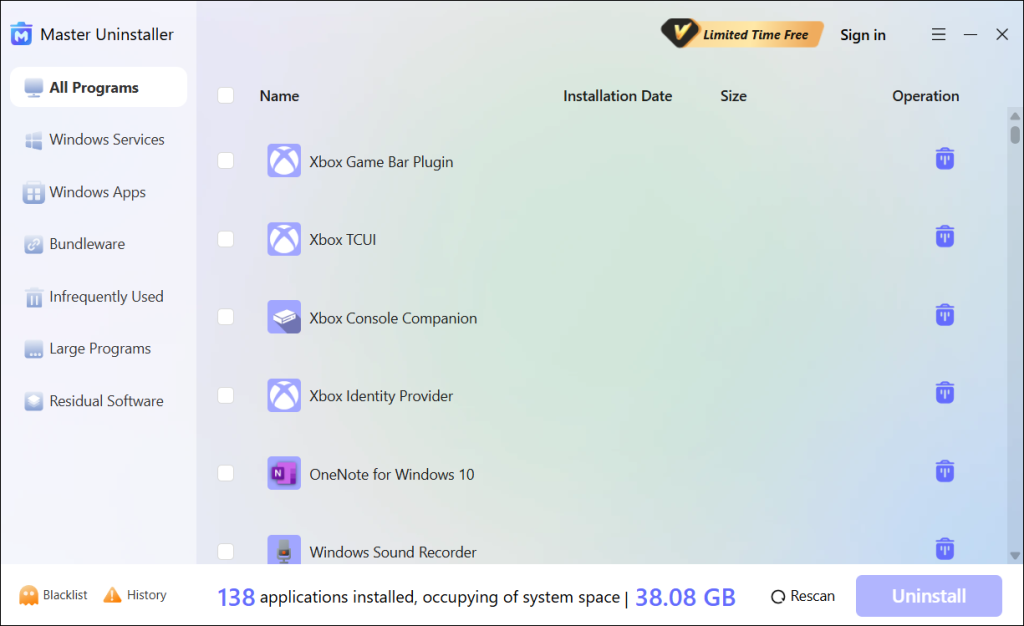
Step 3. Tick the checkbox next to the driver and select the "Uninstall' button. When a popup message displays, check the button for "Automatically remove software remnants" and click "Ok" to initiate the uninstallation process. This will completely remove the selected driver (s) from your device.

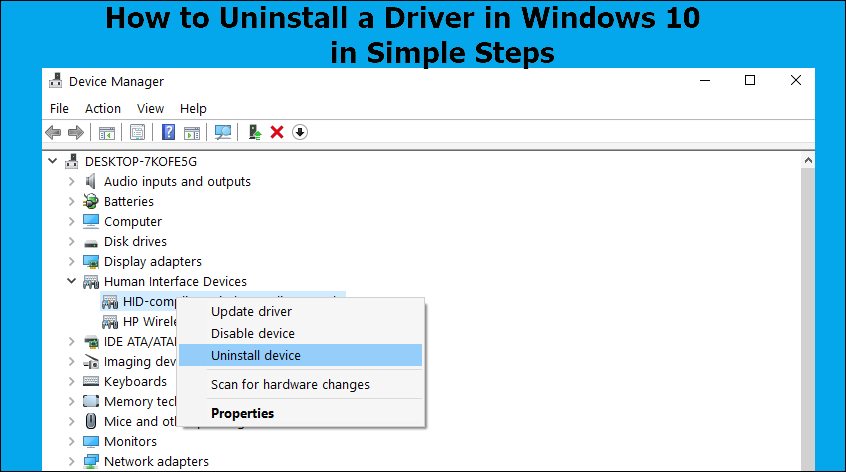
Method 2. Using Device Manager
The second method that helps answer the "how do I uninstall drivers in Windows 10" issue entails using the Device Manager. This built-in Windows utility allows you to manage all the connected hardware and their respective drivers. You can quickly uninstall any driver via this method as follows:
Step 1. Right-click on the Start menu and select "Device Manager" to open it.
Step 2. When the Device Manager window opens, find the hardware whose drivers you want to uninstall. Double-click on a specific category to expand it, then right-click on the specific device. Next, select the "Uninstall device" option.
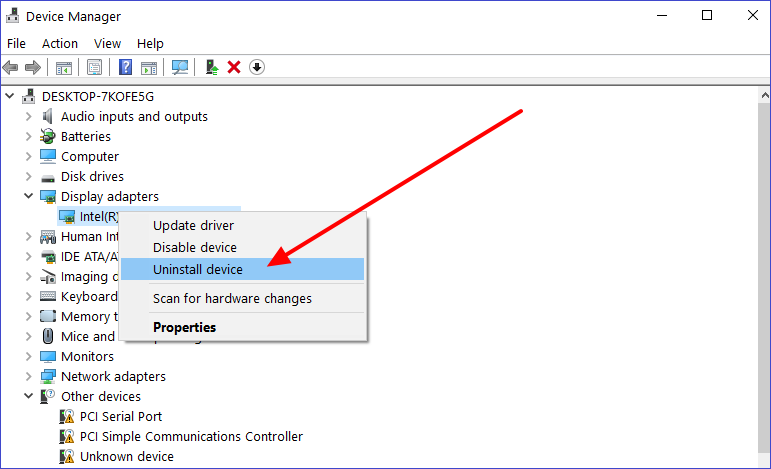
Step 3. Select "Delete the driver software for this device when the next window appears." Then, click the "Uninstall" button to instruct the system to remove the selected device driver.
Step 4. Restart your PC to apply the changes made.
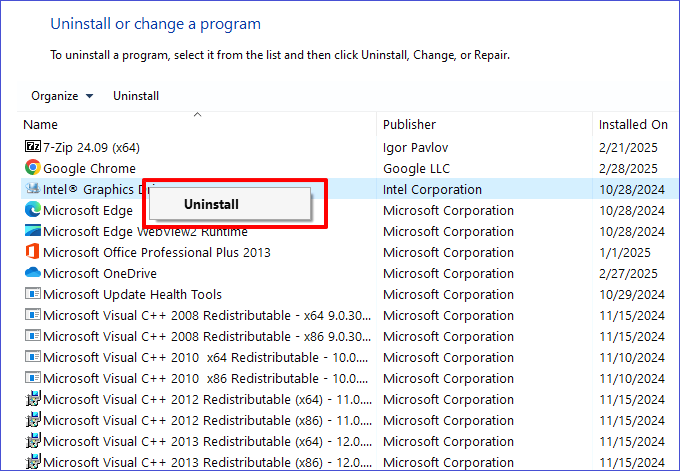
Method 3. Using Control Panel
You can apply this method if the driver you plan to uninstall comes with a dedicated software package such as Realtek Audio Driver or NVIDIA Graphics driver. You can then find the respective package under your Control Panel's "Programs & Features" section and delete it from there. You can learn how to delete driver software packages using these steps:
Step 1. Type "Control Panel" in the search bar and hit Enter to open it.
Step 2. Click on "Programs & features" under the Control Panel window.
Step 3. Next, find the driver software, i.e., "Intel Graphics Driver", and click on it. You can then click the "Uninstall" button at the top to remove the selected driver software from your system.
Step 4. Restart your device to finish the uninstallation process.
Method 4. Using Command Prompt
This method can enable you to forcefully remove drivers that keep reinstalling. Through specific CMD commands, you can instruct the system to completely get rid of some select drivers. You must be familiar with using Command Prompt to apply this method efficiently. Follow these steps:
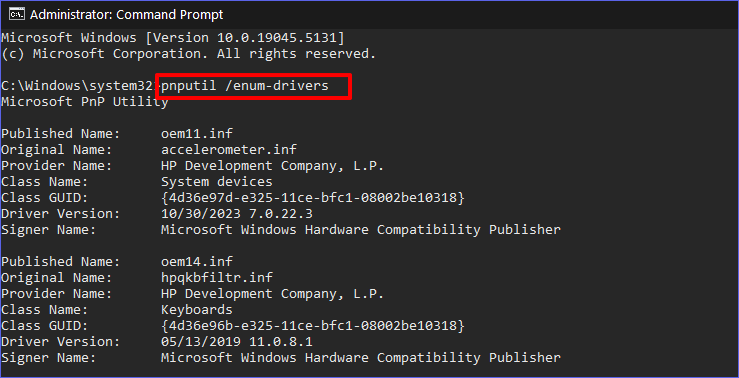
Step 1. Type "cmd" on the search bar and select "Run as an administrator" under the search results that display.
Step 2. Next, type the following command in the CMD window and hit Enter to check all the drivers installed in your system:
pnputil /enum-drivers
Step 3. You can then type the following command and replace [PublishedName] with the exact name of the driver you want to uninstall, then hit Enter:
pnputil /delete-driver [PublishedName].inf /uninstall /force
Step 4. Wait for the Command Prompt to uninstall the selected driver. Then, you can restart your device.
Method 5. Using Windows PowerShell
You can use PowerShell as an advanced option for uninstalling drivers in instances where CMD has failed. This method allows you to input special scripts that will allow you to remove any stubborn drivers. You can learn how to uninstall a specific driver via Windows PowerShell as follows:
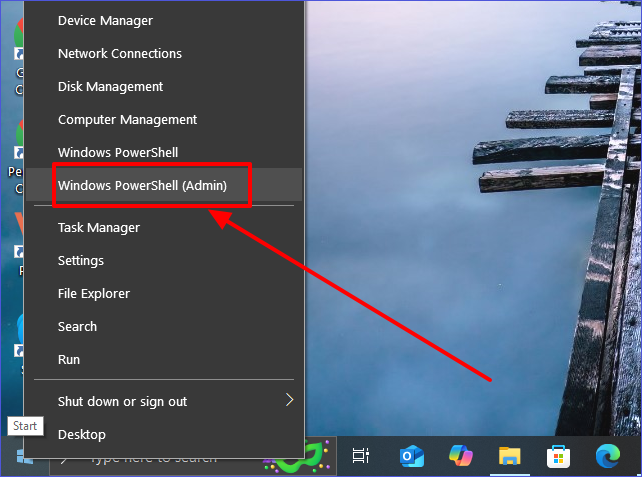
Step 1. Right-click the Start menu and select "Windows PowerShell (Admin)" to open it.
Step 2. You can then type the following command in the PowerShell window and hit Enter to access all the installed drivers:
Get-WmiObject Win32_PnPSignedDriver | Select-Object DeviceName,DriverVersion
Step 3. The next step is to select the driver that you want to uninstall. You can do that by typing the following command and replacing [driver_name] with the exact name of the driver you want to uninstall:
pnputil /delete-driver [driver_name].inf /uninstall /force
Step 4. You can then hit Enter to run the above command. Restart your PC once the process is completed.
Bonus Tip: Use Safe Mode to Remove Stubborn Drivers
It's possible to encounter stubborn drivers that are difficult to remove using the methods mentioned above. This could be the case if some background processes use the selected drivers. Since you may not know the exact process, entering Safe Mode is recommended so that you won't have any background-running processes.
This will make it easier for you to uninstall any stubborn driver. You can enter Safe Mode as follows:
Step 1. Hit Win + R to access the Run dialog box. Type "msconfig" and press Enter to access your System Configuration settings.
Step 2. Next, click the "Boot" tab and check the box next to "Safe Boot" to enable this feature.
Step 3. You can then restart your device to enter Safe Mode and uninstall the stubborn driver using any of the methods mentioned previously. Remember to exit Safe Mode once you've finished the process.
FAQs About How to Uninstall a Driver
Try updating Windows to find the latest drivers.
Restart your PC, and the system will reinstall some drivers automatically.
Visit the manufacturer's website for your computer brand and download the latest driver.
In Conclusion
Learning how to uninstall a driver on your PC is an essential skill. This tutorial describes five simple steps, including using a third-party uninstaller, Device Manager, Control Panel, Command Prompt, and Windows PowerShell. The best method should allow you to uninstall a driver without restriction.
Using a third-party uninstaller like Master Uninstaller is the best approach to eliminate any stubborn driver in your system. This software allows you to efficiently detect and delete those drivers affected by malware. It supports deleting multiple drivers at once, hence saving time and effort. Ensure you download the Master Uninstaller today to efficiently manage all the drivers in your system.

-

Simple and Practical: Easily uninstall unwanted software.
-
Thorough Cleanup: Completely remove residual files.
-
Blacklist Protection: Identify and block malware and adware.