


The Windows registry is a hidden yet essential part of the computer operating system. Entries are created in the registry whenever you install new hardware or apps. But here’s the catch: the entries aren't removed even if you uninstall those apps.
Over time, the registry becomes cluttered with numerous obsolete entries. This clutter invites system errors, which can cause the PC to start lagging and decrease the overall user experience. Registry clean-up is a good option to stabilise system performance.
However, the Windows registry is a dangerous place to make changes, and every step should be taken cautiously. In this guide, we’ll explore how to clean the registry on Win 11 safely without disrupting the PC’s regular system.
What is a Windows Registry?
Before discussing the cleaning methods for the Windows 11 registry, it is crucial to understand how it works. The Windows registry is a complex database that stores everything from configuration settings to user preferences.
This database structure is organised in a hierarchical collection of keys, subkeys, and values. At the highest level, it has five main sections called hives. These hives store essential data about how Windows and installed programs work.
Each hive's backup file is stored on the computer. The only exception is the hive HKEY_CURRENT_USER, which contains settings for the logged-in user. This one is stored in the folder C:\Windows\System32\Config.
Here’s a brief overview of those five hives with their common acronym.
- HKEY_CLASSES_ROOT (HKCR). This hive stores file-type associations. It decides which programs open specific file types, such as PDFs opened with Adobe. It also holds information for particular system components.
- HKEY_CURRENT_USER (HKCU). This hive contains the settings for the user currently logged in. That means it will include everything from desktop preferences, network connections, and installed apps to other personalised settings.
- HKEY_LOCAL_MACHINE (HKLM) contains all information about the computer itself, including hardware, drivers, system settings, security data, and startup configurations.
- HEKY_USERS (HKU) stores settings for all user accounts, including the default user and any guest or Microsoft accounts.
- HKEY_CURRENT_CONFIG (HKCC). This section contains the current hardware setup, including active device settings, drivers, and Windows details.
Precautions to take for Registry Clean-Up
Cleaning the Windows registry can give your PC the much-wanted performance upgrade. However, there are certain dos and don’ts of doing that. A single wrong modification can lead to complex software malfunctions and instability. Here are some of the precautions you need to take before getting started.
- Research the entries before deleting them.
- Use reliable registry cleaners and tools.
- Back up the registry.
Tip: Double-check and note down all the changes you make to ensure your data is safe if troubleshooting is needed later.
How to back up the Registry File?
Before making changes to your Windows Registry, creating a backup is essential to avoid potential system issues. A backup allows you to restore settings if something goes wrong. Follow these quick steps to safely back up your registry before proceeding with any modifications.
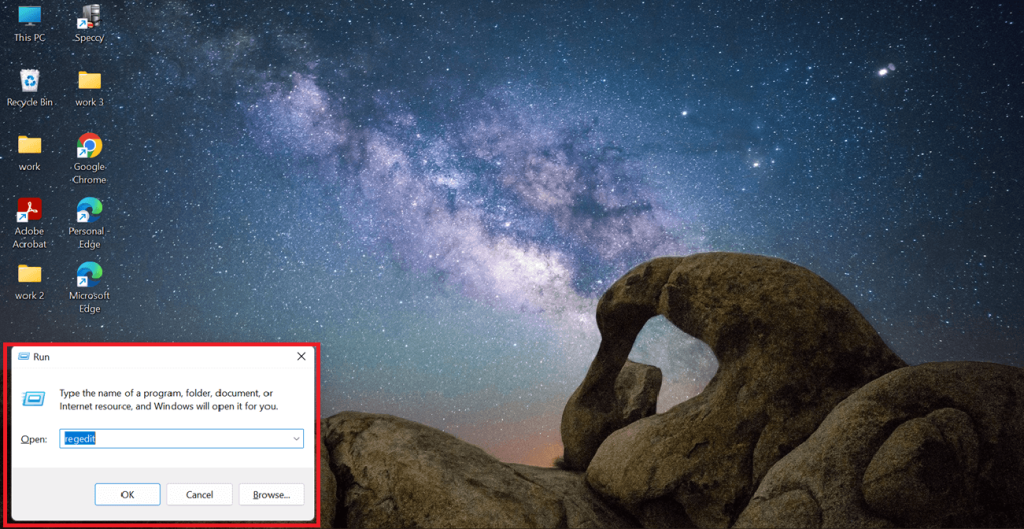
Step 1: Open the Run Dialog Box
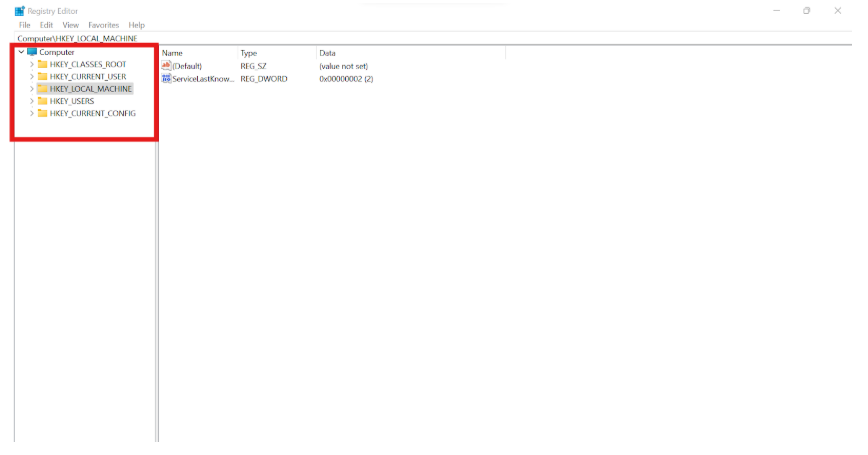
- Start by pressing Win + R to open the Run dialogue. Then type regedit and hit Enter.

Step 2: Export the Registry File
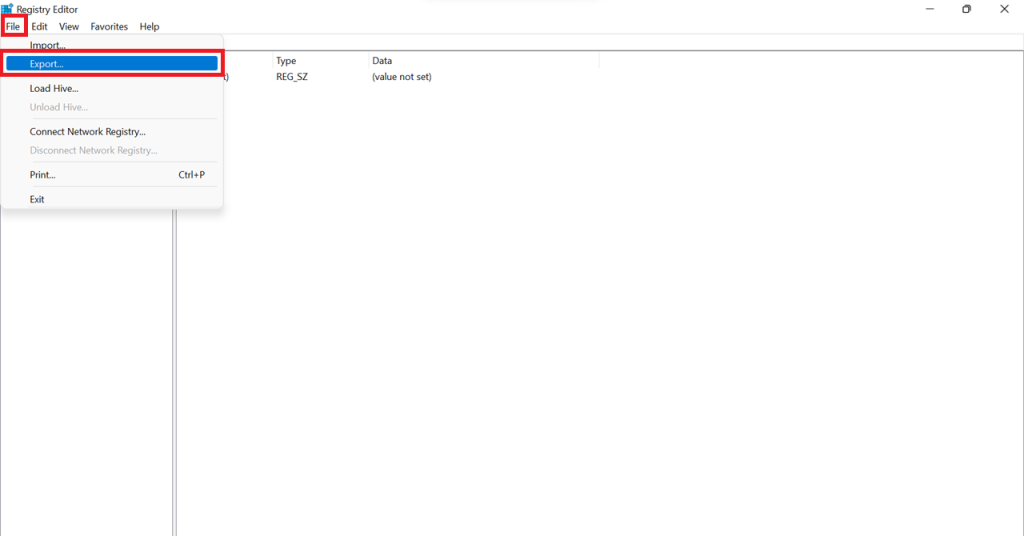
- The Registry Editor window will open. Select all the hives you want to back up. Click on File in the upper left corner and select Export from the menu.
Step 3: Save the Backup Securely
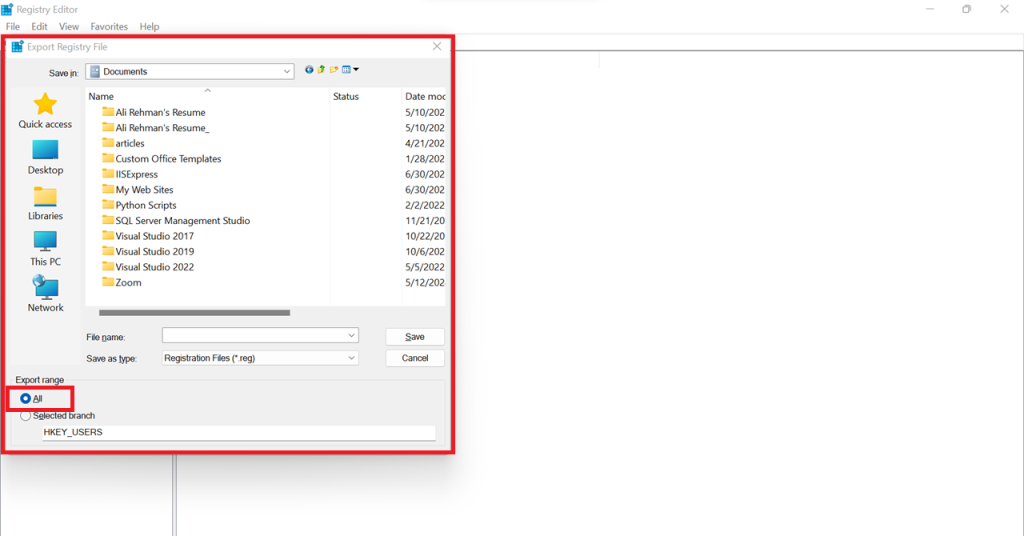
- The Export Registry File dialogue will open. Select a safe location and name the file, for example, RegistryBackupFile. Remember to choose All under the Export range before clicking Save.
Win 11 Registry Cleanup | 4 Quick Methods
Now that you know the necessary preparation, let’s move on to how to clean the Windows 11 registry using four different methods.
Method 1: How To Clean Windows Registry Via Master Uninstaller
If you're not an expert and have limited knowledge about registry cleaning, third-party uninstaller apps like Master Uninstaller are your best bet. They provide a safer and more efficient alternative to manually cleaning the registry, reducing the risk of accidental system errors. Unlike manual methods, Master Uninstaller automates the process, ensuring a thorough cleanup while saving time and effort.
What makes Master Uninstaller stand out is its one-click software and residual file scan, which allow users to remove leftover files effortlessly. Its beginner-friendly interface makes it accessible to all users, even those with minimal technical experience. Additionally, it helps detect and remove unknown bundleware, freeing up valuable system space. Now, let’s explore how to clean the registry using Master Uninstaller.
Step 1: Access Master Uninstaller
- Start by launching and accessing the Master Uninstaller from your desktop or the Start menu.
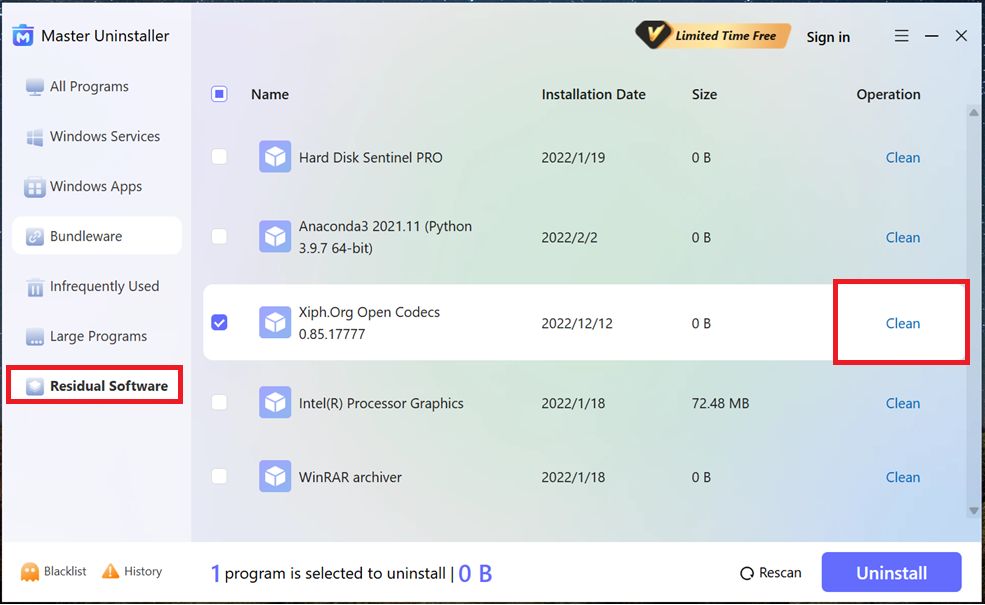
Step 2: Search for the Residual Software
- Once there, head to the Residual Software section. Here, you’ll find all the hidden remnant files that may be present on your PC. Select the ones you want to delete and click on Clean on the right.
Step 3: Uninstall the Entries
- Once you hit the Bin symbol, a confirmation dialogue will appear. Click Ok to proceed with the cleanup.
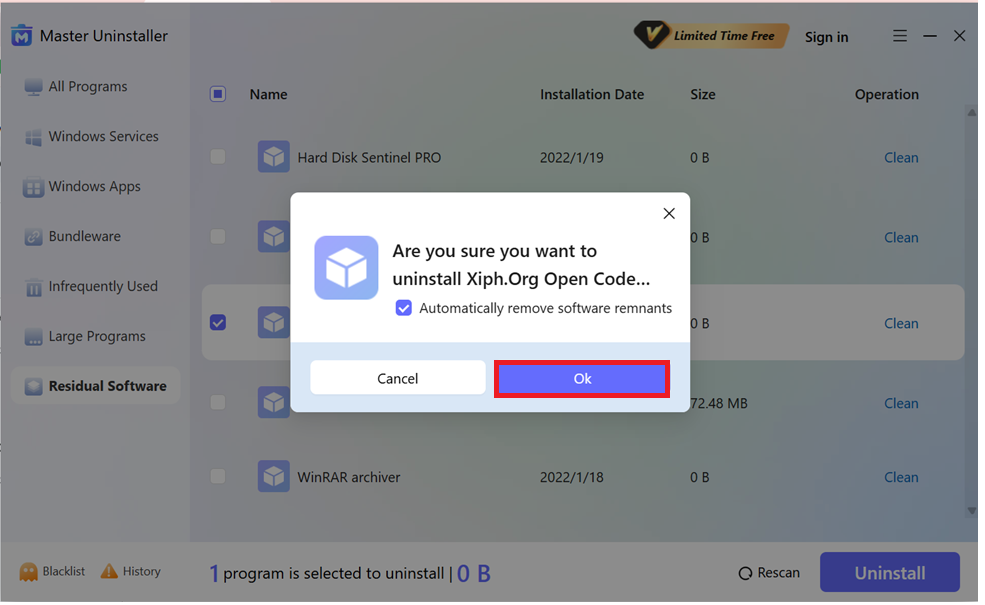
And that’s it! Your system is now free of useless registry entries in a few simple steps.
Method 2: How To Clean Windows Registry Via Disk Cleanup
Windows 11 doesn’t have a dedicated tool for registry cleaning, so Disk Cleanup keeps you sorted for that. With Disk Cleanup, you can delete all the files containing unnecessary data. Naturally, when the data is deleted, the related registry entries will also be deleted.
Pretty neat? Follow these steps to do it yourself.
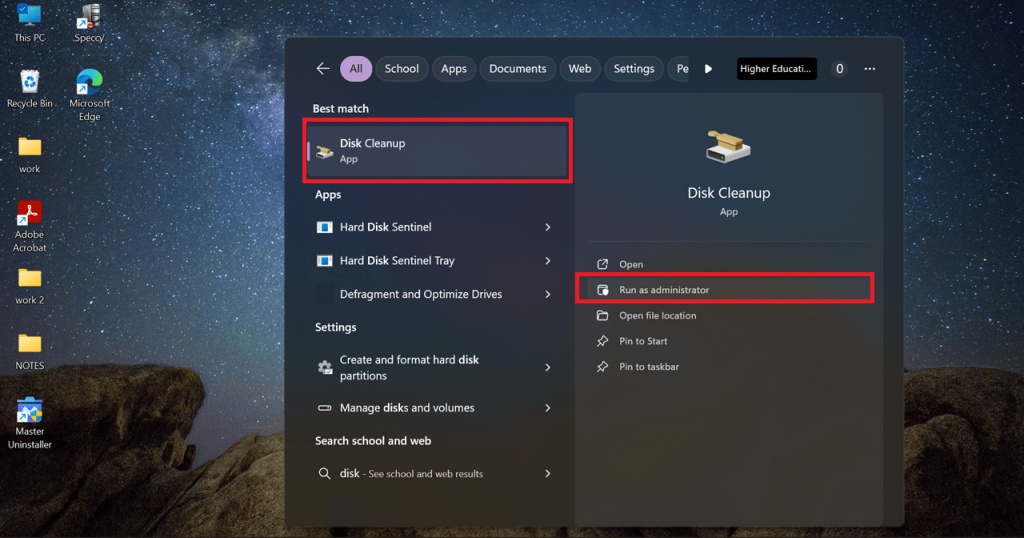
Step 1: Open Disk Cleanup as Administrator
- Press the Win key to open the search bar. Type Disk Cleanup, then choose Run as administrator, and hit Enter.
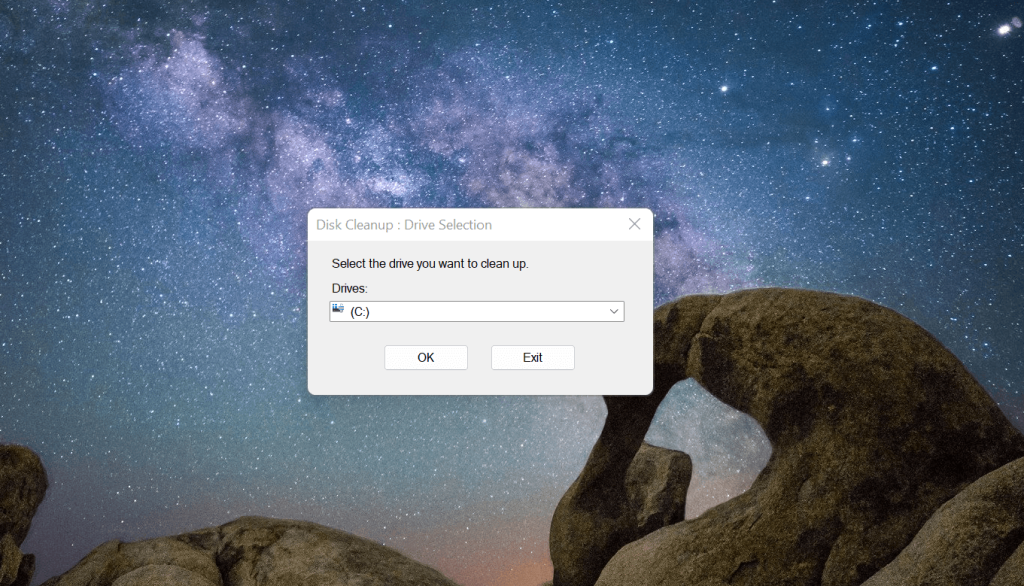
Step 2: Select the System Drive
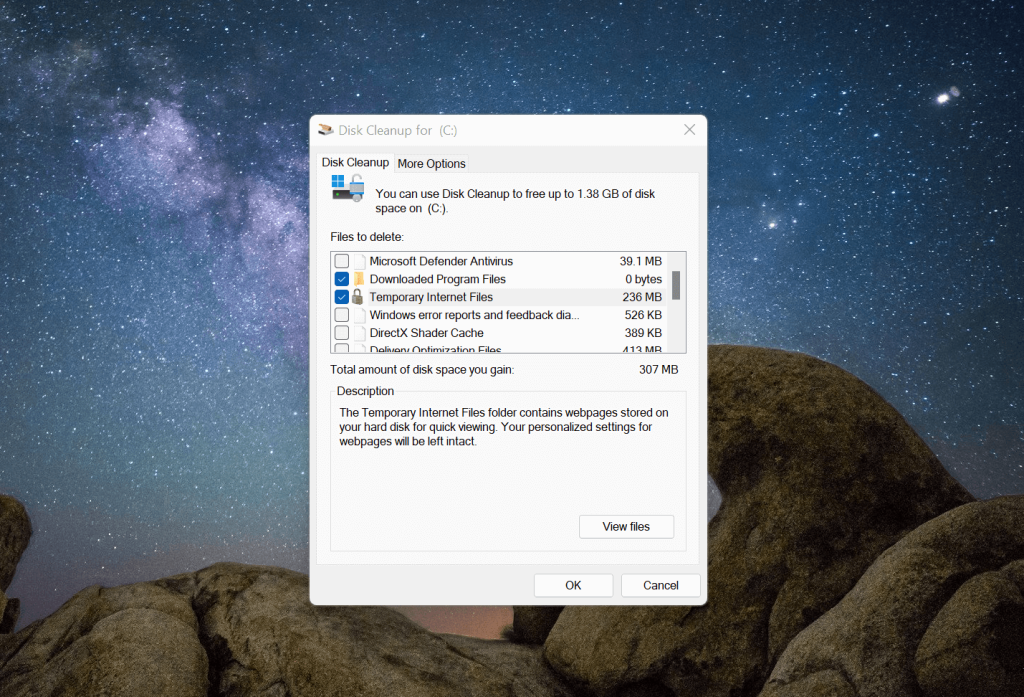
- Once loaded, the Disk Cleanup dialogue will appear. Then select the system drive you want to clean (usually C:).
Step 3: Choose Files to Delete
- Under Files to delete, you’ll see various files. From there, check options like Temporary Files, System Files, or the file you want to remove.
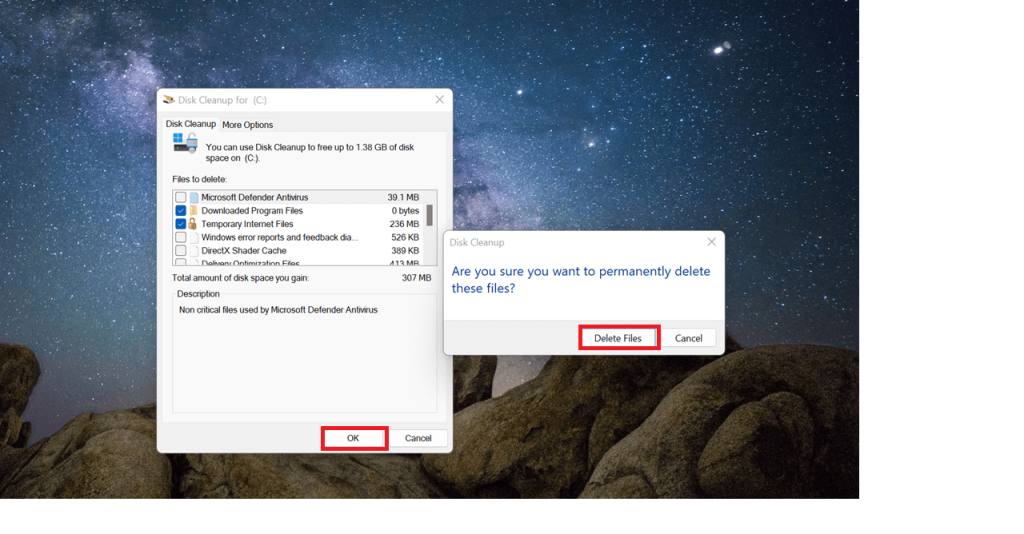
Step 4: Perform Deep Cleanup
- Select Clean up system files for a deeper cleanup. Finally, click OK to delete the selected files.
How To Clean Windows Registry Via DISM tool
Intimidated by using the Registry Editor? DISM tool is another safe method to help you clean the registry. Let’s say you use the DISM tool to repair any corrupted or missing system files. All the registry issues will be resolved automatically since the Windows registry relies on those files.
Here’s how you can use the DISM tool.
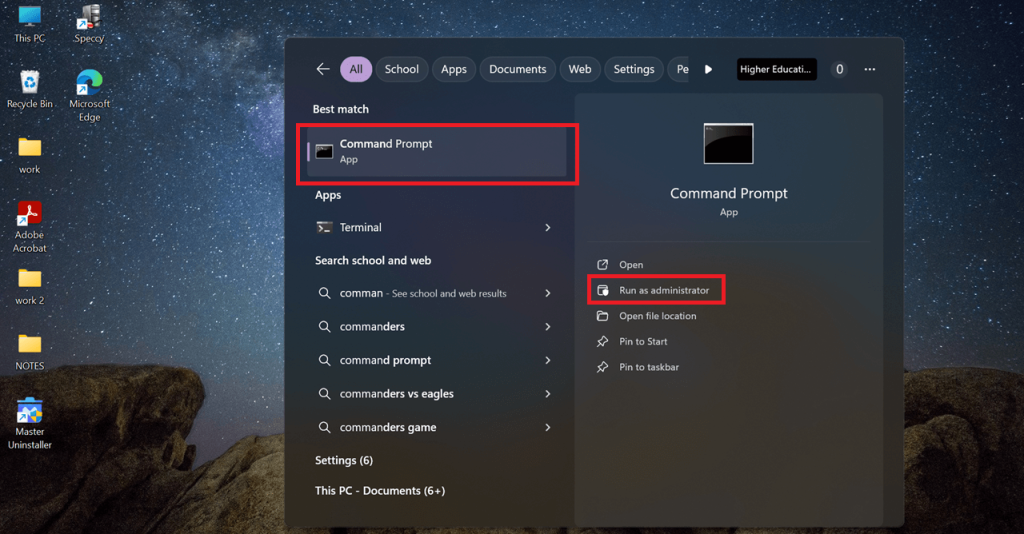
Step 1: Open Command Prompt as Administrator
- Open the Windows search bar and type Command Prompt. Select Run as administrator and double-click to get started.
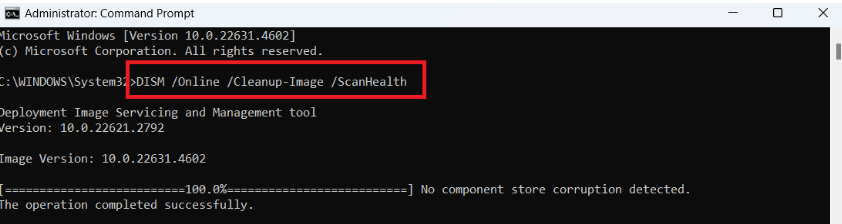
Step 2: Scan for Issues
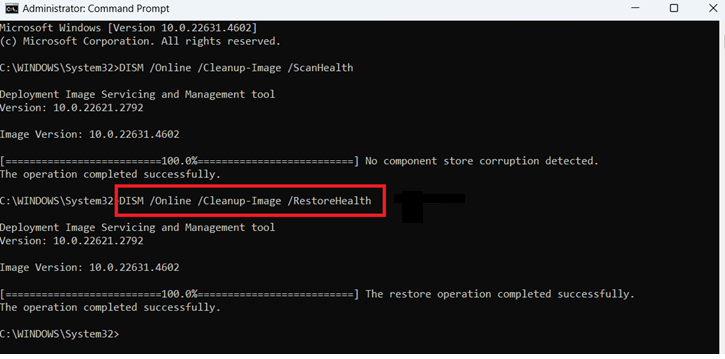
- A black dialogue box will appear. Navigate to where the text cursor is blinking and type the command. DISM /Online /Cleanup-Image /ScanHealth. Hit Enter to start the image scan. Be patient because the scanning part takes a few minutes.
Step 3: Restore and Fix
- Once the scan is completed, run the second command. DISM /Online /Cleanup-Image /RestoreHealth to repair any issues detected.
1. How To Clean Windows Registry Via Registry Editor
This method is for expert users who are confident about tweaking the Registry Editor. However, remember to be careful. One wrong click can mess up the entire registry. Follow our precautions and preparation tips to avoid any mishaps. Let’s see how to clean the Windows 11 registry manually. To clean up deleted apps or software entries, follow the below steps.
Step 1: Open Registry Editor
- Open the Run dialogue by pressing Win + R. Type regedit and hit Enter.
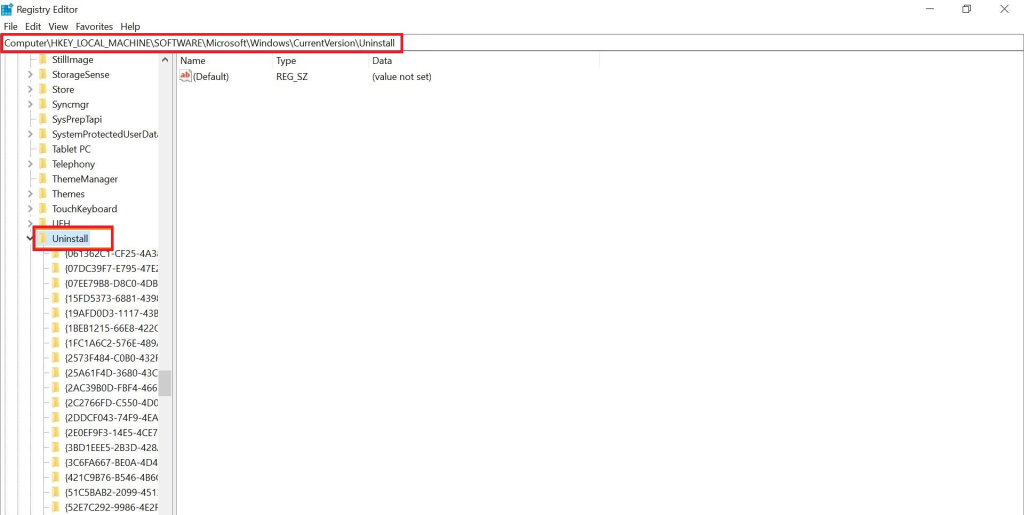
Step 2: Navigate to Uninstall Keys
- The Registry Editor window will appear. From there, navigate to the path below to delete outdated entries.
HKEY_LOCAL_MACHINE\SOFTWARE\Microsoft\Windows\CurrentVersion\Uninstall
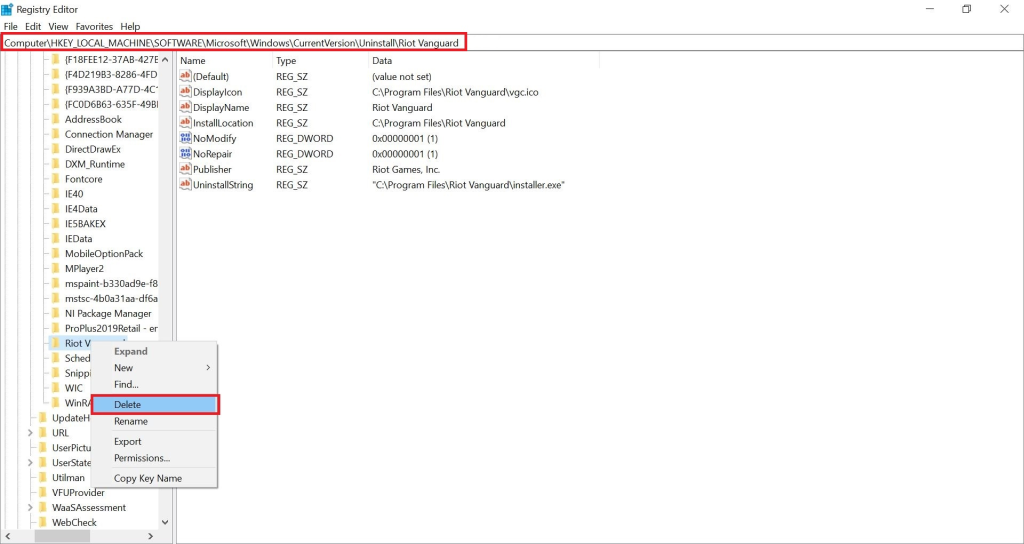
Step 3: Delete Outdated Entries
- Search for the subkeys related to the software you uninstalled and delete it.
Imp: Remember that you’ll have to repeat the process for other hives. For example, if you want to delete entries from the current user hive, you’ll navigate to:
HKEY_CURRENT_USER\Software\Microsoft\Windows\CurrentVersion\Uninstall
Benefits of Cleaning Windows Registry on Win 11
According to Microsoft, even trillions of unused entries wouldn’t slow down your computer that much. However, in the long run, having a clean and up-to-date registry could be beneficial if done carefully. Let’s explore its benefits:
- Fix errors and system crashes. Corrupted system files are the worst. They cause applications to crash or simply fail to run. Registry cleaning helps remove broken links and invalid or outdated keys before they cause more significant problems.
- Improve your system performance. When you fix errors and repair system crashes, it is evident that the PC's health will also improve. This improvement will help remove any delays in processing requests.
- Free up system resources. Broken registry entries take up a lot of system resources like RAM, storage and processing power. Regularly performing registry cleanup can provide more space and a smoother user experience.
FAQs about Cleaning Win 11 Registry
1. Deleting or modifying critical Windows components.
2. Over-cleaning, leading to software errors.
3. Using unknown and unreliable tools.
Keep your PC clean and secure
There you have it. With these registry cleaning methods and tips, you can clean up your Windows 11 registry without hassle. Always make sure you have created a backup file before making any changes. Avoid manually cleaning your registry and opt for built-in tools like Disk Cleanup or third-party registry cleaners like XYZ Cleaner. Tools like this are more risk-free while offering the same level of control. By following our guidelines, you can clean the registry of Windows 11 smoothly and efficiently.

-

Simple and Practical: Easily uninstall unwanted software.
-
Thorough Cleanup: Completely remove residual files.
-
Blacklist Protection: Identify and block malware and adware.