


Are you experiencing performance issues or software conflicts on your Windows 10 PC? If so, disabling or uninstalling Hyper-V might be the solution. Microsoft Hyper-V, formerly Windows Server Virtualization, was introduced in 2008 and has been a widely used virtualization product.
It helps run multiple independent virtual computers on a single physical computer. Over the years, Hyper V has evolved and introduced many new features and enhancements. However, it can sometimes be challenging, as some third-party tools like VM virtual Box interfere with Hyper-V, cause compatibility issues, or consume excessive system resources.
With all these problems, most of us question how to completely uninstall Hyper-V from Windows 10. Don’t worry—we've got you. This detailed guide is here to help you remove Hyper-V from Windows 10 in the most effective way.
What is Hyper-V?
Hyper-V is a native hypervisor developed by Microsoft in 2008. It allows users to create and manage virtual machines (VMs) on one physical system. It produces and runs a software version of a computer called a Virtual Machine (VM). These virtual machines increase flexibility and offer a more efficient way to run not just one but multiple operating systems on physical hardware.
This way, Hyper-V helps you avoid problems such as frequent crashes from workloads. It also increases accessibility by giving different people or groups access to other systems.
Some other notable features of Hyper-V include:
- Virtual Machine Isolation: Keeps each VM separate, preventing interference between systems.
- Resource Allocation: Distributes CPU, memory, and storage efficiently among multiple VMs.
- Snapshot and Backup Support: Enables users to create restore points for disaster recovery.
- Secure Boot & Shielded VMs: Enhances security by protecting virtual machines from unauthorized access.
Steps to Disable Hyper V in Windows 10?
Before uninstalling Hyper-V, you must disable it, as it runs in the background and won’t allow direct removal. Go through these steps to turn off Hyper-V in Windows 10:
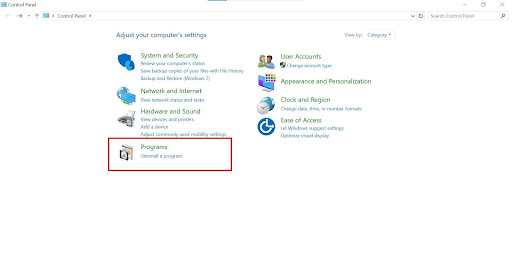
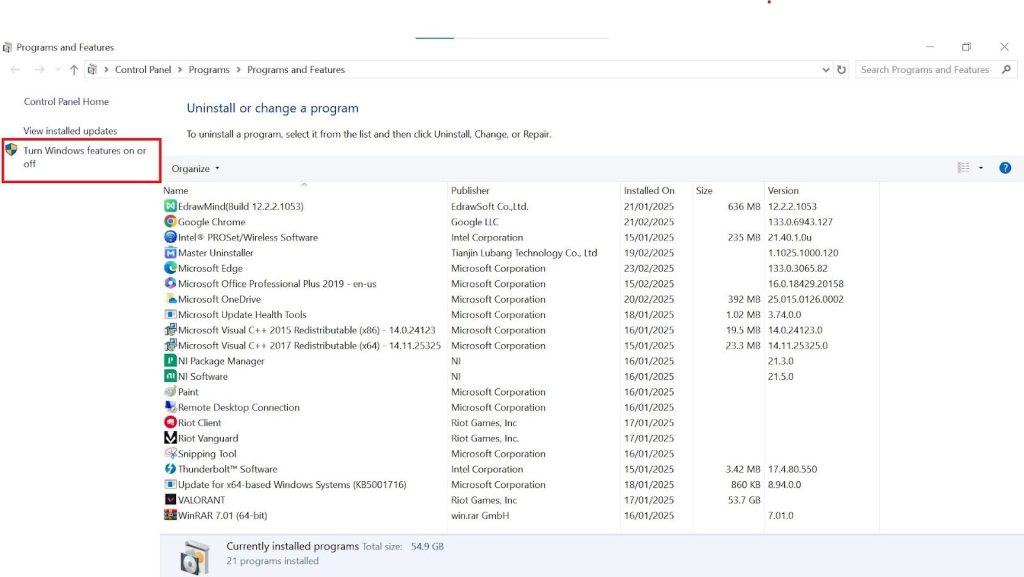
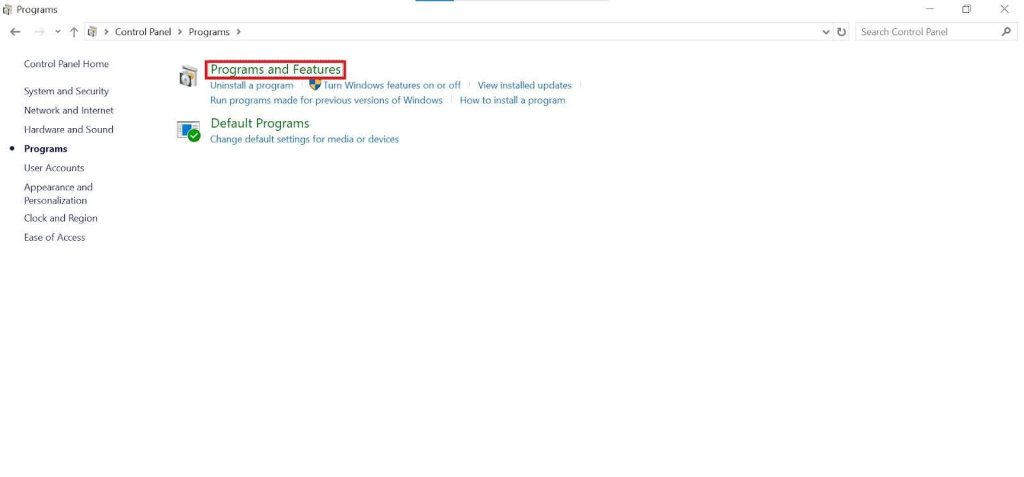
- Head to the Control Panel and open Programs > Programs and Features.
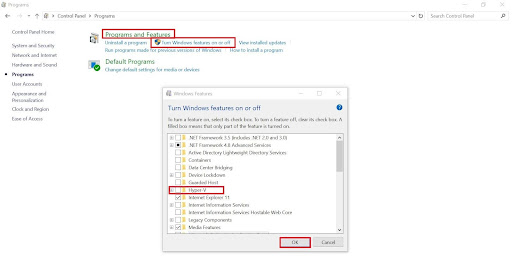
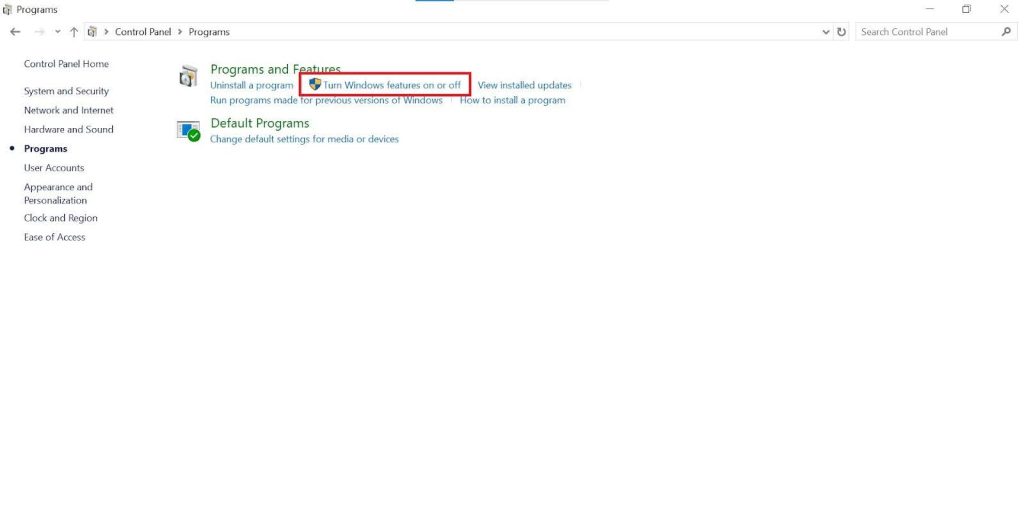
- Under that, you will see Turn Windows features on or off. Double-click on it and the Windows Features dialogue box will appear.
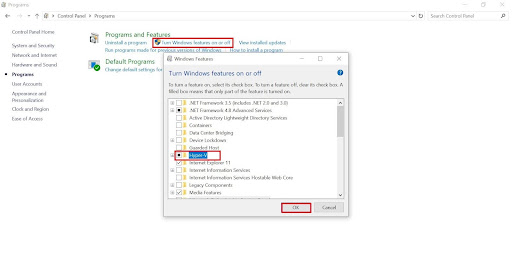
- In the list look for Hyper-V and check if it is enabled. If yes, the check box will be selected, and vice versa.
How to Completely Uninstall Hyper-v in Windows 10 | 4 Methods
Now that you are sure Hyper-V was active in the background, let's move on to how to uninstall it completely on Windows 10.
Method 01: Disable Hyper-V in Windows 10 Via Control Panel
When uninstalling Hyper-V from Windows 10, users prefer using the control panel. This method's convenience makes it a top choice. To uninstall Hyper-V, do the following:
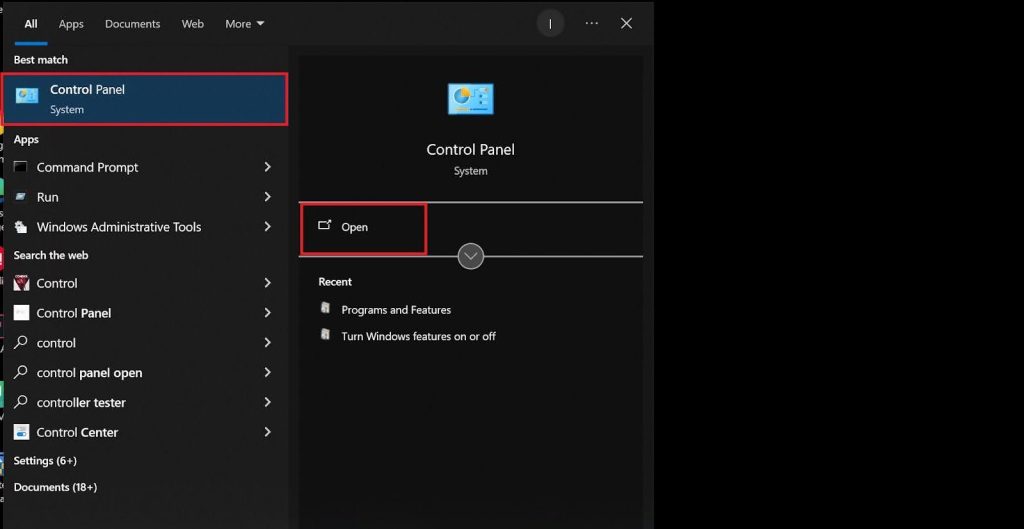
Step 1: Open Control Panel
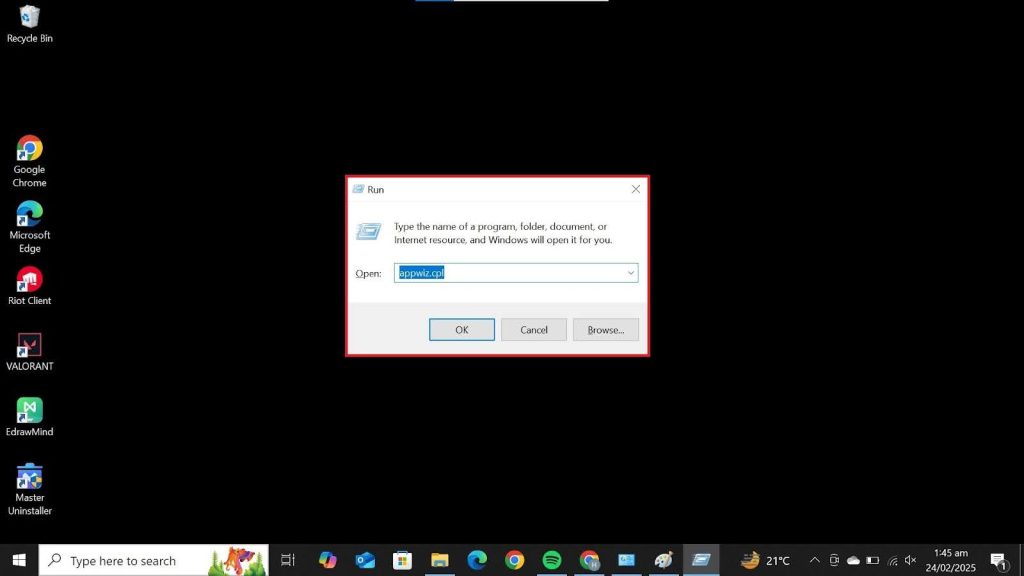
- To get started, press Win+R to open the Run dialogue. There, type appwiz.cpl and press enter.
Step 2: Access Windows Features
- Doble-click on Turn Windows features on or off from the side panel to open the Windows Features dialogue.
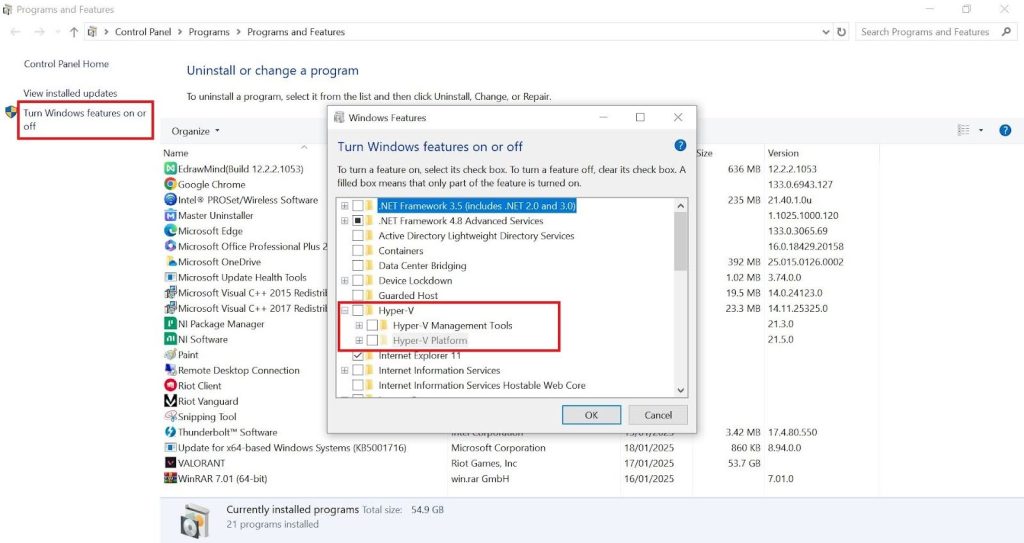
Step 3: Locate and Deselect Hyper-V
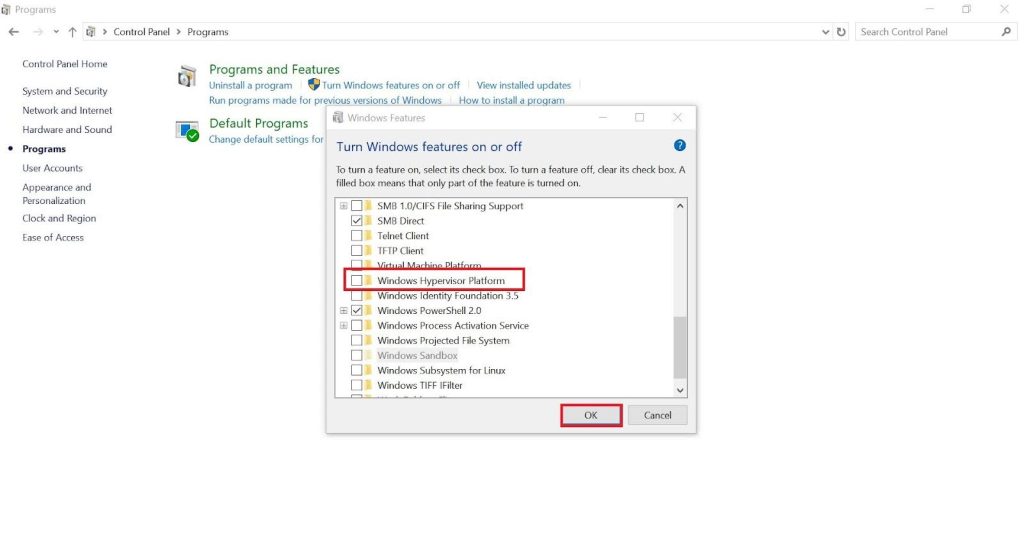
- A list of features will appear. Find and unselect the Hyper-V checkbox. Also, check that the Hyper-V subfolders are deselected.
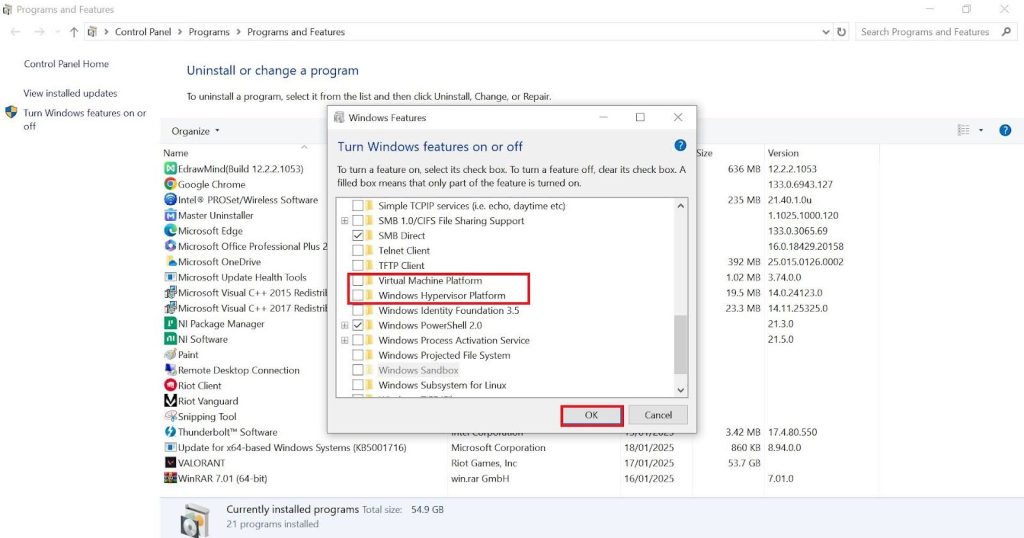
Step 4: Disable Additional Virtualization Features
- Then, locate and unselect the Virtual Machine Platform and Windows Hypervisor Platform. This’ll prevent virtualization conflicts. To save the new settings, click OK and start the Hyper-V uninstallation process immediately.
After uninstallation, select Restart. Now, to finalize the changes, remove Hyper-V from your system. And just like that, Hyper V is uninstalled and completely removed from your PC
Method 02: Uninstall Hyper-V in Windows 10 with the Command Prompt
You can also disable Hyper-V through the Command-Line Interface (CLI). This method is helpful for advanced users who prefer executing commands to navigating through Windows settings. Before uninstallation, you must check whether Hyper-V is installed and running. To do that, follow these steps:
Step 1: Open Command Prompt as Administrator
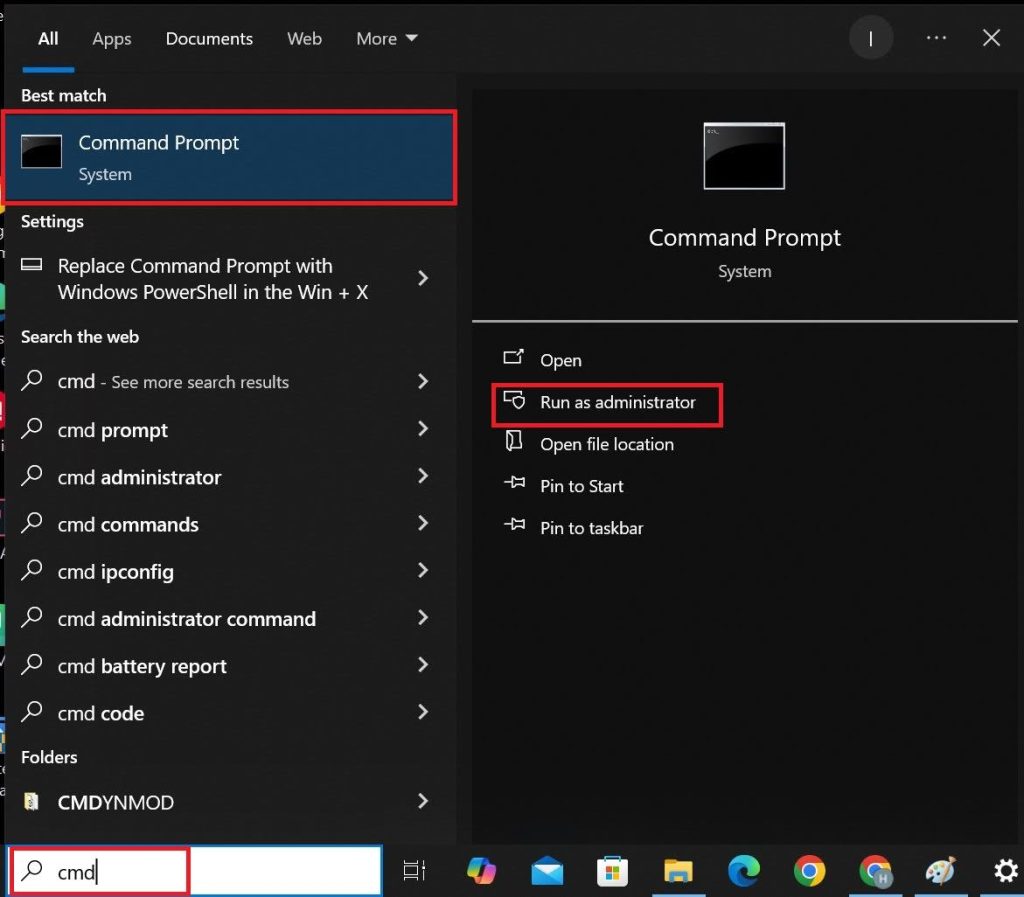
- Open Windows Start and search cmd from there. Open it by clicking Run as administrator.
Step 2: Check Hyper-V Installation Status
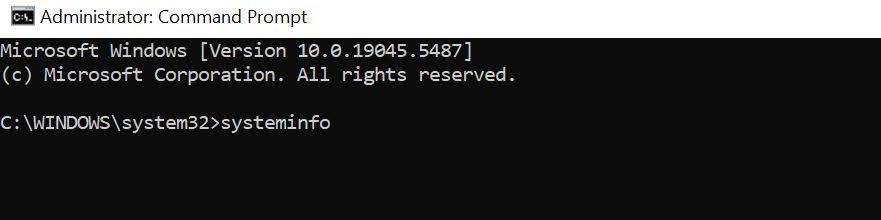
- To check whether Hyper-V is installed, type systeminfo.
- If Hyper-V is not installed, you will see the names of the technology requirements to install Hyper-V.
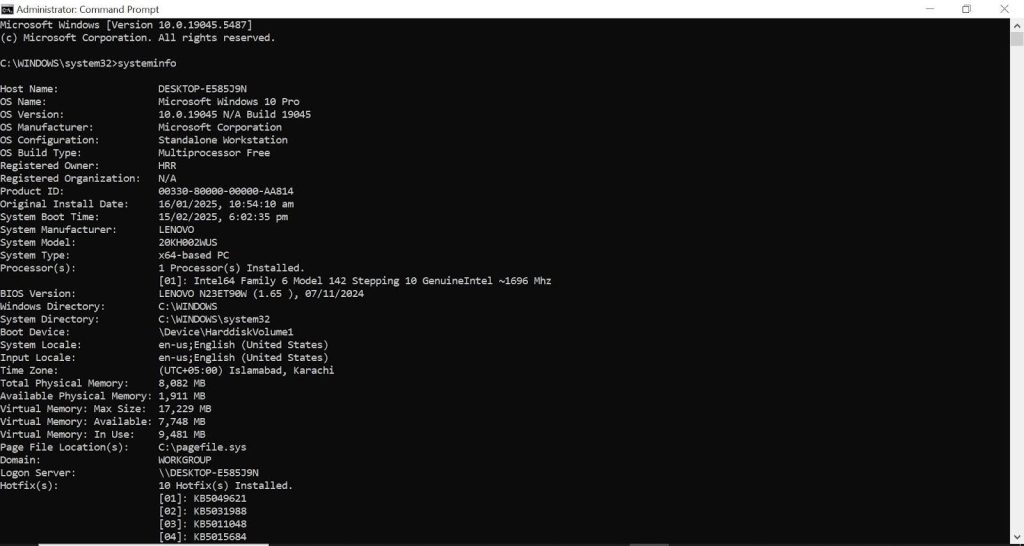
Troubleshoot: If Hyper-V is present in the PC, the message "A hypervisor has been detected" will be shown on the screen. Features required for Hyper-V will not be displayed.
Once you have verified the Hyper-V installation status, uninstall Hyper-V in Windows 10 by following the below steps.
Step 3: Uninstall Hyper-V Using PowerShell
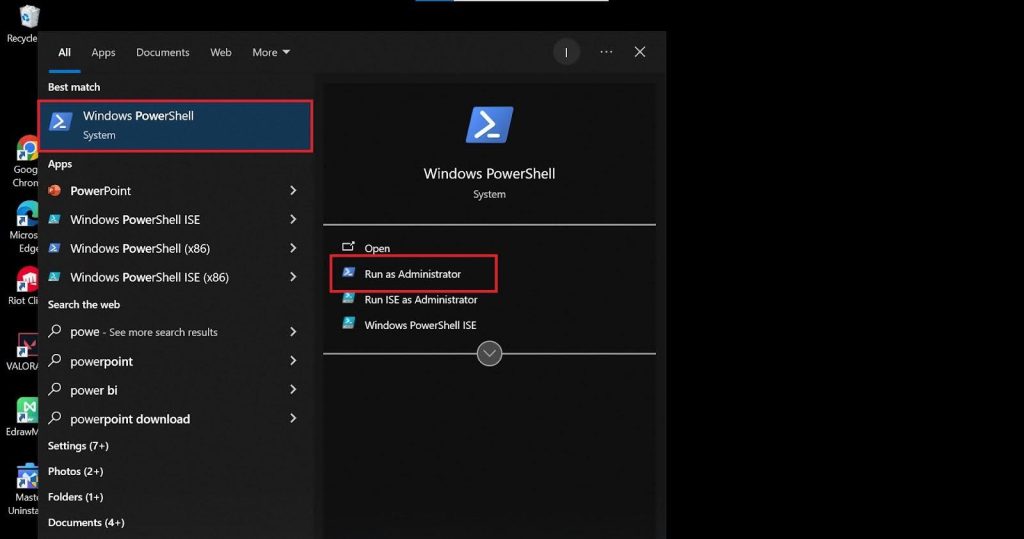
- In the Start menu type PowerShell and click Run as administrator to run it with administrative privileges.

- Once in the Windows PowerShell dialogue, type the command: Disable-WindowsOptionalFeature -Online -FeatureName Microsoft-Hyper-V-All. Then, hit Enter.

Step 4: Restart Your Computer
- As you hit enter, this question will appear: Do you want to restart the computer to complete this operation now? Since you’ve already decided to remove Hyper-V, type Y to select Yes and hit Enter. Type N to select No if you change your mind.
Once restarted, Hyper-V should be removed entirely from your system.
Method 03: Disable Hyper-V in BCDEDIT
BCDEDIT is a command-line tool for managing computer startup. It controls the boot configuration data (BCD), which tells your system what to run when it turns on. You can use it to add boot options, modify settings, or fix startup issues. When using this method for uninstalling Hyper-V from Windows 10, here’s what you need to know.
Step 1: Open Windows PowerShell as Administrator
- Navigate to the Start menu and launch Command Prompt or Windows PowerShell with administrative privileges.
Step 2: Disable Hyper-V with BCDEDIT
- Type this command into the CLI of your choice and hit the Enter key: bcdedit /set hypervisorlaunchtype off

Step 3: Verify the Operation
- If the command returns with the message The operation completed successfully, close the CMD interface and reboot your computer.

Once your system reboots, Hyper-V will be disabled, allowing you to proceed with further cleanup if needed.
Method 04: Removing Hyper-V with DISM
Deployment Image Servicing and Management (DISM), helps work with Windows images (.wim files). DISM tool also installs and uninstalls different Windows features, drivers and packages. To remove Hyper-V in Windows 10 using the DISM method, the steps are as follows:
Step 1: Run Windows PowerShell as Administrator
- Open the Start menu and type PowerShell. Run it with administrative privileges.

Step 2: Execute the DISM Command
- The WindowsPowerShell dialogue will open. Locate the blinking cursor and type command: DISM /Online /Disable-Feature:Microsoft-Hyper-V

Step 3: Verify the Operation
- Once you hit Enter, the command "The operation is completed successfully" will appear on your screen. This message indicates that the Hyper-V feature has been disabled on your PC.
Essential Steps to Take After Disabling Hyper V
Finally, you have removed Hyper-V from your PC. But now what? It’s important to understand that after disabling Hyper-V, its post-disabling steps are just as essential. Disabling Hyper-v’s related settings and features ensures the new software runs smoothly. Here’s how you can disable all other features related to Hypervisor in a few simple steps.
- Open Control Panel.
- Navigate to Programs and Features in the Control Panel.
- From the below pane click Turn Windows features on or off.
- Once there, scroll down to look for any Hypervisor-related features that may be enabled. Deselect, if any. Most importantly, don’t forget to disable the Windows Hypervisor Platform feature.
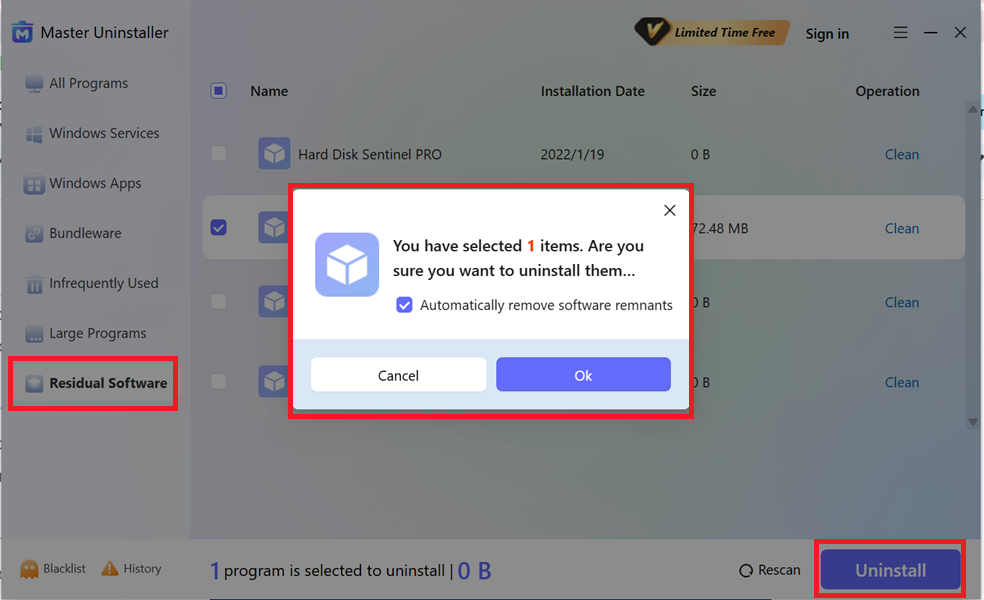
Bonus Tip: Some hidden files might still be buried deep in your system even after manually disabling Hyper-V related features. Instead of searching for them one by one, Master Uninstaller can carry the workload for you. It is a one-click solution to scan for residual files and wipe them clean. Go to Residual Software > Select the leftover file you want to uninstall > Click on Clean, and voila, all hidden files are gone with zero manual work.
Issues That Can Occur While Disabling Hyper-V in Windows 10
Are you having trouble uninstalling Hyper-V from Windows 10? Don’t panic, as it’s not uncommon for that to happen. Sometimes, Windows refuses to uninstall Hyper-V due to system file issues or hidden settings that keep re-enabling it. Here’s how to fix it step by step.
Case 1 (Error Codes: 0x800F0831, 0x80073701)
If you see errors when removing Hyper-V, system file corruption may be the culprit. Let’s check and repair that using command-line tools.
- Run Command Prompt as administrator.
- Repair System Files
Dism /Online /Cleanup-Image /RestoreHealth
- Clean Up Windows Components
Dism.exe /online /Cleanup-Image /StartComponentCleanup
- Scan for Corrupt Files and Fix Them
sfc /scannow
- Remove Hyper-V
Disable-WindowsOptionalFeature -Online -FeatureName Microsoft-Hyper-V-All
Case 2 (Virtual Network Adapter)
Sometimes, Hyper-V clings to your system because of the virtual network adapters or switches it creates. To fix this:
- Head to the Device Manager > Network Adapters.
- There, look for anything related to Hyper-V (eg, Hyper-V Virtual Ethernet Adapter)
- Right-click and select Uninstall device to remove the connection.
- Restart your PC and try removing Hyper-V again.
Case 3 (Hyper V Keep Re-Enabling After Restart)
Have you already disabled Hyper-V multiple times, yet it’s back again? This might be because group policies force it to turn on automatically.
You can fix it by checking your Group Policy settings.
- Open the run dialogue by pressing Win+R. Type gpedit.msc and hit Enter.
- Go to: Computer Configuration > Administrative Templates > System > Device Guard
- Once there, look for settings that force Device Guard or Credential Guard to run (eg, Turn On Virtualization Based Security).
- Disable them, then finally restart your PC.
FAQs about Uninstalling Hyper-V in Windows 10
Final Words
Voila! There you have it: a detailed guide to all the uninstallation methods for Hyper-V in Windows 10. It’s safe to say that uninstalling Hyper-V isn’t always straightforward. Each method has complexities, from using Windows Features to running PowerShell commands. However, following our step-by-step guide, you can effectively remove Hyper-V without dealing with errors, hidden settings, or leftover components. Choose the method that best suits your needs and enjoy a Hyper-V free PC.

-

Simple and Practical: Easily uninstall unwanted software.
-
Thorough Cleanup: Completely remove residual files.
-
Blacklist Protection: Identify and block malware and adware.